
Why This Guide
You will master your soda maker in six clear steps. Set up, carbonate, flavor, tweak fizz, clean, and save. Quick tips. Fast results. You can do this now and smile.
What You Need
Unboxing and Setup of the Drinkmate Omnifizz: First Impressions
Set Up and Inspect
Want a safe start? One quick check saves spills and time.Unpack the unit. Read the manual. Know each part. Lay out the bottle, CO2, and cap.
Hand tighten the bottle. Do not force parts. Set the machine on a flat counter. Keep it away from heat. Put a towel under the bottle. Keep kids away while you work. Wear dry hands. Clear clutter. Note dents or leaks. Stop and call support if you see damage. Install the CO2 per instructions. Screw the cylinder until it seats. Do not cross-thread. Listen for a hiss. Test the release valve once. Store extra cylinders cool. Register the cylinder if required. Plan your first flavor. Buy simple syrup. Read syrup safety. Stay calm. Start slow. Take notes. Enjoy small sips. Adjust next time.

Carbonate Like a Pro
Two pulses, not twenty. Control the fizz like a chef controls heat.Chill the water. Cold water takes CO2 fast.

Master Flavoring
One teaspoon can change everything. Why guess when you can measure?Pick a flavor. Start small. Add one teaspoon at a time. Try syrups made for soda makers or use fresh juice. Avoid thick syrups that clog. Use low-sugar mixers for health.
Add flavor after you carbonate. Do not carbonate syrup. Rinse the bottle when you switch flavors. Use a clean glass for each flavor. Stir gently to mix. Taste between adds.
Add more if the taste is weak. Add plain carbonated water if it gets too sweet. Try herbs or citrus zest for depth. Write your best mix and label the bottle. Chill again after mixing if you like. Serve cold.
Use ice wisely. Avoid big ice; it slows flavor. Use small ice; it cools fast. Clean the bottle after use. Store syrups in a cool, dark place. Check labels for allergens daily.

Dial In Your Fizz
Too fizzy or flat? Your thumb and a log will fix both.Experiment with fizz. Keep records. Try a baseline. Start with three short pulses. Note pulses, water temp, and bottle age. Use the same glass to compare.
Change one thing at a time. Make small shifts. Use a gentle touch. Settle on one method for a week. Tweak after a week.
Chill the bottle when it sprays. Release gas slowly. Hold the bottle at an angle when opening. Clean the nozzle if foaming persists.
Stop the machine if it clunks. Tighten loose parts. Replace worn seals. Call service if leaks remain.
Practice daily. Let your hand learn your maker.
Clean and Maintain
A clean maker is a loyal maker. Neglect it and pay later.Rinse the bottle after each use. Wash removable parts in warm water and mild soap. Do not wash the machine under water. Wipe the exterior with a damp cloth.
Remove the nozzle per the manual. Soak removable parts for 10 minutes in warm water when grimy. Use a soft brush for tight spots. Rinse well. Dry parts fully before reassembly.
Replace bottles with cracks. Change the cylinder when pressure drops. Track cylinder life. Tighten fittings. Do not over-torque.
Keep vents clear. Check seals for wear every month. Lubricate seals if the manual allows. Store the machine upright. Keep children away from cylinders. Recycle empty cylinders per local rules.
Carry a small kit: towel, brush, spare seal.
Do a deep clean monthly. Remember: clean maker, clean drinks.

Save, Share, and Sustain
Make less waste. Save cash. Throw a party with what you have.Save money. Buy refillable cylinders or trade them. Track liters per cylinder. Log usage and swap dates.
Make syrups at home. Simmer equal parts sugar and water. Add fruit or herbs. Simmer berries 5 minutes, mash, strain. Cool and bottle.
Use soda water in recipes. Brew tea or coffee, chill, then carbonate for a cold brew soda. Bottle extras. Store chilled for a party.
Freeze leftover soda into ice cubes for cocktails. Reuse glass bottles. Replace cracked ones. Recycle worn bottles per local rules. Buy strong bottles for repeated use.
Share tips with friends. Host a tasting. Teach a friend to use your maker safely. Keep safety first. Sip and save.
Key points
Refill or trade cylinders
Track liters per cylinder
Store chilled bottles

Go Make Soda
Now you can master your maker. Start slow. Keep good notes. Tune your method. Make sharp, clean soda you own. Try it. Share your results daily. Join the fizz today.


Nice breakdown on ‘Master Flavoring’ — but how long should you let infused flavors sit before carbonating? I tried berry syrup right away and the flavor felt flat.
Agree with admin. Also, if using fresh basil or mint, bruise the leaves first to release oils — gives better flavor even with shorter infusion times.
Good question. For syrups, mixing right before carbonating is fine, but for infusions (herbs, fruit bits) we recommend 30–60 minutes chill time to let flavors meld, and strain if you don’t want solids.
Question about syrup-to-water ratio. The guide suggests “start small and adjust,” but can someone give ballpark measurements for a medium-sweet drink? I’m tired of guessing and wasting syrup.
A common starting point is 1:8 to 1:10 syrup-to-water (by volume) for medium sweetness. So for 1 cup of water, try ~1.5–2 tablespoons syrup and adjust from there.
If you’re using strong fruit concentrates, start even lighter. And keep a notebook — ratios add up fast once you find your favorite.
I use 1:9 as my baseline. If you’re planning to carbonate after mixing, go a tiny bit stronger since carbonation can slightly mute perceived sweetness.
Dialing in the fizz is more art than science — I wrote down three settings I like for different drinks:
– Light: 2 quick presses
– Medium: 4 presses
– Party: 6+ (careful)
This saved me a ton of trial and error. Anyone else keep a little “settings cheat sheet”?
Love the cheat sheet idea, Priya. We might include a printable settings card in the guide. Thanks for the suggestion!
I keep mine stuck on the fridge too. Also mark which CO2 canister is new/used — it affects fizz strength as pressure drops.
I prefer counting seconds instead of presses, but to each their own. Haven’t measured consistency though — anyone tested both methods?
For me, the temp of the water matters most. Colder = more fizz. So I combine temp + presses on my cheat sheet.
Press-counting changed my life. No more guessing. 🙌
Cute guide. I made my own cola syrup and it actually tastes decent! 😋
Awesome, Hannah! Homemade cola is a fun project. If you’re up for sharing the recipe, we’d love to feature reader recipes in a future post.
Yes pls share! I’ve been dying to try making cola at home but worried it would taste like cough syrup lol.
I keep getting inconsistent carbonation levels even when I repeat the same steps. Sometimes it’s flat, sometimes it’s aggressive. Any ideas? I’m using filtered, chilled water and same CO2 tank.
Also check bottle fill level — too much headspace or too little changes results. I mark my ‘max fill’ on bottles with a tiny sticker.
Don’t forget altitude — if you moved recently, carbonation behavior changes slightly at different elevations.
Inconsistent fizz can come from several factors: water temperature fluctuations, partial CO2 tank pressure, loose seals, or not fully engaging the carbonation mechanism. Try: 1) ensure constant water temp, 2) tighten and re-seat seals, 3) swap to a full tank and compare.
If you have access to another bottle, test with that — sometimes bottles degrade internally and cause weird absorption.
Really appreciated the ‘Save, Share, and Sustain’ tips. Reusing bottles and DIY syrups cut our household waste a lot. Also the math on cost-per-litre vs store soda was eye-opening.
Yesss — batch-making syrups and freezing small portions has saved me money and reduced packaging. Pro tip: freeze in ice cube trays for single-serve flavor pops.
Thanks Marcus — sustainability is a big motivator for many readers. If you have photos of your DIY syrups or refill setups, we’d love to see them to possibly feature in a community post.
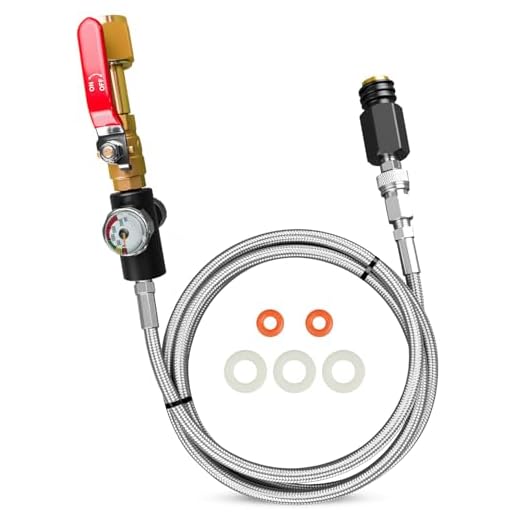
Loved the ‘Carbonate Like a Pro’ section but wish there was more on CO2 canister swaps/replacements. I’m nervous about over-pressurizing when I change the tank.
When in doubt, wear gloves and do it slowly. I also keep the manual close — some models have a release button that helps avoid surprises.
Good point, Tom — we kept it concise but should definitely include safe tank swap steps. Short answer: always vent residual pressure per your device manual, swap outdoors if possible, and check seals after installing the new canister.
This guide is cute but I think it assumes everyone is patient. I’m lazy and most of my ‘mastering’ has been hitting the button until it sounds right. 😂
Also, typo spotted in step 4 — ‘Dial In Your Fizz’ paragraph 2 has double ‘the the’.
Same!! I’m with you on the impatient method. Works most of the time!
Thanks for the catch, Maya — we appreciate the eagle eye and will fix that typo. Button-pressing is an entirely valid strategy, lol.
Okay, confession time: I tried to make “kinda-sparkling” water and ended up with a mini fountain across my counter. 😂
But on the serious side:
1) The step-by-step on dialing fizz actually saved my life (and my ceiling).
2) I wish there was a flowchart for “too fizzy / not fizzy” troubleshooting.
3) Also, can we get more flavor combos? mango + rosemary???
Mango + rosemary would be amazing with a splash of lime. Try muddling rosemary gently first so it doesn’t get overpowering.
If you like wild combos: pear + ginger + a tiny pinch of salt. Trust me. Also, baffle the bottle before carbonating to reduce geysers.
I live for weird combos. Anita, next step: film the fountain and monetize 😂
Haha, fountains are part of the learning curve! We’ll add a troubleshooting flowchart for fizz levels. Mango + rosemary sounds wild but promising — we’ll test it.
I tried the herb infusion tips and omg the basil-lime soda is my new obsession. Flavoring steps were straightforward and the ‘strain before carbonating’ note was gold.
Two thumbs up for keeping the flavoring techniques practical.
Basil-lime + a tiny splash of elderflower tonic = classy AF.
I substitute basil with Thai basil sometimes for a peppery twist. Worth trying.
So glad it worked out, Olivia! Basil-lime is a favorite of ours too. We’ll add a few more herb-citrus combos to the flavoring section.
The cleaning section is clutch. I used to only rinse and now I actually deep-clean weekly like the guide says. My sodas taste WAY better and the machine smells fresher.
One question though: do you recommend vinegar or a specialty cleaner for descaling?
Citric acid here too. Cheap and effective. Just follow proportions and run a few plain water cycles afterward.
Vinegar is a safe, inexpensive option for light descaling. For heavy limescale, a manufacturer-recommended descaler is best. Be sure to rinse very thoroughly after either method.
I use diluted citric acid for descaling — works wonders and smells better than vinegar imo.
Solid article. One missing bit: safety around broken glass. If you over-carbonate a cracked bottle it can explode. Maybe add a bold safety warning in ‘Set Up and Inspect’?
Yes please — learned that the hard way. Scary but thankfully just a mess for me.
Excellent catch, Liam. We do mention inspecting bottles but we’ll add a bolded safety warning about cracked or compromised containers and what to do if a bottle fails.
Long-time soda maker here — really liked the mix of practical tips and sustainability notes. A couple of advanced suggestions from my side:
1) If you want ultra-fine bubbles, chill the water with the bottle inverted for 15 mins before carbonating.
2) For consistent carbonation pressure, keep an extra gauge meter on hand if your model supports it.
3) When storing homemade syrups, use amber bottles in the fridge to extend life.
Hope this helps others who want to level up beyond the basics.
Tom: I got mine from a homebrew supply store — small inline gauges that mount in the CO2 line. Not cheap but very satisfying to watch.
Where do you get an extra gauge? Link? I’m a bit of a gadget nerd and would love to monitor pressure more closely.
Fantastic advanced tips, Robert — especially the amber bottle note. We’ll consider an “advanced techniques” sidebar for the guide that includes your suggestions.
Love the bottle inversion trick. Works like a charm for a smoother mouthfeel.
Great guide — super clear. I followed the ‘Set Up and Inspect’ steps and found a tiny crack in my old bottle cap I never noticed. Saved me from a soggy kitchen lol.
Quick tip: check the rubber seals in natural light, sometimes you can’t see wear until you stretch them a bit.
Thanks for the heads-up, Sarah — glad the guide helped! Good call on the natural light check. We’ll add a note about inspecting seals under light in the next update.
Yep, seals love to hide damage. I keep a spare O-ring kit in my drawer now. Cheap insurance.
Totally — and if you toss the old ones, make sure to recycle them if your local program accepts small rubber bits.