Ditch Plastic. Start Composting Your Wraps
You can cut plastic from your lunch. You can wrap sandwiches with materials that break down. This piece shows why compostable wraps work. It shows how to pick them. It shows how to care for them. It keeps it simple. You will learn practical steps. You will save plastic and help soil.
You will read six clear parts. Why Plastic Wrap Fails and What Compost Fixes. What Compostable Sandwich Wraps Are Made Of. How to Choose the Right Wrap for Your Life. Use and Care: Make Your Wraps Last. How to Compost Your Wraps the Right Way. DIY and Smart Alternatives to Store-Bought Wraps. Each part gives short tips. Each gives action you can try tomorrow.

4 Creative Ways to Use Compostable Food Wraps — Vegan
Why Plastic Wrap Fails and What Compost Fixes
Plastic sticks. It tears. It does not leave.
You wrap your sandwich. You peel the film. It crumples. It stays in the bin. It does not rot. Plastic wrap can last decades in a landfill. It sheds tiny bits as it breaks. Those bits travel. They land in soil and sea. They enter worms, fish, and the food you eat.
It makes real harm you can see and not see.
You will spot plastic on beaches and in streams. You will not see the microplastics in garden soil. Tests show microplastics reduce soil health and water retention. That means weaker plants. It means slower breakdown of real compost. When you use less plastic, you cut this chain.
Compostable wraps do different work.
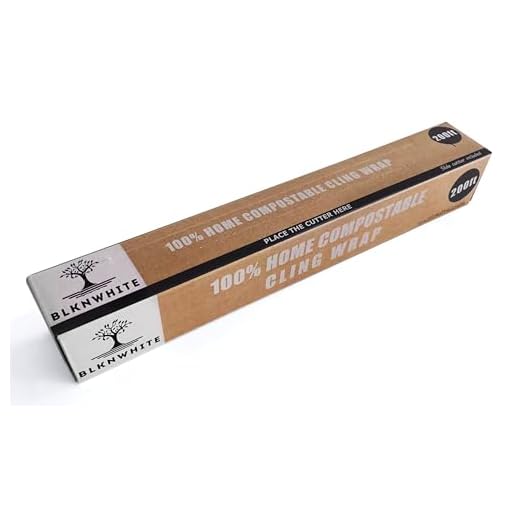
They break down. They turn to organic matter. They feed the soil. Some need a home compost pile. Some need a commercial facility. Read the label. Look for a known certification. If the label says “home-compostable,” you can add it to your backyard bin. If it says “industrial compostable,” check your local program first.
Small swaps bring big gains you can act on today.
Start with one swap per week. Swap one cling film roll for a cloth or beeswax wrap. Rinse or scrape food off. Toss soiled, home-compostable wraps into your bin. Send industrial-only material to the right facility. Keep a small counter bucket for compostable scraps so you do not accidentally throw them away.
These steps cut waste at the source. They keep plastic out of soil and sea. They turn your scraps into something useful.
What Compostable Sandwich Wraps Are Made Of
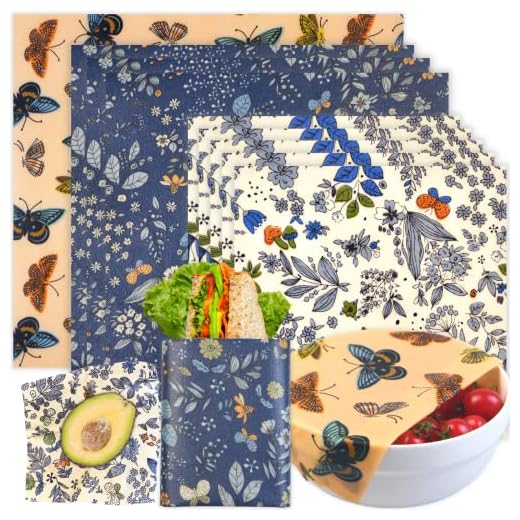
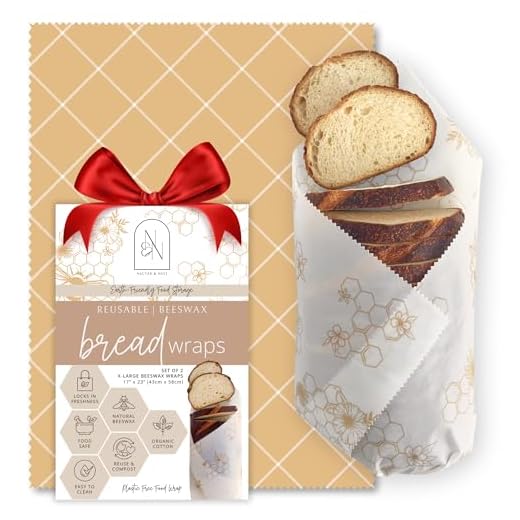
Beeswax and plant-wax wraps
Beeswax wraps use cotton cloth dipped in beeswax and often a little tree resin or jojoba oil. They feel warm and slightly tacky when you press them. They smell faintly of honey or earth. They bend with your hands. They will last months to a year with regular use. Wash in cool water. Do not microwave.
Cloth blends (cotton, hemp, linen)
These are durable cloths treated with wax or natural oils. They give strength and breathability. Hemp and linen resist stains and wear better than cheap cotton. You can wash them by hand or on a gentle cycle. Expect years of use if you care for them.
Plant polymers and coated papers
Some wraps use plant-based films like PLA or cellulose. They often look and feel like thin plastic. They stay clear and slick. Many need industrial composting. They may soften in hot water. Check the label before you toss them in your backyard bin.
How they behave in use
Labels and quick checks
Look for clear marks: “home-compostable,” BPI, OK Compost HOME, or EN 13432. Beware the word “biodegradable” alone. It can hide plastic blends. If it smells like chemicals or feels oddly slick but claims compostable without a cert, treat it with caution.
How to Choose the Right Wrap for Your Life
You have habits. You pack lunches. You hike. You bake. Pick a wrap that fits the way you live. Small choices save waste and time.
Match size to use
Buy a wrap that fits the food.
For sandwiches, a 10–12 inch square works.
For loaves or bowls, go large.
Bread needs room to breathe. Wraps that are too tight tear.
Pick the right feel and seal
You want a strong fold or a tight tuck.
Choose a stiffer waxed cloth if you toss it in a bag.
Choose a softer wrap if you need crisp, tight folds.
Look for a sewn edge and a full coating. Those last longer.
Heat, wet, and grease
Decide how you use warm food.
Most waxed wraps take brief warmth. They soften with hot soup.
Plant-film wraps stay slick around wet food but may need industrial composting.
For oily foods, pick a tighter weave or a coated wrap.
Care and lifespan
Check the care rules before you buy.
Some wraps wash by hand. Some handle a gentle machine cycle.
If you need long life, choose hemp or heavyweight cotton.
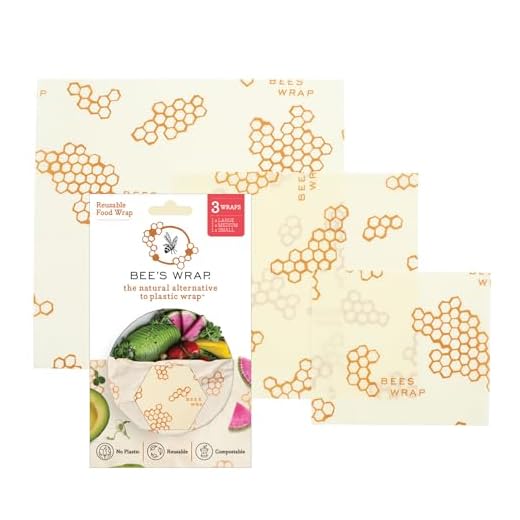
If you want months of ease, buy a branded beeswax wrap like Bee’s Wrap or Abeego and follow the label.
Quick buying checklist
Try one that matches your main routine. Test it for a week. Adjust. Keep buying less and using more.
Use and Care: Make Your Wraps Last
You bought good wraps. Now make them last. Small care saves waste. Do a few simple things each day.
Quick rinse, then wash
Rinse your wrap right after use. Cold water knocks off crumbs and sauce. Use mild soap. Wash by hand in cool or lukewarm water. Scrub with a soft sponge. Hot water melts some coatings. Don’t scrub hard. Let heavy grease sit and rinse a second time.
Dry flat, then store
Lay the wrap flat to dry. Do not fold it while damp. A flat cloth or a rack works. Fold only when fully dry. Store folded in a dry drawer. Stack by size. Rotate them so one wrap does not bear all the work. If you swap wraps each day, each one lasts longer.
Avoid risky uses
Do not wrap raw meat. Do not use for raw fish. Do not soak in greasy pans or wrap dripping bacon. Oils linger. They weaken the fabric and the coating. If a wrap smells or stains badly, retire it to compost.
Repair and extend
Small holes happen. Patch them. Clean and dry the patch area. Stitch with strong thread and a needle for a quick fix. Or sew a small fabric patch and seal the edge. A thin bead of food-safe wax can bind seams. I fixed a picnic wrap with a stitch in five minutes. It saved a year of use.
Day-to-day habits
Rinse, wash, dry, store, rotate. Check for breaks. Patch early. Treat them like tools, not trash. Follow these steps and your wraps will live for years.
Next, learn how to compost worn wraps properly in the section ahead.
How to Compost Your Wraps the Right Way
Not every bin will take every wrap. Read the label first. Some wraps need industrial heat. Some break down at home. Tear or cut large pieces so bugs and microbes can reach them.
Read the label and know the terms
Look for clear marks: “Home compostable” or “Industrial/commercial compostable.” Avoid vague words like “biodegradable” with no proof. Check for certifications (ASTM D6400, EN 13432) if you want specifics.
Steps for home composting
Do this if your wrap says “home compostable” or is thin cloth or beeswax:
I tossed a stained beeswax scrap into my backyard bin. In six months it was soft, torn, and mixed with the compost.
What to ask your local composter
Call or email and ask:
Signs a wrap is ready — and fixes if it’s not
Look for crumbly, faded pieces. No plastic shine. Earthy smell. In home piles expect 3–12 months; industrial systems often finish in 2–6 months.
If a wrap resists breakdown: shred more, increase heat and turning, or take it to an industrial composter. If it still fails and it’s not labeled compostable, keep it out of recycling and send it to trash.
Next, you’ll see DIY and smart alternatives you can make or buy.
DIY and Smart Alternatives to Store-Bought Wraps
What you need
Simple beeswax wrap recipe
Preheat oven to 150–180°F (65–82°C).
Lay the cloth on parchment. Sprinkle 1 tablespoon of grated beeswax per 8×8″ square. Add a pinch of resin if you want stick. Cover with a thin cloth. Place on a sheet pan. Heat until the wax melts. Lift the cloth and spread the wax with a brush or gloved hand. Flip and heat again if needed. Hang to cool. The wrap will seal with the warmth of your hands.
Tools and store buys that save time
Use hemp or heavy cotton for strength. For wet foods choose silicone or glass. Stasher-style silicone bags fold and clip well. Glass jars like Pyrex or Weck work for salads and soups.

Silicone won’t leach. Glass stores cold and hot well. Both cut single-use waste.
Quick fixes on the road
Tear a small beeswax scrap. Rub it on a worn edge. Heat briefly with a hot mug to re-soften the wax. Fold and clip. For sticky cheese, stash in a folded cloth and zip in a reusable bag.
When to toss a DIY wrap
When the fabric frays, wax peels off in hard flakes, or food stains don’t lift, compost it. Cut it into small pieces for faster breakdown. Plant wax and beeswax are biodegradable. Fabrics break down faster when cut.
Make a few wraps. Test them. Trade one plastic roll for a stack of cloth. Then move on to the Conclusion.
Start Small. Keep Going.
Switch one wrap. Learn the care. Compost the old ones right. Small steps add up. You cut plastic and feed soil.
You save money over time. You make a simple habit that lasts. Do one wrap today. Teach a friend. Repeat. It becomes your normal. Start today. See change. Keep at it. Worth the work now.