
Unlocking the Secrets of Fryers
Did you know that the right fryer technique can elevate your meals from ordinary to extraordinary? It’s true. A simple twist in your approach can transform your cooking game.
Fryers are not just appliances; they are gateways to crispy, golden delights. Whether you want to create perfectly crispy fries or succulent chicken wings, mastering your fryer can be a game changer.
In this article, you’ll discover five easy tricks to make your frying experience not only simpler but also more enjoyable. From choosing the best oil to experimenting with unique seasonings, these tips open up a world of flavor.
So, grab your fryer and get ready. You’re about to unlock the secrets that will make your meals deliciously easy. Let’s dive in and fry like a pro!


Unlock the Secrets to Deliciously Better Food
Choose the Right Oil
The type of oil you choose is crucial to your frying success. Not all oils are created equal, especially when it comes to high heat. You need an oil that can withstand the temperature without breaking down. Here are some top contenders:
Best Oils for Frying
Selecting Based on Your Meal
When deciding which oil to use, consider the flavor profile of your dish. If you’re frying something like chicken that you want to taste savory, peanut oil is a great fit. For more neutral dishes, go for canola or sunflower.
Avoiding Common Pitfalls
Choosing the right oil elevates your frying game, making it a key ingredient in achieving crispy, delicious results. Ready for the next step in your frying journey? Up next, we’ll discuss the importance of preheating your fryer for perfect results.
Preheat for Perfect Results
Preheating your fryer is a step you shouldn’t skip. It’s crucial for achieving that golden-brown, crispy texture we all crave. When you immediately add food to cold oil, you’re inviting disaster. Instead of crispiness, you’ll get soggy, greasy results. No one wants that.
Why Preheating Matters
When you preheat the oil, the food quickly forms a barrier that prevents it from absorbing too much oil. This results in a perfectly fried exterior while keeping the inside juicy and tender. Imagine how a fresh batch of fries or chicken nuggets should look: golden and crunchy on the outside, with a moist interior. That picture becomes a reality with preheating.
How Long to Preheat
The preheating time depends on what you’re cooking and your fryer model. Here are some general guidelines:
To ensure you reach the right temperature, using a thermometer is handy. A digital candy thermometer is perfect for this task. It provides accuracy, so you can monitor the oil’s temperature without guesswork.
Signs You’re Ready to Fry
Look for ripples or slight steam rising from the oil’s surface as a sign that it’s preheated. You can also drop a small piece of food; if it sizzles right away, you’re good to go. If it sinks and doesn’t bubble, give your oil more time.
The Right Temperature
Different foods require different oil temperatures. Here’s a quick cheat sheet:
By nailing the preheat step, you’re setting yourself up for frying success. Your culinary adventure just got even more exciting! Next up, we’ll delve into mastering the art of breading, so your fried treats will have that extra crunch.
Master the Art of Breading
Breading transforms your frying game. It adds texture and flavor, creating a delightful contrast between crunchy and tender. With a few simple techniques, you can achieve maximum crispness. Let’s explore the three-step breading process that will elevate your fried foods.
The Three-Step Breading Process
- Drying the Food: Start with dry ingredients. Pat your meat, vegetables, or seafood with paper towels. This removes excess moisture, allowing the breading to adhere better. If the surface is too wet, the breading will slide off or become soggy.
- Dipping in Flour: Next, roll your food in all-purpose flour. This initial layer is essential. The flour creates a tacky surface for the next steps. It helps the egg mixture stick. Don’t be shy; ensure an even coating. Shake off any excess flour to avoid clumping.
- Egg Wash and Breadcrumbs: Dip the floured food into beaten eggs. This mixture binds the breadcrumbs. Now, coat your item in seasoned breadcrumbs for that crispy finish. You can use store-bought or make your own. For homemade breadcrumbs, simply pulse stale bread in a food processor.
Flavor Boosting Tips
Frying Techniques
Once breaded, let your items rest for about 10-15 minutes. This allows the coating to set, which will help it stay intact during frying. When you’re ready, follow the preheating advice from earlier, and gently place the food in the hot oil.
Now that you know the art of breading, your fries, chicken, and veggies will shine with crispy perfection. Up next, discover why it’s crucial to avoid crowding the basket in your fryer to maintain that elusive crunch.
Don’t Crowd the Basket
Cooking in batches is key to achieving that perfect fry. Overcrowding your fryer basket can lead to uneven cooking and soggy results, which no one wants. By giving each piece space to breathe, you’re setting up your food for success.
The Importance of Space
When you pack too many items into the fryer, they lower the oil’s temperature. This results in a loss of crispness as your food stews in the oil instead of frying. Think of it this way: when you hold a party, everyone needs a little space to mingle, right? Your food needs the same courtesy.
Ideal Cooking Portions

Recognizing Overcrowding
If you’re wondering whether your basket is too full, look for these signs:
Takeaways for Frying
Avoiding overcrowding not only makes for a cleaner fry but leads to better texture and flavor. Imagine biting into perfectly crispy fries or wings—now that’s the dream. As you gear up for your next cooking session, remember to keep those batches small. Next, we’ll dive into the exciting world of experimenting with seasonings, turning up the flavor on your fried creations!
Experiment with Seasonings
Seasoning can transform your fried dishes. It’s the secret ingredient that elevates your meal from ordinary to unforgettable. So, how can you mix and match spices and herbs to create unique flavor profiles? It’s easier than you think.
The Power of Seasoning
Think of seasoning as the magic wand of your kitchen. Just a pinch can unlock a world of taste. When frying, every layer of your dish should be infused with flavor. This means seasoning at every step—in the flour, egg wash, and breadcrumbs.
Mix and Match Flavors
Here are some ideas to get you started:
When you choose your spices, think about the natural flavors of the ingredients you’re frying. For example, cumin goes wonderfully with fish, while paprika works well with potatoes.
Create Your Signature Blend
Why not craft your own seasoning mix? Start with a base (salt, pepper) and build from there. Here’s a simple recipe to get you started:
- Base: 1 tablespoon salt
- Herbs: 1 teaspoon dried thyme
- Spice: 1 teaspoon smoked paprika
- Heat: ½ teaspoon cayenne pepper
Combine these in a small bowl and use liberally on your flour and breadcrumbs before frying.
Tasting and Adjusting
Don’t hesitate to taste your seasonings before using them. Adjust them based on your preferences. A little experimentation goes a long way. Try a few different blends to see how they enhance your dishes.
Just imagine serving up fried foods that not only look amazing but burst with flavor. The right seasoning will take your culinary creations to the next level.
As your frying journey continues, apply these tips, and you’ll see how delightful a well-seasoned dish can be. Up next, we’ll wrap everything together and show how frying can be easy and fun!
Frying Made Easy
With these five tricks, you are now ready to fry like a pro. Choose the right oil, preheat properly, master your breading, avoid crowding, and let your creativity flow with seasonings. Each step enhances your cooking, making it easier and more enjoyable.
Remember, practice makes perfect. Don’t be afraid to get in there and experiment. Fry up your favorites and savor the delicious results. Happy frying!


I’m new to frying, so these tricks are super helpful! I didn’t know about not crowding the basket – gonna try that next!
Welcome to the frying club, Emma! It really makes a difference, trust me!
I tried the breading technique and let me tell you, my chicken has never tasted better! But I still struggle with the mess. Anyone else? 🥴
Haha, I feel you! Breading is a workout in itself! 😆
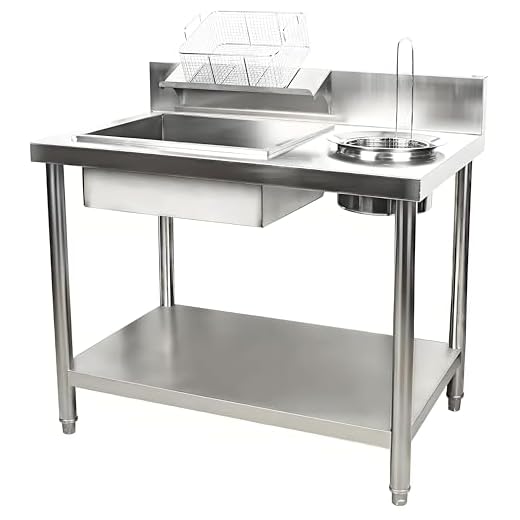
Glad to hear the breading worked out for you, Danny! Maybe check out the Commercial Stainless Steel Breading Table to help with the mess!
I appreciate the tips, but I still struggle with knowing when my food is actually done. Any advice?
That’s where the thermometer comes in, Olivia! It’s super helpful for ensuring your food is cooked perfectly.
Just ordered those air fryer liners! I can’t stand cleaning up all the grease. 😩 Thanks for the recommendation!
They are a lifesaver! Can’t believe I waited so long to get them.
You’ll love them, Chris! They save so much time on cleanup.
Why does everyone keep saying to not crowd the basket? I mean, it’s an air fryer, isn’t that the point? 😂
Exactly! It’s all about that crispy finish! 🥳
It’s about airflow! If you crowd it, things can get soggy instead of crispy. Trust me!
So, I’m all about that non-greasy life, but can anyone tell me if the frying really makes things healthier?? I’m skeptical. 😅
Great question, Sophie! Air frying generally uses less oil than traditional frying, which can be healthier!
True! It’s all about balance. You can enjoy some crunchy goodness without the guilt.
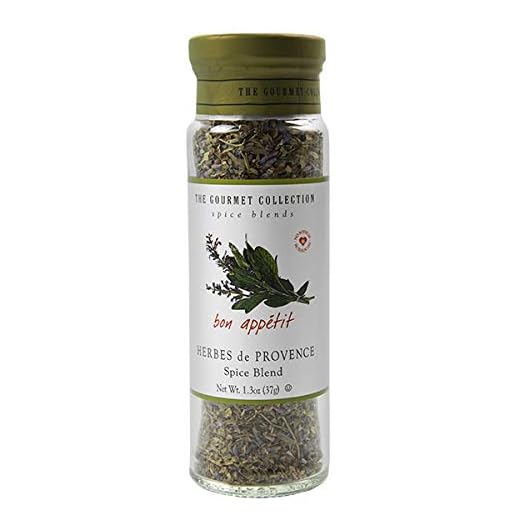
Just tried frying sweet potatoes with the Herbes De Provence blend, and wowza! Delicious! Who knew herbs could elevate fries!
I need to try that! Sweet potatoes are my favorite!
Yum! That combo sounds fantastic! Glad you enjoyed it!
Wow, these tips are a game changer! I’ve been using my air fryer for a while, but I never knew about preheating. Definitely going to try that out this weekend! Also, those paper liners look super handy. 😍
Absolutely, Mike! Preheating helps get that crispy texture we all love. Give it a shot!
Preheating? Never thought about that! Do you think it really makes a difference? 🤔
Why do I feel like I need to buy EVERY product mentioned?! 😂 Seriously though, I think I need that thermometer for my candy-making too!
Right?! I have an unhealthy obsession with kitchen gadgets now.
Haha, it’s tempting, right? But the thermometer is super handy for frying and baking!
I’ve been frying my veggies like a pro since I read this! The seasoning experiment section is my favorite. Do you guys have any seasoning combos you love?
I love using garlic powder and paprika together! So good! 😋
Great combo, Lisa! You can’t go wrong with garlic! What about trying the Herbes De Provence for something different?
I find it interesting that you suggest experimenting with seasonings. But like, what if I mess it up? Any tips on how to know what works?
Exactly! And don’t be afraid to try new combos. You might surprise yourself!
Start with small amounts! You can always add more if you need! 😄
Okay, but why is everyone raving about the oil choice? I’ve always used whatever I have on hand. Is it really that important?
Good question, Sarah! The right oil can change the flavor and health factors of your dishes! Chef-Grade Algae Oil is a great option!
Exactly! A good oil can really complement your food. It’s worth the switch!