
Master Your Oven-Toaster: Start Here
You want a stove that fits your life. An oven-toaster saves time and space. This guide cuts to the point. It shows what to know. It helps you pick the right model. It walks you through safe set up. It teaches basic cook timing. It shows how to clean and fix common faults. It gives advanced tricks and fast recipes. You will learn small skills that make big food.
Read fast. Try fast. Learn by doing. Use the steps. Master one dish. Then add more. Keep it simple. Save time every day. Cook with confidence.


Master Your GE Oven: Delay Start & Cook Time Features Tutorial
Know Your Oven-Toaster
Take a good look
Open the door. Measure the cavity. Note the racks and where they sit. Spot the heating elements. See if they sit on top, bottom, or both. Check the door type. Does it pull down or swing open? Is the glass thick? These things tell you what you can cook and how fast.
I once tried to roast a small chicken in a tiny 4-slice unit. It never browned. It smoked. I learned to match size to task.
What to check right away
Read the controls
Turn every dial. Press every button. Learn what each does. Modes matter: bake, broil, toast, convection, air fry. Convection moves hot air. It cooks faster and browns more. Broil hits from above. Toast cycles heat and time. Use mode names, not guesswork.
Know the limits
A 4-slice oven will handle toast, small casseroles, and a 9-inch pie. A 6-slice or larger will take a 12-inch pizza or a 9×13 pan. High wattage speeds bake times by roughly 10–20% versus low-power units. Don’t expect an oven-toaster to replace a full oven for big roasts.
Quick tip
Mark the usable shelf positions with tape. Try a test run with water in the pan. Watch how long it takes to boil or brown. You will learn its habits.
Pick the Right Model for Your Needs
Decide what you cook
Think of your meals first. Do you warm slices and bake small trays? Or roast chicken and air-fry wings? Buy for the work you do, not the shiny dial. If you cook once a week, a basic 6-slice does fine. If you cook nightly, choose a robust model with more modes.
Fit your space
Measure your counter. Allow space for the door and heat clearance. Think of where you will store pans and accessories. A unit that fits your routine will live on the counter, not the shelf.
Power and heat types
Watch watts. Higher watts heat faster and brown better. Note heat styles: top heat for broil, bottom heat for bake, convection for even browning. If you want crisp food fast, favor convection or air-fry modes. Look for even heat in reviews. A unit that runs hot on one side will ruin your roast.
Controls, seals, and cleaning
Pick controls you will use. Big knobs beat tiny menus for simple tasks. Choose doors with good seals for steady heat. Look for crumb trays, removable racks, and nonstick interiors. These make cleaning quick and painless.
Balance features against cost
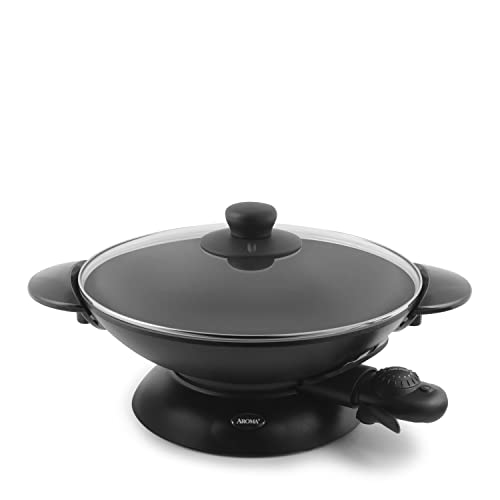
Extra modes add value only if you use them. A rotisserie or dehydrator costs more and adds weight. Compare models like Breville Smart Oven Pro and Cuisinart TOA-60. See which features you actually need.
Buy with an eye to years, not weeks. Pick a unit that fits your meals, your counter, and your hands.
Set Up and Install with Care
Position and power
Place the unit on a flat, heatproof surface. Give it room. Leave at least 3–4 inches around the sides and 6–8 inches above the top for air to flow. Open a window for the first run. Plug into a proper outlet. If the cord feels tight, move the unit. Never use an extension cord for long cooks.
Unpack and clean
Remove all packing, tape, and plastic. Check pockets and trays. Wipe the interior with warm, soapy water. Rinse and dry. Read the manual once. It tells you model-specific warnings and the correct plug type.
Run a short burn-in
Run the oven at medium heat for 10–20 minutes. The smell will go. Keep the room ventilated. This clears factory oils and varnish. If the smell lingers, repeat for 5–10 minutes more.
Level and fit
Set the feet so the oven does not rock. Use a tiny level or a folded napkin under a foot to test. Slide racks in so they sit true. Place the drip tray on the lowest slot. A wobbly rack can spill a hot pan. My neighbor learned that the hard way when a roast slid forward. He now checks rack fit every time.
Safety basics
Keep flames, hot burners, and wet cloths away from the sides. Do not block vents. Store flammable items well clear. Check that cords do not cross hot surfaces.
Quick setup checklist:
You are set. Next, you will learn how to cook with steady heat and perfect timing.
Master Cooking Basics and Timing
Preheat and rack choice
Preheat when a recipe calls for it. The metal needs to reach the right temperature. Put baking on the center rack for steady heat. Use the lower rack for slow browning. Move food up to broil on the top rack for a quick crust.
Toast and bake
Toast low and slow for even color. Set a lower temp and watch the time. Thin slices need less heat than thick ones. Bake in the center for steady results. Small pans heat faster than a full sheet. A Breville Smart Oven Pro will hold heat longer than a tiny 4-slice unit. Learn your unit’s habits.

Broil, turn, and check
Broil close to the top heating element. Stand by. Turn food for even browning. Flip fish or veggies once. Rotate trays if one side runs hotter. Use short bursts under the broiler to avoid burning.
Meat and temps
Use a thermometer every time you cook meat. Probe into the thickest part. Aim for the safe temp in the recipe, not the color. The thermometer saves dinner. It ends guesswork and scraps.
Small batches and time adjustments
Cut times from full-oven recipes for small batches. Start checking at two-thirds of the stated time. A half-sheet that fits loosely will cook faster than a crowded pan. If in doubt, lower the temp 25°F and add a few minutes.
Quick rules to use now:
Keep notes. Write temps and minutes on a sticky or in your phone. Repeat the same cook twice. You will learn what your oven-toaster truly does next when you deal with messes and fixes.
Keep It Clean and Fix Common Problems
Daily care
Empty the crumb tray after each use. Crumbs burn. They smoke. They smell. Wipe the door and glass when the unit is cool. Use a soft cloth and mild soap. Do this after you cook toast or broil.
Deep clean fast
Soak racks and trays in hot, soapy water. Let them sit for 30 minutes. Scrub with a nylon brush. For stuck grease, use a baking soda paste. Rinse well. Never spray cleaners onto the heating parts. Spray can foul the elements and spark.
Door, seal, and hinges
Check the door seal and hinges often. A loose seal leaks heat. Hinges can bend with heavy pans. Tighten screws. Replace torn seals. A tight door keeps heat in and cooks food right.
Heat checks and uneven cooking
If heat feels uneven, rotate trays while cooking. Run a simple test. Place an oven thermometer in the center. Put others at the corners. Heat to 350°F and note gaps. Many small units like the Breville Smart Oven Pro or Cuisinart TOB-260N1 show 10–20°F variance. Track the pattern. Adjust rack position or rotate pans during the bake.
Knobs, cords, and no-heat fixes
If knobs stick, pull them off and clean the shaft. If they break, replace them. Camping or rental kitchens often need a quick fix with spares like the Universal Stove Control Knobs Replacement 4-Pack.

If your unit won’t heat, check the cord and wall outlet first. Plug a lamp into the outlet. Flip the breaker. Try a different outlet. If the cord is frayed, stop using the unit. For no obvious power issue, seek a qualified repair person. Clean care keeps the unit safe and long-lived.
Advanced Tricks, Recipes, and Time-Savers
Use convection for speed and crisp
Turn on convection to cut cook time and crisp edges. Drop temp 15–25°F or shave 10–20% off the time. Watch closely the first two runs. You will learn which trays brown fast. Try convection when roasting veggies or making fries.
Toast nuts, seeds, and quick snacks
Spread nuts or seeds on a rimmed sheet. Roast at 325–350°F for 5–10 minutes. Stir once. They go from flat to fragrant fast. For garlic chips or pumpkin seeds, check every two minutes. One batch will teach you the timing.
Reheat pizza and broil fish right
Reheat pizza on a low rack at 325°F for 5–8 minutes. The crust crisps without burning the top. Broil fish close to the element for 6–10 minutes. Use a broiler-safe tray. Thin fillets cook fast. Thick ones need more time.

Small loaves, roast trays, and covered bakes
Make small loaves. They bake faster and brown well. Use a pan with a lid to trap steam for moist bread and braises. The lid keeps heat even. It acts like a tiny Dutch oven.
Dry herbs and fruit on low heat
Set the oven to 170–200°F. Slice fruit thin. Lay herbs flat. Dry for hours. You get crisp herbs and long-storing fruit leather. Check every 30 minutes at first.
Quick hacks that save time
Test, tweak, and log
Write short notes. Date, rack, temp, time, result. Small tests beat guesswork. Try one change at a time. You will build a set of reliable tricks.
Try these hacks and move on to the final notes in the Conclusion.
Cook, Learn, Repeat
You can do this. Start with clear goals. Cook one simple dish at a time. Learn the heat and time. Fix small faults fast. Clean after each use. Save notes on settings and tweaks. Taste, judge, and change. The oven-toaster will teach you.
Keep your tasks small. Build skill with steady steps. Repeat the act. Track wins and mistakes. Soon the oven-toaster will feel like yours. Share a dish. Pass the skill on. Start tonight. Note what worked. Try one new tweak weekly. You’ll gain confidence. Keep cooking. Share your notes with friends and learn together. Always.


Nice article. The ‘Set Up and Install with Care’ section saved me when I installed the BLACK+DECKER 5-in-1 last month — didn’t realize leveling mattered that much. Turned out my kitchen counter was slightly uneven and it was causing weird airflow.
Also, the universal stove knobs replacement tip is gold. Replaced mine and feels safe again.
Totally. Took me ages to figure out why toast was browning unevenly. Once I leveled the oven and used the thermometer, problem solved.
Glad that helped, Miguel — uneven surfaces can definitely mess with convection. The universal knobs are an easy safety fix.
Great roundup! I especially liked the ‘Know Your Oven-Toaster’ tips — so many people underestimate preheating and rack position. I switched to using an analog oven thermometer (picked one similar to the one mentioned) and my baking is so much more consistent now.
Quick question: does anyone here use the Cuisinart 8-in-1 and also air fry a lot? Wondering about the footprint and whether it gets too hot on the counter.
Thanks, Emma — glad the thermometer tip helped! The Cuisinart is pretty versatile. It does run warm on top when air frying, so I keep it away from cabinets and use a heat-resistant mat.
I have the Cuisinart and I love it. Counterspace is a tradeoff but worth it for me. Pro tip: leave a couple inches all around for airflow, and don’t put the cooling racks directly on a wooden surface when it’s hot.
I use it daily for fries and reheating pizza. It does get warm but nothing crazy. If you’re tight on space, the Ninja Flip might be better — smaller footprint for similar function.
Haha, this thread is making me want to catalog my toaster-oven experiments. One weird tip I have: when using convection and baking small items, reduce fan speed if possible or the tops get too brown.
Not all units let you change fan speed, but if yours does it’s worth playing with.
Also try moving the rack one slot lower to avoid direct top heat if you’re getting too brown.
Good suggestion, Ryan. Fan speed can make a big difference — I’ll add a note about that in the advanced tricks section.
My oven doesn’t let me change fan speed but I just lower the temp a bit and keep an eye on browning.
Fan speed control would be a premium feature for me. Worth upgrading if you bake a lot.
I sometimes tent with foil for gentler browning. Works well for delicate pastries.
Real talk: I bought the 2-pack stainless steel cooling racks for cheap baking and they’re decent. But don’t expect pro-level sturdiness. For big roasts, the enameled carbon steel pan is the real MVP.
Also, cleaning racks is a drag — soaking overnight is mandatory.
Yep, heavy-duty racks cost more but worth it for big jobs. I use the cheap ones for cookies only.
If you want both, get one sturdy rack and one light rack so you’ve got options.
I stack two cheaper racks under the pan for extra support once. Works in a pinch.
Thanks for the down-to-earth review, Zoe — that distinction between cookie racks and heavy-duty ones is important.
I appreciate the recipe/time-saver ideas. Made garlic bread using the air-fry setting and it was done in half the time. Saved a sentence for my notes: ‘air-fry = less time, more crisp’.
Also — lol — the article was right about not crowding. Tried to shove eight slices in once and it was a soggy mess.
Been there with the soggy toast. Now I do two rounds and everyone survives happily.
If you’re feeding a crowd, do staggered batches and keep the first ones in a warm but not dry oven (like 150°F) to hold.
Love the garlic bread win — air fry for the win. And yes, crowding kills crisping.
Constructive feedback: the article is comprehensive but could use a quick printable checklist for setup and cleaning routines. I’d hang that on my fridge.
Other than that, excellent — especially the section on common problems.
Great idea — a printable checklist is in the works. Thanks for the suggestion!
I’d print it too. A one-page ‘first week with your new toaster oven’ checklist would be clutch.
Wanted to say: the ‘Master Cooking Basics and Timing’ section is underrated. Timings in toaster-ovens are so variable — my tip is to always subtract 25°F from conventional oven temps and check 5 mins early. Saved so many burns.
Also, anyone else mark their recipes with little notes like ‘use convection’ or ‘flip at 12 min’? It’s made a huge difference for me.
I do the same — and I keep a sticky note on the fridge for my favorite recipes with temp/time tweaks.
+1 on the thermometer. My toaster ran 20°F hot out of the box, fixed a lot of guesswork.
Subtracting temp is my go-to too. Also invest in that analog oven thermometer — it’s cheap and so revealing.
Great rule of thumb, James. Those small notations are the best way to build a personal timing database.
Minor rant: some toaster-oven manuals are so vague about recommended cookware. The article mentions a 16-inch enameled carbon steel roasting pan — does that size fit in most mid-sized toaster ovens or am I dreaming? 😅
Measure your oven cavity — I nearly sent a pan back once because I assumed ‘fits’ based on photos. Also check depth with racks in place.
If you’re tight on space, a roasting pan with removable handles can help with fitting it in.
If in doubt, smaller is safer. Or buy a pan that lists compatible oven models. Many product pages have interior dims.
Totally fair point. 16-inch pans generally fit in larger countertop ovens (like Cuisinart 8-in-1) but not in compact models. Always measure interior dimensions first.
Pro tip: measure the diagonal too! Sometimes a pan fits corner-to-corner even if it seems wide.
Question: anyone tried the Ninja Flip Toaster Oven and Air Fryer for sheet-pan dinners? I’m tempted because of the flipping rack feature but worried about capacity for a family of four.
I use the Ninja for 2-3 people max. It’s great for weekly meal-prep but for large family meals I stick to my conventional oven.
We have a family of 4 and it works if I prep smaller portions or roast veggies separately. Not ideal for a giant roast though.
The Ninja Flip is clever — the flipping function helps crisp both sides. For family-size sheet-pan dinners you may need to do two rounds or use the 16-inch pan if it fits. Depends on portions.
Flip feature is gimmicky but handy. If you mainly do single-sheet dinners, consider a bigger toaster oven or the Cuisinart for more space.
Came for the product tips, stayed for the maintenance section. That universal stove control knobs replacement idea solved a safety problem I’d been putting off. Replacements were cheap and easy to install.
Would love a follow-up post about troubleshooting specific error codes on different brands.
Agreed — a brand-specific FAQ would be super helpful. Many of us have a mix of models and need tailored tips.
Great suggestion about error codes — I’ll plan a troubleshooting deep dive for upcoming posts.
Yes please! My BLACK+DECKER shows an odd beeping sometimes and the manual is so vague.
Thanks for the cleaning tips — haven’t found a good way to get baked-on cheese off the tray without scratching. The ‘Keep It Clean’ section had some useful mild-abrasive suggestions but any favorite cleaners from the community?
Bar Keepers Friend works wonders (use gloves). Pro tip: heat the oven slightly to loosen stuff before soaking the tray.
Use a paste of baking soda and water, let it sit, then scrub gently with a non-metal brush. For stubborn spots, a little white vinegar helps.
I use a silicone pan protector for cheesy bakes now — zero scrubbing. Also the enameled roasting pan cleans up like a dream compared to cheaper steel.
Short and sweet: don’t be afraid of experimenting. The ‘Cook, Learn, Repeat’ vibe of the article is my kitchen motto now. Tried air-fried brussels and never looked back 😅
Same here. Added a squeeze of lemon after air-frying — instant upgrade.
FYI: if your oven has an air-fry tray, use it upside down for better airflow sometimes.
Experimentation is the fun part. Also, label your favorite presets if your oven allows — big time saver.
Love that! Brussels in the air fryer are a game-changer.
Try tossing them with a little honey and soy before air-frying. Sticky heaven.
Loved the advanced tricks section — definitely trying the convection roast hack next weekend. But a heads-up: when you said to use 2-pack stainless steel cooling racks, maybe mention checking the gauge/thickness; thin racks can warp under big roasts.
Also tiny nitpick: a photo showing rack placement would be super helpful.
Good point, Priya — I’ll add a note about rack gauge and a photo suggestion for the next update. Thanks!
Lol I learned the hard way too. The cooling racks in that 2-pack I bought were fine for cookies but not for my dutch-style roasts.
Agreed on the photos. I ruined a tray by using a flimsy rack under a heavy roast. The 16-inch enameled carbon steel pan with lid mentioned is solid though — way more stable.
FYI — if you want more accuracy for baking, get an analog oven thermometer (the stainless steel 100-600°F one mentioned in the article). Saved my custard from curdling.
Also had to laugh at the ‘fix common problems’ bit — every toaster oven is a diva sometimes 😂
Yes, the analog thermometer is low-tech but so useful. Glad it saved your custard!
Pro tip: put the thermometer at rack level where you typically bake, not just the center, to get real readings.
Also rotate trays — helps even out hotspots.
Diva is the perfect word. Mine randomly decides it wants to be a broiler some days.
The thermometer helped me too. Mine runs cool and I would’ve underbaked so many times if not for it.