
Start Simple. Bake with a Bread Machine.
You can bake a fresh loaf with little fuss. A bread machine does the hard work. It kneads the dough. It times the rise. You add simple ingredients and press start. The machine hums. The loaf bakes. Your kitchen fills with warm bread. You will feel proud and calm.
This guide shows how to pick a machine that fits your counter and life. It lists the tools and the dry goods you need. It gives one clear first recipe and step‑by‑step timing. It teaches repairs for common faults and shows small tweaks to make the loaf loved by your family.


Beginner’s Sourdough Mastery: Your First Loaf
Why a Bread Machine Makes Bread Simple
How the machine controls dough strength
A bread machine kneads with steady force. It works at set speeds and times. That builds gluten the same way every time. You do not guess how long to knead. You do not watch the clock. This is why even a first loaf can rise well. Try a machine like the Zojirushi BB-CEC20 or Panasonic SD‑YR2500. They run consistent cycles and give repeatable results.
How it saves time and effort
You load the pan. You add ingredients in order. You press start. The machine mixes, rests, and bakes on its own. You free up an hour or two for chores, homework, or a quick walk. If you need hands-on shaping, use the dough cycle and finish in the oven.
What machines do well
Where they fall short
What to expect on your first try
Expect a neat, soft‑crusted loaf. Expect good crumb and even rise. Use basic white or sandwich loaf recipes first. Tip: weigh flour or spoon and level. Use fresh yeast. Watch water temps if your machine lacks a proofing temp readout. Small tweaks matter more than big machines.
Next you will learn how to pick the right machine for your kitchen.
Pick the Right Machine for Your Kitchen
Match capacity to your life
Pick a size that fits your table. If it is just you, a 1 lb loaf works. A couple needs 1.5 lb. A family of four wants 2 lb. Larger pans mean larger loaves and longer bake times.
Pan shape and crust control
Long, narrow pans give sandwich slices. Square pans give taller loaves. Look for adjustable crust settings: light, medium, dark. If you like a crisp crust, choose a machine with a higher bake-temp option.
Programs and a knead-only cycle
Check menu options. You want basic white, whole wheat, and quick bake. A dough or knead-only cycle is gold. Use it when you want to shape by hand or bake in the oven.
Delay timer and quick-bake function
A delay timer lets you wake to fresh bread. A quick-bake drops time when you are short. Use quick-bake only for plain loaves. It will not do dense whole-wheat well.
Paddle design and crumb
Look inside the pan. One large paddle makes a hole. Two small paddles reduce the hole. Some makers include a collapsible paddle. That changes the crumb and the hole size.
Ease of cleaning and noise
Removable pans and nonstick liners save time. Check how the lid cleans. Run the machine in the store if they allow it. Listen for loud motors. A noisy machine can wake kids or fill a small apartment.
Power rating and warranty
Higher wattage gives stronger heat and shorter bake times. A long warranty shows confidence. Two years is common. Five years is a sign of build quality.
Quick store tests you can run
Budget tips: where to splurge
Spend on a reliable motor, good warranty, and a true dough cycle. Save on bells like dozens of presets you won’t use.
Next you will learn what to put in that pan and which tools will make your first loaf fail-safe.
Know Your Ingredients and Tools
Choose your flour
Flour is the boss. All-purpose will do for a first loaf. Bread flour gives more chew. Whole wheat brings flavor and weight. Try King Arthur Bread Flour for rise. Try Bob’s Red Mill Whole Wheat for depth. Swap one for the other in small steps. Too much whole wheat makes the loaf dense.
Yeast: instant vs active
Instant yeast goes straight in. It wakes fast. Active dry needs proofing in 105–115°F water. If your dough won’t rise, check the yeast date. Store yeast in the fridge. Replace it yearly.
Pantry basics and their jobs
Salt controls yeast and builds flavor. Use it. Sugar feeds yeast and browns the crust. Fat — butter or oil — softens the crumb. Liquid sets hydration. Small changes change everything. More water = looser dough, bigger holes. More fat = softer, finer crumb.
Measure with care
Weigh when you can. Grams are exact. Cups lie. A kitchen scale changes results from loaf to loaf.
Use a thermometer if you proof yeast. Aim for lukewarm, not hot. Too-hot water kills yeast. Too-cold slows it.
Small tools that matter
Add-ins and small rules
Chop nuts and dried fruit. Toast seeds for more flavor. Add-ins should be 10–20% of the flour weight. Add them at the “add-in” beep or after the first knead. Too many add-ins break the gluten. Wet add-ins need extra flour.
Small moves steer taste and texture. A tablespoon more sugar. A half cup more water. Try one change at a time. Next, you will use these facts to make your plain first loaf.
A Plain First Loaf: Step-by-Step Recipe
Ingredients (choose by loaf size)
Load the pan — exact order
Pour liquids first. Add butter. Add flour to cover liquids. Sprinkle salt and sugar at the edges. Make a small well on top of the flour and add yeast last. This keeps yeast separate until the machine starts.

Program, crust, and time
Pick “Basic” or “White.” Set loaf size to match your recipe. Choose “Medium” crust for a first try. Expect 3 to 4 hours. A Zojirushi basic cycle runs ~3:30. A Hamilton Beach basic cycle runs ~3:00. Times vary by model.
Check dough during knead
About 8–12 minutes in, open the lid quickly. The dough should form a smooth, slightly tacky ball. If it spreads flat, add 1 tbsp flour. If it clings to the pan, add 1 tsp water at a time. Close the lid and let the machine finish.
Remove the paddle and cool
When bake ends, remove pan with oven mitts. Invert pan onto a rack. Tap to release the loaf. Remove the paddle if it stays in the crumb. Cool 30–60 minutes before slicing.
Quick fixes
Dough too flat: check yeast, water temp, salt. Dough too wet: add flour 1 tbsp at a time. Dough too dry: add water 1 tsp at a time. Burned top: lower crust setting next time.
Troubleshoot Like a Pro: Fix Common Problems
Dough too wet or too dry
Cause: wrong flour weight or too much/too little water.
Fix: add flour 1 tbsp at a time for wet dough. Add water 1 tsp at a time for dry dough.
Quick test: pinch a bit. It should hold shape, not smear.
Loaf too dense or too thin
Cause: too little yeast, too much salt, or overmix. Wrong flour (use bread flour).
Fix: increase yeast by 1/4 tsp next bake. Use recommended bread flour. Shorten heavy knead cycles on cheap machines.
Quick test: check rise at the end of knead. Dough should double in the pan during proof.

Collapsed sides or tall holes
Cause: over-proofing or too much water. Yeast gas collapses the gluten.
Fix: shorten rise time or lower sugar slightly. Use a shorter program or press pause earlier.
Quick test: poke dough lightly; it should spring back slowly.
Underbaked center or burned crust
Cause: wrong program, too high crust setting, or large loaf size on small machine.
Fix: choose a longer bake or lighter crust. Test with an instant-read thermometer: 190–200°F (88–93°C) center for enriched loaves.
Quick test: tap the bottom—hollow sound means done.
Paddle marks and uneven rise
Cause: paddle left in, weak knead, or sticky dough.
Fix: remove paddle after bake ends. Adjust flour/water to get a smooth ball. Try a manual dough cycle on Zojirushi or Hamilton Beach to compare knead patterns.
Quick test: open a minute into knead to see ball shape.
Strange smells and loud clanks
Cause: old yeast, burned bits, or a jammed paddle.
Fix: toss old yeast. Clean the pan and paddle. Lubricate motor area per manual.
Quick test: run an empty short bake to listen for odd sounds.
Keep a simple log. Note flour brand, grams, water temp, and program. Small changes win. Next: turn fixes into flavors that wow your family.
Make Bread That Wows Your Family
Quick add-ins that work every time
Start small. Add 1/2 cup of mix-ins to a 1.5 lb loaf. Fold them in at the first knead beep or during the manual dough cycle. Try:
A rosemary-cheese loaf will fill the house in 30 minutes. People will come to the kitchen.
Shape and dress for show
Turn a plain loaf into a star. Sprinkle seeds on wet dough. Brush with melted butter after baking for shine. Add a pinch of flaky salt on top for contrast. For rolls, pinch into even balls and brush with egg wash. For sandwich loaves, score a neat line down the top before bake.
Tip: machines like Zojirushi BB-CEC20 and Cuisinart CBK-200 give a clean crust that takes seeds well.
Serve like a pro
Always serve warm. Slice with a sharp serrated knife. Let the bread cool briefly if you need clean slices. A heatproof cloth keeps loaves warm while you plate.
Store and freeze
Cool fully. Wrap in plastic or beeswax wrap. Freeze extras in slices. Toast from frozen for best texture. Thaw whole loaves at room temp in the bag.
Simple spreads and gift ideas
Make herbed butter, garlic olive oil, or a quick jam to go with the loaf. For a gift, wrap in parchment, tie with twine, and add a small jar of jam or spice. People like things that smell good and feel homemade.
Use these small moves. They lift your loaf from good to loved. Now move on to the final word.
Your First Loaf Is Waiting
You now have a clear path. You know what to buy. You know what to measure. You have one strong recipe and fixes to use. Turn the machine on. Watch the dough rise. Take the loaf out. Share it warm.
Your family will notice. Keep baking. Each loaf will teach you more. Hone your skill with time. Try small changes. Trust your senses. Write notes. Smile at the crust. Eat the first slice. Do it again and share often proudly.


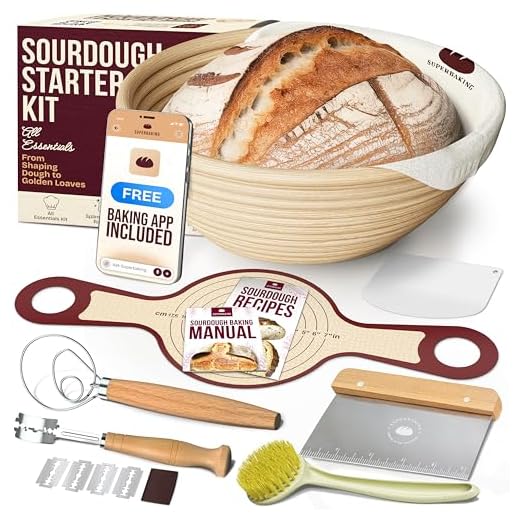
First-time baker here — followed the plain loaf recipe and impressed my partner! 😅 Thanks for dumbed-down steps. Quick Q: does the Superbaking Complete Banneton Sourdough Proofing Kit matter at this stage or save it for later?
Yup, save it. If you get into sourdough or longer fermentation breads, you’ll love the banneton for shape and pattern. Right now, enjoy the easy wins!
Congrats, Owen! Banneton is more for hand-shaped sourdough or artisan loaves — not necessary for your first machine loaf. Hold off until you try free-form loaves; then it’s a great tool.
Question for the group — the article lists both the Wilton Platinum Non-Stick 9×5 Inch Loaf Pan and the Amazon Basics Rectangular Baking Loaf Pan Set. For finishing a machine-made loaf in a conventional oven (to get a crisper crust), which pan do you prefer? I’m worried about sticking and cleanup.
Also — are there any differences in how the loaf bakes between the two? Thx!
I use the Wilton — it’s non-stick and has been forgiving. If you grease it lightly it releases great. Amazon Basics is fine too and often cheaper. Main difference I noticed is weight: Wilton feels sturdier and browns slightly more evenly.
Both are good. Wilton’s non-stick finish can help if you’re worried about sticking, but if you prefer metal that conducts heat a bit differently, Amazon Basics pans are solid value. Spray or butter + a light dusting of flour prevents sticking on either.
Okay soooo — I followed the “Start Simple” advice and let the bread machine do the kneading.
Result: amazing smell in the house, kids proclaimed me a wizard, loaf was decent.
But the texture was a tad gummy in the middle. I know, I know, “read the Troubleshoot” — I did. Tried longer bake, tried less water, tried scolding my toaster for being judgmental. 😂🤣
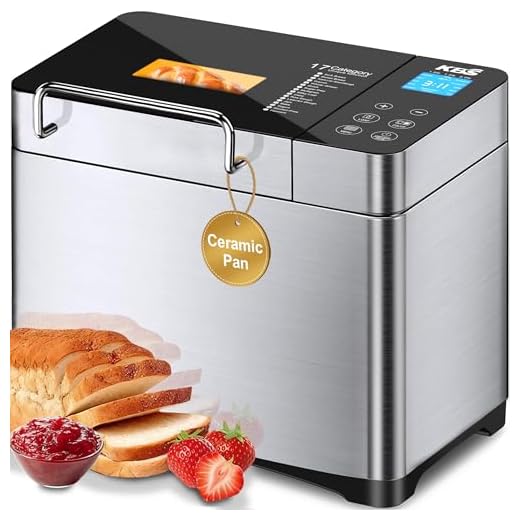
Any real tips? Also debating whether to trade up to the KBS Pro 710W Ceramic Pan Bread Maker because I heard ceramic = different texture? Or is that bogus marketing?
If you can, take the loaf out and bake it another 5–10 minutes at 350°F. It sometimes finishes in the oven. Also, let it cool completely before slicing — still-warm loaves look gummy but often set up fine after cooling.
And one last tip: use the toothpick or thermometer test — internal temperature around 190–200°F for enriched loaves to ensure it’s done.
Thanks all — will try oven finish and an oven thermometer. Also might stop yelling at small appliances 🤣
Gummy crumb usually points to underbaking, too much liquid, or insufficient gluten development. Try: 1) reduce hydration by 5–10g water per 500g flour, 2) ensure the machine’s internal temp is reaching full bake (some machines underbake — add 5–10 extra minutes if possible), 3) check your yeast activity. Ceramic pans can change heat distribution slightly, often giving a softer crust — not a magic fix for gummy centers.
Haha love the toaster scolding. I had a gummy loaf once and it was my oven temp sensor being off — my oven read 375°F but was actually lower. An oven thermometer helped me catch that.
Really appreciated the “Know Your Ingredients and Tools” section. Short anecdote: I used all-purpose flour the first time and it was OK, then switched to bread flour and my crumb improved a lot. The Etekcity scale made the switch painless.
Only constructive nitpick: maybe add a small table of approximate hydration percentages for common flours? Would’ve saved me some trial-and-error. Otherwise, great article!
+1 for the table idea. I keep notes on % hydration per flour and it’s saved me lots of time. Also try mixing AP and bread flour 50/50 for a nice balance.
Great suggestion, Hannah — a simple hydration table is a good idea for future updates. Glad the scale helped; weighing really cuts down on the experiments.
Loved this — finally tried my Cuisinart Automatic Stainless Steel Bread Maker after reading the article. First loaf turned out golden and the crumb was soft. The tip about weighing flour with the Etekcity Digital Kitchen Scale was a game changer — no more guesswork!
Two small things: the recipe times in the article were spot on, but my machine’s crust setting seems darker than pictured. Anyone else adjust bake time or use a lower crust setting?
Also, thanks for mentioning the Amazon Basics loaf pans — I used one to finish a quick banana bread and it didn’t stick. 🙂
So glad it worked for you, Karen! Crust darkness can vary by machine and even flour type. Try reducing the crust setting one notch or shortening the final bake by 5–7 minutes. If your machine lets you pause during the last few minutes, you can also tent with foil.
If you switch to the KBS Pro 710W Ceramic Pan Bread Maker, apparently it browns a bit more evenly? Heard that from a friend. Haven’t tried it myself tho.
Yep, same here with my Cuisinart — particularly with high-protein flour it browns faster. I usually pick ‘light’ crust or do the foil trick. Congrats on the first loaf!
Long-ish post because I like details:
1) Bought the OSIPOTO 17-in-1 Stainless Steel Bread Maker for versatility.
2) Followed the article’s “Plain First Loaf” recipe exactly — measured on an Etekcity scale, used instant yeast, cold water.
3) Dough looked great during knead and rise, but the top had a couple of weird air pockets after baking. Not huge but noticeable.
Anyone know if that’s a shaping issue or a proofing thing? The Troubleshoot section helped, but I’m still unsure whether to reduce rise time or punch down more thoroughly before shaping.
Also, the SuperBaking banneton kit looked tempting for my next try — would that even work with a machine loaf?
If you’re using instant yeast, try cold water like you did but shorten the initial rise by 10–15% and see. Might reduce those big bubbles. Banneton would be overkill for a machine loaf, but fun when you move to sourdough.
Great rundown, Marcus — those pockets often come from trapped gas that didn’t get redistributed. For machine loaves, make sure you lightly deflate (punch down) and then shape gently to expel big bubbles before placing in the pan. Banneton is more for shaped and free-form loaves (sourdough), so it’s not needed for straight machine recipes, but it’s excellent if you progress to hearth breads.
One more tip: try a gentle fold after the first rise to redistribute gases. It’s quick and can save you from giant holes without overworking the dough.
I had similar pockets once — I gave it an extra minute of kneading (by hand after the machine) and that helped. Also check that yeast wasn’t old — can make fermentation weird.