Tune Your Kegerator for a Perfect Pour
You want beer that pours right. A bad pour ruins nights. You will learn to set pressure, temperature, and flow. You will tune CO2 and regulator. You will control fridge temps for head, taste, and life.
You will size lines and fit taps for smooth flow. You will master the tap and serving habits. You will spot and fix common faults fast. Clear steps. Plain talk. Get ready to pour the perfect pint.


Pour Perfect Beer Every Time: Kegerator 101
Know the Three Pillars: Pressure, Temperature, Flow
Pressure: the push
Pressure moves beer from keg to glass. Too much and you blast foam. Too little and the beer goes flat and slow. Use your regulator like a tap dial. Start low. Raise in small steps. For many ales, 10–12 psi is a good check point. For lagers, 12–14 psi often works. Watch how the beer reacts. If foam rises as you pour, dial pressure down or add line resistance.
Temperature: the tame
Cold beer hides CO2. Warm beer gives it up. Set your fridge and leave it alone. Aim for 36–40°F (2–4°C) for most beers. If you drink highly carbonated styles, keep them colder. If you warm the beer to taste, expect more foam and faster pours. Think of temp as the leash on CO2.
Flow: the speed and head
Flow is line length, line diameter, faucet type, and tilt of the glass. Small ID and long lines slow the pour. Big ID and short lines speed it. A Perlick 630SS faucet pours cleaner and reduces chugging. If a pint pours too fast, add length or switch to a smaller ID line (3/16″ vs 5/16″). If it crawls, shorten or widen the line.
How they force fixes — quick checks you can run now
Use these checks. Change one thing. Watch the result. If nothing helps, stop and test a different pillar. You will learn the balance by doing.
Set Your CO2 and Regulator for Steady Pressure
Start at the source
You set the pour at the regulator. Set it wrong and nothing else will fix the pour. Set it steady and the rest falls into place. Fit the tank. Open the valve. Watch the gauges.
Know the targets and why they change
Aim for steady psi, not a high number. Use these as starting points:
Adjust up a few psi if your run is long or uses a narrow line. Drop 2–4 psi if your tap sits very near the keg or the line is short.
Read the regulator like a pro
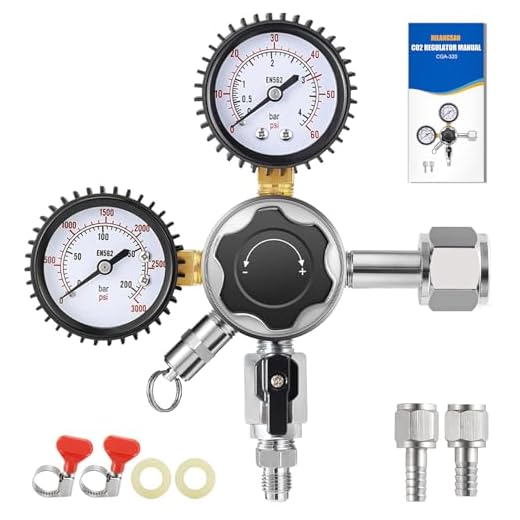
A dual-stage regulator shows tank pressure and working pressure. The tank gauge tells you if gas is left. The outlet gauge tells you what the keg sees. Twist the adjustment knob. Watch the working gauge climb or fall. Let it settle for a minute. If it drifts, check connections and leak-test with soapy water.
Test the pour with a beer thief or glass
Pull a sample. Use a thief or a clean pint glass. Time a 16 oz pour. You want about 5–7 seconds for a smooth pint. If you get foam, lower PSI in 1–2 psi steps. If it crawls, raise the PSI a bit. Change one thing at a time.
Quick tips you can use now
Tune slowly. Watch. Steady psi gives steady pour.
Control Temperature for Head, Taste, and Life Span
Set the right temp for the beer you serve
Cold beer pours clean. Too cold hides aroma and slows flow. Too warm makes foam and dulls the taste. Use these targets as a guide you can tweak:
Set the fridge a few degrees cooler than your target. Keg mass and line run raise the pour temp a bit.
Use a controller you trust
A simple dial can lie. A good controller holds steady. Inkbird ITC-308 is cheap and reliable for temp hold. Johnson Controls A419 gives pro-grade stability and alarms. If you ferment or run mixed systems, consider a two-stage controller for tighter control.
Watch ambient heat and door openings
Your kegerator is not isolated. Sunlight, a hot garage, or frequent door slams add heat fast. Each door opening can raise temps by several degrees. Run your kegerator away from ovens, heat vents, and sun. Keep door time short. Use a thermometer probe on the keg, not just the fridge wall.
Spot fridge drift fast
Look for these signs:
Do a quick check: place a probe on the keg bung. Close the door. Watch for drift over 2–4 hours. If it shifts, clean coils, check door gasket, and consider a stronger controller or extra insulation.
Small fixes that help now
A few degrees make a big taste difference. Tune, watch, and adjust.
Tune Lines, Faucets, and Fittings for Smooth Flow
Pick the right line for the run
Your beer fights resistance on the way out. Choose line by length and pressure. 3/16″ ID (4.8 mm) is the workhorse. It gives good resistance for short runs and normal CO2. Use 1/4″ (6.4 mm) or 5/16″ (7.9 mm) only for long runs or low-pressure systems. Aim for 4–6 feet of 3/16″ for a standard tower. Longer runs need more length or a smaller diameter to keep foam down.
Cut and install like a pro
Measure the run. Add a little slack. Cut square with a tubing cutter or sharp scissors. Push the line fully onto barbs. Use stainless hose clamps or Oetiker crimp clamps to seal. Check for kinks and tight bends. Fit quick-disconnects if you swap kegs often. A crooked cut or loose clamp is often the root of mystery foam.

Know when to add flow control or a restrictor
Add a manual flow-control faucet if pours come too fast. Use an inline restrictor disc for long runs or nitro pours. Flow control helps you pour slowly without lowering CO2 for the whole system. Restrictors give fixed resistance. Try a Perlick forward-seal faucet for a smooth, drip-free flow.
Routine line care that saves taste and time
Clean often. Heavy use: every 2 weeks. Home use: monthly. Use an alkaline cleaner (PBW or brewery line cleaner), circulate for 15–30 minutes, then flush. Follow with a sanitizer. Replace soft vinyl lines every 1–2 years. Keep fittings and faucet internals disassembled and scrubbed. A clear rinse and a clean test pour tell you the rest.
You’ll feel the gain when the stream is steady and the head behaves. Next, learn how your hand and pour timing finish the job.
Master the Pour: Tap Technique and Serving Habits
Grip and motion
Grip the tap with purpose. Hold it near the lever. Let your wrist lead. Open the faucet fast. Close it fast. A quick full-open then a quick full-close makes clean starts and stops. Small half-open moves make foam. Try a Perlick or the Stainless-Steel Core Brass Body Beer Faucet if you want a smooth, firm lever and less drip.

Glass prep
Rinse the glass with cold water. I once watched a backyard host switch to chilled rinses. Guests noticed the beer stayed colder and the head hit right. Never pour into a warm glass. Wash hands and keep them dry. Grease kills lacing and taste.
The pour in steps
Tilt the glass 45°. Aim the stream at the middle of the slump. Open fast. Straighten the glass when it is two-thirds full. Let the head form. Close fast. Practice this motion until it feels like one move. Aim for a 1–1.5 inch head on most ales. For nitro or stouts follow the beer style rules.
Quick checklist
Teach helpers and keep count
Show the move once. Watch them pour three times. Mark a pour spot on the counter if you need speed. Use a simple pour log at parties. Keep pour sizes steady. Guests like the same glass each time.
Small habits cut waste. Small habits make guests smile. If a pour goes wrong, spot the cause and fix it fast in the next section.
Spot and Fix Common Problems Fast
Usual faults
You will meet the same errors. Over-foaming. Flat beer. Sour or off flavors. Slow pour. Gushing. Each one has a few likely causes. Know them. That saves time and guests.
Fast tests to find the cause
Start with facts. Check pressure first. Then temperature. Then lines and fittings. Do the quick checks below. They take minutes.

Isolate the fault
Swap in a known good glass. Use a different faucet. Try a fresh keg you trust. These swaps tell you if the problem is glass, faucet, or keg. You will cut the guesswork. Keep tests one change at a time.
Quick fixes you can do now
Keep a log
Write the date, the symptom, what you changed, and the result. Over time you will see patterns. You will stop guessing and start fixing. Now move on to the final takeaways.
Keep It Simple. Keep It Tuned.
Tune one thing at a time. Test the pour. Write down each change. Check pressure, check temp, check flow. Clean faucets and lines. Tighten fittings. Train your hands to pour the same way. Note how the beer looks and tastes. Make small fixes. Repeat.
With steady care you will pour with pride. Your kegerator will repay the work with a perfect pint. Start today. Keep notes. Check weekly. Enjoy better beer every pour now.


Short and sweet: article is solid but I wish there were more troubleshooting flowcharts for weird stuff (gushing beer, no pour, off-flavors). The ‘Spot and Fix Common Problems Fast’ section helps but I like flowcharts. Maybe part 2? 🙂
Great suggestion — a flowchart-style troubleshooting guide is on our list for a follow-up. Stay tuned for a printable version with quick fixes and escalation steps.
Yes please! A printable would be perfect to tape inside the kegerator door.
I’m curious — the article recommends tuning line length, but doesn’t give exact numbers. I went with 3/16″ ID tubing for craft lagers and 5′ length after some trial. Anyone have go-to setups for hazy IPAs vs lagers?
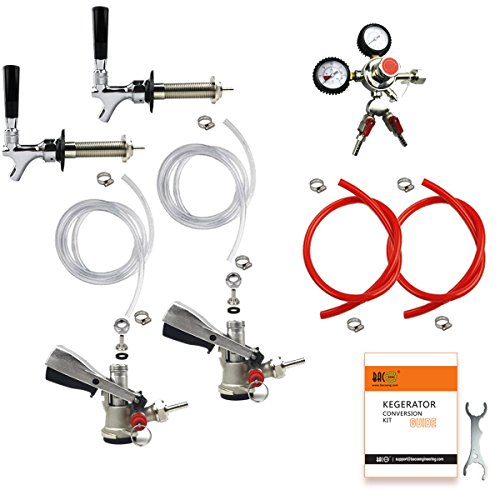
Don’t forget to account for bends and fittings — they add resistance. If you have a Double Faucet kit, balance lines between towers.
Also make sure to factor in the faucet type: commercial-grade stainless steel faucets have different flow characteristics than brass-core ones.
I use 7 ft 3/16″ for IPAs and 9 ft for lagers. Works well with my Dual-Stage CO2 Regulator set to 12–13 PSI for ales and 10–11 for lagers.
Good point — we kept it general because it varies with CO2 pressure and faucet type. Common baselines: 5–7 ft of 3/16″ for most ales, 7–10 ft for lagers at lower PSI. Hazy IPAs often prefer slightly shorter runs to preserve hop character, but adjust PSI accordingly.
Minor nit: the article mentions ‘faucet vents’ but doesn’t explain how to clean them. I had sticky faucet action after months. I took apart my All Stainless Steel Commercial-Grade Beer Faucet and soaked it in PBW — nice as new.
Five-line review style: Practical, concise, saved my keg night.
Thanks — we’ll expand the faucet maintenance subsection. Soaking in PBW or similar cleaners and brushing with a small faucet brush covers most sticky-action issues.
Yup. Also lube moving parts with food-grade lubricant if needed after cleaning to keep action smooth.
Funny story: tried to be clever and used a garden compressor to ‘test’ my lines. Don’t do this. The better move would’ve been reading the ‘Set Your CO2 and Regulator for Steady Pressure’ section. 😂
Anyway, would love a checklist for weekend tune-ups (pressure, temp, quick clean steps).
Oof — garden compressor = nope. We’ll put together a simple weekend checklist: check regulator lock PSI, confirm temperature with the digital controller, quick rinse with cleaner, check fittings, and a 10-second test pour on each faucet.
That checklist would be golden. I keep a sticky note on my fridge with PSI and temp targets. Saves me from guessing during parties.
Here’s my quick list I use:
1) Check CO2 tank level
2) Verify regulator PSI
3) Run a small cleaner through lines if needed
4) Inspect faucets/fittings
5) Test pour
Works every time.
I’m a total noob but the article is approachable. Quick dumb question: Do I need the Digital Two-Stage Temperature Controller for a kegerator or is the stock thermostat OK? I host a lot so taste/consistency matters to me.
No dumb questions! Stock thermostats are fine for casual use, but a Digital Two-Stage Temperature Controller gives tighter control (better head/taste and longer keg life). If you host frequently, it’s worth the upgrade.
Depends how picky your guests are 😉 I upgraded and it’s been worth it for consistent pours and fewer warm pints.
For what it’s worth: the digital controller also prevents big temp swings during heavy use (door opens), which keeps foam under control.
Cleaned my lines with the Complete Kegerator Beer Line Cleaning Kit after following the article — wow. Beer tastes fresher. Pro tip: soak the faucet parts overnight if you haven’t done a deep clean in a year. 🙈
Excellent tip — soaking for stubborn deposits works. The ‘Spot and Fix Common Problems Fast’ section covers regular maintenance intervals; agree that deep cleans every 3 months are a good baseline.
Agreed. Skipping line cleaning is the fastest route to off flavors. Once I started a quarterly schedule, my pours improved a lot.
Heads up for folks thinking of cheap regulators: the Dual-Stage CO2 Regulator with Locking PSI Control is worth the extra cash. Single-stage cheapies will drift on long pours, especially if you keg a lot. Learned this the hard way.
Good practical advice — dual-stage regulators stabilize pressure by compensating for tank pressure drops, which matters in heavy-use setups.
Also lock the PSI once set — saves accidental tweaks when friends try to ‘help’ 😂
Agreed. My first regulator couldn’t keep up during parties. Upgrading fixed that instantly.