
Pack an Eco Picnic Fast
You can pack smart. Pack light. This guide shows six steps to build your ECO picnic kit. Learn what to buy, how to pack, and how to leave no trace.
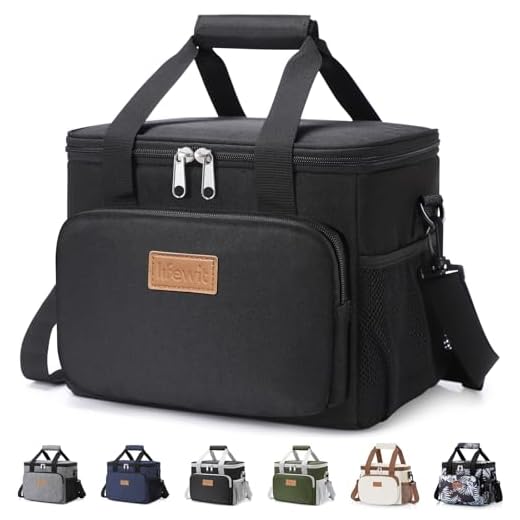
What You Need

Master the Perfect Picnic: A Simple Step-By-Step Packing Guide
Choose Durable Containers
Want gear that lasts? Buy once. Save waste and time.Choose a sturdy bag or box you can carry.
Pick light, hard containers that seal.
Select two to three sizes that stack. Use one for salads and one for sandwiches.
Use glass or stainless steel. They last. They resist stains and smells.
Bring these basics:
Keep food order. Place cold items low, heavy jars below, bread on top. Label when needed. Plan one dish per person.

Pick a Solid Menu
What travels well? Simple food. Fewer spills. Bigger smiles.Plan a menu that travels well.
Pick foods you can eat cold or at room temp.
Skip fragile items that spoil fast.
Choose hearty salads, grain bowls, roasted veg, sturdy sandwiches, and fruit that lasts.
Choose these:
Cut fruit to size.
Keep dressings and sauces in small sealed jars.
Portion snacks into single serves.
Pack dark chocolate, nuts, and dried fruit for energy.
Bring a loaf or rolls. Toast bread at home for crunch.
Pack a small cooler for meat or dairy. Use ice packs or frozen water bottles.
Keep raw and cooked food separate.
Pack a small trash bag. Bring lids for leftovers.
Aim for simple flavors. Bring extra water. Bring citrus to boost flavor and kill germs.
Try a quinoa bowl with roasted carrot and an apple for one.
Layer Smart Inside the Bag
Ever packed like a pro? Weight and order change the game.Lay out your gear before you load. Use the bag like a small pantry. Put heavy items low and close to your back, like jars or a full water bottle. Place fragile boxes in the middle. Keep cold items against ice packs. Wrap glass in cloth or a tea towel.
Nest small containers to save space. Fill gaps with napkins, cloths, or utensils. Use cloth napkins as cushions. Keep sauces upright in sealed jars. Use a rigid lid or cutting board as a flat top layer.
Pack plates and cups in a separate pouch. Keep a trash bag and wipes near the top. Stash a light towel and hand sanitizer. Tie thin items to the outside. Check weight and balance. Walk with the bag. Repack if things shift.

Serve Clean and Light
Want a tidy meal? Use rules that cut mess and guilt.Plan a simple serving plan. Choose one plate per person or share family style. Place a small cutting board as a serving slab. Use tongs or a large spoon to pass food. Offer drinks in tumblers and keep lids on to cut spills.
Bring Essentials:
Rinse containers with water at the site when you can. Wash by hand with the soap and basin. Dry with your cloth. Pack wet items last. Store leftovers in sealed containers.
Serve trash into the lined bag. Take all trash and compost with you. Scan the area for stray bits. Drop scraps in the compost pile only if allowed. Teach friends to pack out their trash. Be quiet. Respect nature.

Manage Drinks and Hydration
Thirsty? Freeze, filter, and mark bottles. Small moves, big payoff.Pack drinks with care. Use insulated bottles to keep drinks cool. Fill bottles at home and mark them with names. Bring spare water for cooking and cleaning. Freeze one bottle to act as an ice block in your cooler. Use a filter or purified water if you hike far. Bring a small kettle or thermos for hot drinks. Measure coffee or tea at home and pack it in a jar. Use a small cup that nests in other gear. Keep straws reusable or skip them. Carry a small towel for condensation. Store drinks upright. Keep alcohol light and obey site rules. Drink water often. Hydrate before and after the meal. Plan cups per guest. Rinse bottles before you leave. Share water with pets if you brought them. Stay safe.
Bring these essentials:

Move, Set Up, and Maintain
Is your kit ready for the road? Check straps, dry gear, and fix chips.Check straps and zippers before you leave.
Carry heavy items close to your center.
Use a shoulder strap or a backpack for long walks.
Pad fragile jars in a padded pocket or wrap them in a cloth.
Secure the kit in the car for the ride.
Set the kit down on a flat spot when you arrive.
Open the bag gently.
Lay a ground cloth or blanket first.
Unpack in order of use: plates, utensils, then food.
Shade cold food and replace ice packs as needed.
Teach kids the gear rules.
Clean spills at once.
Dry gear fully before you save it.
Air out containers and store wraps clean and dry.
Repair chips or dents when you see them.
Review your kit after each trip and plan small upgrades.

Ready, Set, Go Green
Pack once. Eat well. Leave no trace. With this kit you cut waste and stress. Keep it ready. A small habit makes a green change. Try it. Share your results.


This was a helpful read. Love the step about ‘Serve Clean and Light’ — wipes and compostable plates are game changers.
Small note: compostable plates often need ultra-high heat to break down, check local compost rules before assuming they’ll disappear. Not the guide’s fault but worth a footnote!
Pro tip: keep a small bag for compostables vs landfill — makes sorting later easier if you’re unsure about pickup rules.
Yes! I once tossed compostable plates in a green bin and they were still there months later. Local rules are everything.
Thanks, Emily — excellent reminder. We’ll add a line about checking local composting facilities and proper labeling for compostables.
Okay real talk:
1) I tried the ‘pack an eco picnic fast’ approach and ended up with 3 containers, 2 lids missing, and a soggy baguette.
2) The guide is solid, but maybe add a quick checklist printable? Something like: containers, utensils, napkins, ice packs, cutting board.
3) Also, how do you stop flatbread from getting cold and chewy? I need texture tips.
Totally agree on the checklist. I keep a small zippered pouch with forks/knives/napkins so lids don’t get lost.
Tom — also, consider silicone bands or an elastic wrap to keep lids paired with containers while packing.
For flatbread, wrap it in parchment + a thin cloth — keeps it from sweating and keeps warmth. Also experiment with grilling quickly at the site if there’s a portable grill.
Great feedback, Tom — a printable checklist is a good idea, we’ll add one soon. For flatbread: toast or keep it in an insulated wrap, and separate moist toppings in a different container.
Solid write-up. I appreciated the ‘Pick a Solid Menu’ advice — nothing worse than fragile stuff on a hike.
Two quick ideas:
– Sandwiches wrapped in beeswax wrap keep better than plastic AND are reusable.
– Pre-slice fruit and keep worst offenders (like bananas) separate until serving.
Also: anyone have go-to picnic cocktail/mocktail recipes that don’t require carrying tons of extra stuff?
I do a simple citrus spritz: sparkling water + a squeeze of lime + a splash of frozen juice concentrate. No bulky mixers and super refreshing.
Thanks for the tips, Daniel. For drinks, concentrate syrups or pre-mixed pouches are great — just mix with chilled water on-site.
Tea infusion! Brew strong, chill, and bring in an insulated bottle. Add lemon slices when serving for a fresh touch.
Question: for longer trips (4-6 hours) — would you recommend dry ice? Seems overkill, but curious about safe options for perishables.
I bring extra frozen water bottles — they act as cold packs and become drinking water later. Cheap and effective.
Dry ice is not recommended for casual picnics due to handling risks and ventilation needs. For 4-6 hours, use a good insulated cooler, several frozen gel packs, and pre-chill food before packing.
Love the hydration section. I used to bring 6 plastic bottles like a caveman. Now I bring a big insulated bottle and refill smaller ones from it — saves space and trash 😅
One tiny nit: the article mentions cold packs but not whether to freeze herbs with them? Anyone tried?
Good point on herbs — avoid direct contact with ice packs. Store delicate herbs in a sealed small container or jar with a damp paper towel to keep them fresh.
Freezing herbs can bruise them. Better to keep herbs fresh in a small jar with damp paper towel at the top layer, away from the coldest spot.
I tried going fully zero-waste once and brought cloth napkins, metal cutlery, glass containers and an enamel plate.
Pros: felt super proud and cute.
Cons: I forgot a wet bag for dirty cutlery and everything smelled a little weird on the way home. 😬
Suggestion: add a reminder to pack a small washable wet bag or container for dirty stuff.
Great reminder, Hannah. We’ll add a tip to include a sealable wet/dirt bag for used cutlery and scraps.
Yeah, those wet bags are lifesavers. I use an old produce bag and it works fine.
Also toss in a little biodegradable soap if you plan to rinse stuff before packing back in. Less stink later!
If you want to be fancy, get a small collapsible silicone tub for a quick rinse — folds flat in your kit.
This sentence — ‘Move, Set Up, and Maintain’ — perfectly sums up what I forget: set up a spot and then actually maintain it. LOL.
Minor gripe: photos of how to layer inside the bag would help. I’m visual and a few diagrams would make the steps immediately actionable.
Agree on diagrams. Even a simple top-down sketch would clarify where to place cold packs and delicate items.
Noted — visuals would definitely help. We’ll work on adding diagrams showing layering and bag layouts.
My 5-step (ok 6) ritual before leaving the house:
– Pack containers into bag
– Put ice packs along sides
– Add utensils & napkins in top pocket
– Fill water bottle last so it’s cold
– Quick scent check — no mayo bombs allowed 😂
Really loved step 3 about layering smart. Saved me from a tuna catastrophe once. Also, small mason jars are underrated for sauces and dressings 🥗✨
Mason jars + rubber bands = secure. I use small jars for hummus and they travel well.
Thanks for sharing your ritual — we might feature a reader checklist like this in a future update.
This is gold, Zoe — mayo bombs are the worst. Mason jars are perfect for dressings and keep things from making everything soggy.
Also stash a small bag for trash/wet wipes — keeps your picnic site tidy and makes cleanup fast.
Scent check is genius. My lunch once smelled like a mystery gym locker. Never again.
Great guide — short and actually useful! I always forget the layering part and end up with squashed salads. The tip about putting heavier items at the bottom and cold packs near the outside saved my last picnic.
One question: for durable containers, any favorite brands that won’t leak? I’m trying to avoid single-use plastic but also don’t want to spend a fortune.
I use glass jars for salads and stainless containers for sandwiches. Cheap-ish silicone lids from a local store have been surprisingly reliable.
I swear by a local thrift shop find — no brand but heavy-duty and zero leaks. So you don’t always need to buy new!
Glad it helped, Sarah! Look for stainless steel or thick borosilicate glass with silicone seals. Brands vary by region, but focus on leakproof lids and a good warranty.