Why Your Lunch Bag Matters
You eat with your hands. You trust your food. A good lunch bag keeps both safe. It holds heat or cold. It saves food from spills and bruises. It makes your day smooth. This guide shows how.
You will learn to pick the right bag. You will learn which insulation works. You will learn smart packing order and safe temps. You will learn care, greener choices, and daily tricks to keep lunch fresh and simple.


Keep Lunch Fresh: Use an Ice Pack the Right Way
Pick the Right Bag for Your Day
Start with your commute
Think about how you move. You walk five blocks. You bike across town. You ride a train for an hour. Each trip needs a different bag. A sling that hugs your body works for biking. A flat, wide base works for desk lunchers. If you tote a laptop, pick a bag that nests neatly inside.
Size matters
Too big and food slides. Tubs topple. Sandwiches get crushed. Too small and you force bad swaps. Measure your usual containers. Leave room for an ice pack. Aim for a bag that holds what you eat, not what you might.
Fast zips and tight seals
Zippers matter more than you think. A stiff, locking zipper keeps cold in. Look for water-resistant teeth and a flap over the zip. Internal pockets with sealed seams stop leaks. Try a zipper that opens wide. You should grab food with one hand.
Handles, straps, and how it sits
Check the handle first. It should not cut your hand. Shoulder straps should stay put. If you bike, pick a bag with strap anchors or a MOLLE strap. The base must sit flat. A bag that tips will spill. Hard-bottomed bags keep jars upright.
Match the bag to your meals
Bring the meals you like. If you use glass containers, pick a bag with rigid sides. If you meal-prep salads, choose a tall bag for dressing bottles. For bento boxes, choose a slim one with dividers. Test a bag a week. Use it. You will know fast if it fits your life.
Insulation That Works, Not Hype
How insulation works
Insulation slows heat flow. It keeps the warm out and the cold in. Thick walls matter. Tight seams matter more. Layers trap air. Foil reflects heat. Foam slows it. A good liner will hold temperature for hours. That is the goal.
What to look for
Pick bags with:
Compare models. The YETI Daytrip has stiff walls and a wide zipper. Hydro Flask’s lunch box uses thick foam. PackIt freezable bags add phase-change gel inside the walls. Each wins different tests. You want the one that suits your routine.
Use ice and heat
Perishables need cold. Use flat ice packs. They sit under and around containers. For hot soup, pre-warm your thermos. Fill it with boiling water for five minutes. Dump, then add soup. This keeps heat where you want it.
Test and time it
Bring a cheap food thermometer. Test once. Put a cold item inside at lunch time. Check after one, three, and five hours. Mark how long it stays below 40°F for safety. Do the same for hot foods. This tells you what to trust.
Fast checklist
You will save food and hassle. Next, learn how to place containers and choose orders so your bag’s insulation does the most work.
Pack Smart: Order and Containers
Plan the load
Think before you pack. Put heavy items at the bottom. A jar of hummus. A soda can. Let them sit. Fragile things live on top. Crackers. Greens. They stay whole that way. You prevent a messy lunch and a ruined mood.
Stack and seal
Use stackable boxes with flat lids. Rigid walls keep shape. Leak-proof jars hold sauces and dressings. Silicone lids and twist-top cups beat spills. In tests, tight-seal containers cut leaks almost entirely. Pick models like Rubbermaid Brilliance or Bentgo for strong seals and clean stacks.
Keep wet and dry apart
Wrap wet items separately. Put dressings in small jars. Place sushi or cut fruit in a thin leakproof bag. Leave a small air gap for crisp things. Chips and apples need room to breathe. A tiny gap stops steam and softening.
Place ice where it helps
Put the ice pack near the perishable foods. Not on top of bread or crackers. Flat packs slide beside a salad or under meat. That keeps temps steady and textures sound.
Pack by time
Pack for the day you will eat. What you eat first should be easiest to reach. Lunch-first items go on top or front. Snacks you grab later go deep. This keeps food neat and quick to pull.
Small gear, big wins
Use small pouches for nuts, sauce, and utensils. Label lids with a dot of tape if you pack many boxes. A neat pack keeps food intact and fresh. Next, learn the simple safety rules that make that freshness safe to eat.
Food Safety: Rules You Can Count On
Keep temps in the safe zones
Bacteria move fast in the danger zone. Keep perishable foods below 40°F or above 140°F. If you must leave food out, follow the two-hour rule. If the air is 90°F or hotter, cut that to one hour. If you treat time as a tool, you avoid a bad meal and worse.
Cold packs and timing
Freeze gel packs overnight. Pre-chill containers and lids in the fridge. Place packs next to dairy, meat, and cut fruit. Check the pack after a few hours. If it is soft, act fast. For on-the-go chill, a thin frozen towel or a hard-sided ice pack holds cold longer than loose ice.

Clean, dry, and inspect
Wipe spills right away. Wash containers with hot, soapy water. Air the bag until it smells clean. Once a week, give the bag a deep clean: remove liners, scrub seams, and hang to dry. A small fridge thermometer or an instant-read like ThermoWorks DOT helps you know if your cooler is cold enough.
Quick rules to live by
Trust your sense and the clock. When in doubt, toss it. Safety beats regret.
Materials, Care, and Greener Choices
Choose fabrics that last
Pick cloth over thin plastic. Nylon resists scuffs. Waxed canvas sheds water and looks better with age. Seek tight stitches and heavy-duty zips. A chewed zipper will end a bag faster than a ripped seam. Think of the bag as gear, not trash.

Repair and replace parts
Buy bags with replaceable parts. Removable liners and changeable straps matter. Look for brands that sell zipper pulls or liners. A new pull or patch costs less than a new bag. You keep the same bag. You cut waste.
How to clean and dry
Wipe spills the moment they happen. Remove liners. Hand-wash or use a gentle cycle if the label allows. Use mild soap. Rinse well. Hang to dry with the bag open. Let seams and corners get air. If the bag stays damp, it will smell and rot.
Quick care list:
Greener choices that matter
Choose recyclable or repairable pieces. Pick natural fiber options if you can compost or recycle parts. Buy from makers who publish repair guides. A tough bag saves you money. It saves the planet a little too.
Real-world note: commuters who keep one durable lunch bag report fewer replacements. One good bag often lasts three to five years. Ten cheap bags do not.
Small habits that extend life
Store empty, dry, and open. Avoid overstuffing. Treat the zip with a little wax or graphite if it sticks. When a seam frays, stitch it. These small moves keep your bag ready for the next lunch.
Daily Routines and Real-World Tricks
Night-before wins
Pack the night before. Lay out the food. Stack containers. Tuck ice packs in the freezer. You avoid the scramble. You save minutes and lower mistakes. Many people find a 10-minute evening routine beats a 20-minute morning panic.
Prep your gear
Chill your bag or warm your thermos a little before you fill it. A cold bag slows melt. A warm thermos holds heat longer. Fill the thermos with hot water for a minute, then pour it out. It makes a difference on the walk to work.

The small kit that saves lunches
Keep a kit in the bag or desk. Replace what you use.
Portion and plate like a pro
Portion meals to the size you finish. Use shallow containers for fast cooling. Pack dressings in a tiny jar. Cut fruit so you eat it at lunch. Leftovers that fit your appetite get eaten.
Reheat smart
Remove metal or foil. Vent lids by cracking them or lifting a corner. Stir midway for even heat. If you use a microwave-safe container, place a paper towel under wet salads to stop sog. Test a sip before you bite.
Quick mental checklist
Run this in your head as you walk out the door: food? ice? napkin? utensil? lid? A two-line check saves a forgotten lunch. Make it a small ritual. Do it three days and it becomes habit.
These small moves trim waste, cut stress, and keep food fresh. Next, tie the tips together in the final wrap.
Pack with Purpose
You choose a good bag. It makes your lunch better. You save time, cut waste, and keep money in your pocket. Pick the right size and insulation. Use order and tight lids. Guard food with cold packs or heat wraps. Clean gear fast. Learn small habits. They add up. Plan your week. Freeze parts ahead. Label meals. Rotate food safe. Trust small steps. They work. Start simple. You can.
Start today. Pack with care. Enjoy your meal.


The Waxed Canvas bag looked cool enough to make me feel like a picnic influencer 😂. Bought it mainly for the aesthetic but turns out it’s practical too. Downsides: it gets heavier than I expect and if you spill oily food it can be a pain to clean. Tip: keep a couple of the 3-Piece Reusable Hot and Cold Gel Wraps in the freezer so they’re always ready.
Also, small PSA: don’t try to overpack a lunchbox like it’s a suitcase. You’ll regret it. 😆
Haha that ‘picnic influencer’ energy is real. How’s the canvas at repelling spills though?
Thanks for the honest review — aesthetics vs. function is always a tradeoff. We can add a note about canvas weight and spill upkeep in the care section.
Oily spills are the worst. I keep a small microfiber in my work drawer for quick blotting.
Agree on the overpacking tip. I used to cram in leftovers + snacks + gym gear and my bag was miserable by noon.
If you wax it again it helps with spill repellency. Learned that the hard way 😉
This was super practical. I appreciated ‘Pack Smart: Order and Containers’ — I usually pack my lunch in this order:
1) Frozen water bottle at the back
2) Insulated main (hot/cold)
3) Sides in Dealusy containers stacked vertically
4) Snacks in front easy-to-reach pocket
Works for my desk job and the 24oz containers are perfect for portion control. Also — wash tips for the Waxed Canvas Insulated Paper Bag Lunchbox: spot clean, avoid machine wash, re-wax occasionally. Saved my bag once I followed that.
Nice list — I put snacks in the main compartment and then regret it every day. Will try your order!
Love the step-by-step. Great tip about re-waxing canvas bags — adding aftercare notes to the article could help others maintain theirs longer.
Long-time packer here — small routines make the biggest difference.
I prep portions on Sunday with the Dealusy 24oz containers, freeze a couple for the week, use FlexiKold pads on top of frozen meals, and keep snacks in the front pocket.
A few extra thoughts:
– Label containers with dates
– Keep a tiny bottle of dish soap in my desk for emergencies
– Rotate gel pack usage so they don’t lose chill
Also, sustainability note: ditch single-use plastic bags. The article’s greener choices section is gold. 🌱
Labeling is clutch. I once ate my roommate’s mystery lunch — learned my lesson 😂
Do you freeze the 24oz containers fully or just partially? Concerned about glass expansion if anyone uses glass ones.
Appreciate the detailed routine, Maria. The label idea is so simple but often overlooked — will add as a quick tip.
I partially freeze liquids to avoid expansion issues. For glass, leave headspace or avoid freezing fully.
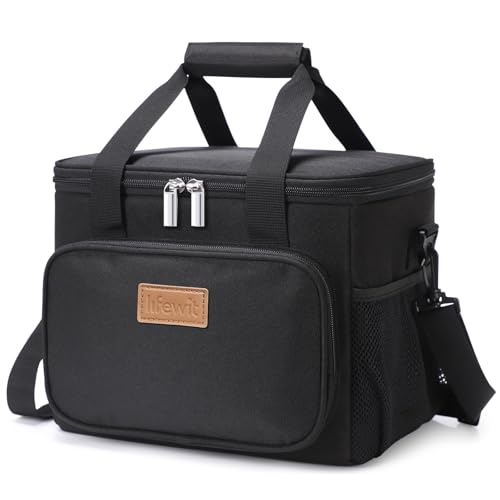
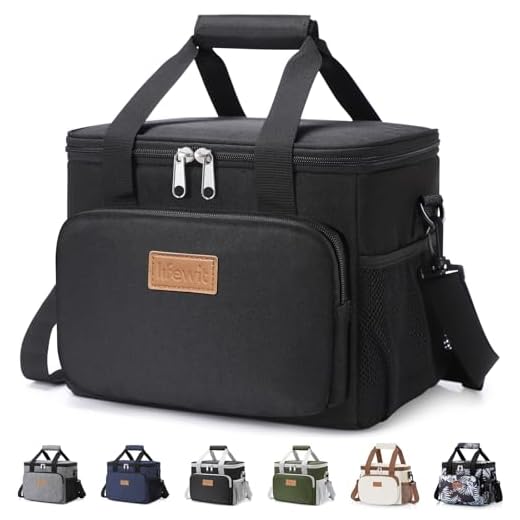
Short and sweet — the Lifewit and ExtraCharm totes both fit my yoga mat + lunch which is surprisingly useful. Article had good, no-fluff tips. Thx!
Glad you found the comparison useful, Olivia. Combining gym gear and lunch is a real-life constraint for many — great to note.
Yup, space for extras is underrated. More pockets = fewer fridge trips.
Quick question — the ExtraCharm Leakproof Insulated Lunch Tote Bag sounds promising for commuting. Any special care? The article mentions materials and care but I missed whether the lining is dishwasher-safe.
Also wondering how it compares in size to the Lifewit 9L.
I own the ExtraCharm — it’s wipe-clean only. I’ve tossed small interior inserts in the top rack (risky) but hand-wash is best.
I measured mine: Lifewit felt larger by about a couple inches in height, which matters if you pack tall water bottles.
Good question, Zoe. Most leakproof liners are wipe-clean only; avoid the dishwasher unless the product page explicitly says so. In general, Lifewit 9L is a bit roomier than the ExtraCharm tote, but check dimensions if you want to fit large containers like the 24oz Dealusy ones.
Food safety q: the article’s ‘Food Safety: Rules You Can Count On’ mentions the 2-hour rule and cold chain. If I use FlexiKold pads plus an insulated bag, how strict should I be about that 2-hour window? Is it still safe for a 4-hour commute if everything starts cold?
Good question. The 2-hour rule is conservative; with proper insulation and frozen or very cold gel packs you can extend safely to about 4 hours for perishable foods. But avoid repeated opening and always check temperatures — if in doubt, err on the side of caution.
Also consider the food type: mayo-based salads are riskier than dense cooked grains.
Great read — finally an article that treats lunch packing like a worthy skill 😂. I bought the Lifewit Insulated 9L Lunch Cooler Tote Bag last month after reading a few recs and it actually keeps my salads crisp until 2pm. The tips about order (cold stuff closest to ice packs) were spot on.
Also liked the bit on greener choices — switched from single-use containers to the Dealusy 100-Piece 24oz Meal Prep Containers Set and it’s been a game changer for leftovers.
Thanks for sharing, Emma — love hearing real user experiences with the Lifewit and Dealusy sets. Any favorite salad dressings that travel well?
Which size Dealusy container do you use for salads? I’m tempted but unsure about portion sizes.
I second the Lifewit praise. Mine’s survived a toddler explosion and still looks good 😅
Good article but wary of the ‘insulation that works, not hype’ section — the marketing on some of these products is wild. For example, the FlexiKold Reusable Flexible Gel Ice Pack Pad helped a bit, but if you leave it in a thin tote you won’t get magic hours of cold. It really depends on container placement and how often you open the bag.
A more technical breakdown of R-values or a simple timed test would’ve been helpful.
Agree — I did a quick test with FlexiKold in a cheap tote and it was meh. Put the same pack in the HydraCup All-in-One Meal Prep Bag Kit and it lasted noticeably longer.
Would love a follow-up that ranks the specific bags (Lifewit vs ExtraCharm vs Waxed Canvas) under the same test conditions.
Solid point, David. We avoided heavy technical jargon but could add a simple timed test protocol (bag + ice pack + thermometer) for readers who want to DIY validation. Thanks for the suggestion!
If you’re into numbers, I once measured temps every hour for 6 hours. Insulated foam + frozen gel packs = best combo. Thin linings = nope.
The 3-Piece Reusable Hot and Cold Gel Wraps are underrated. I use one for soup and it stays warm on my commute if I preheat the wrap. Also works frozen for yogurt. Simple but effective.
Great tip, Liam — dual-use gel wraps are super handy. Preheat tips are useful for readers packing hot lunches.
Wait, you can preheat those? I only ever froze them. Mind blown 😅
Helpful article. Quick comment on packing order: I put hot items in insulated containers in the center and surround them with frozen gel pads so they keep temp longer. The Waxed Canvas bag is stylish but don’t use it for rainy days unless you reproof it. One more thing — the FlexiKold pads can crack if you fold them too sharply over time, so treat them gently.
Is there a recommended lifespan for those FlexiKold pads? Curious when to replace them.
Noted on folding — I accidentally creased a pack and it leaked. Oops.
Pro tip: cycle gels between fridge and freezer rather than room temp to preserve longevity.
Thanks Daniel — good practical tips about pad care and canvas reproofing. We’ll note the fold/care guidance for gel pads in the materials/care section.
LOL at all the meal prep politeness. I bought the HydraCup All-in-One Meal Prep Bag Kit because the kit concept sounded fun, but it made me feel like a fancy bento dad. Still — it keeps things tidy and looks less like I smuggled takeout.
If it reduces takeout temptation, it’s worth it. Wallet + waistline saved.
Haha ‘bento dad’ — love it. Glad the HydraCup kit worked out for you. Kits can reduce decision fatigue in the morning.
Which HydraCup configuration did you get? The compartments looked oddly satisfying in the product photos.