
Start Small, Carry Less
You will carry fewer items and gain more time. Most workers spend ten minutes a day fussing with lunch gear. That adds up. You can stop that. Choose a small kit that works. Let it do the heavy lifting.
This piece shows a clean way to carry lunch. It strips away excess and keeps what works. You will save time. You will eat better. You will feel lighter. I show simple containers, a tight kit, and foods that travel well. You will learn to plan, pack, and rotate with ease. You will care for gear. Start with a choice. Pick less. Keep what fits your life. Then go and enjoy a calm lunch every single day.


Packing My Husband’s Lunches for a Week
Why Minimalism Matters for Your Lunch
The true cost of carrying too much
You lug gear you do not use. You make small choices all day. They add up. Ten minutes a day of prep and fuss is about 43 hours a year if you work 52 weeks. Spend $10 on a bought lunch five days a week and you lose about $2,600 a year. Extra weight wears your shoulders and your patience. Single-use containers fill the bin. Small wastes grow into big costs.
What you actually win
Less clears space and thought. You gain time, cash, and calm. You cut trips to the store. You cut decision fatigue at noon. You eat more of what you like, not what is easy. One colleague I know stopped carrying five containers. He kept one sturdy box. He cooks twice a week now. He says lunch feels like a small gift. He also saved $200 a month.
Clear steps that work
Act like a scout. Inspect what you carry for one week. Ask three questions: Do I use it? Does it fit my meals? Does it add time or waste? Set one tight goal. Examples:
Try a one-week test. Pack the same simple meal five days. Note time, waste, and mood.
Quick product pointers
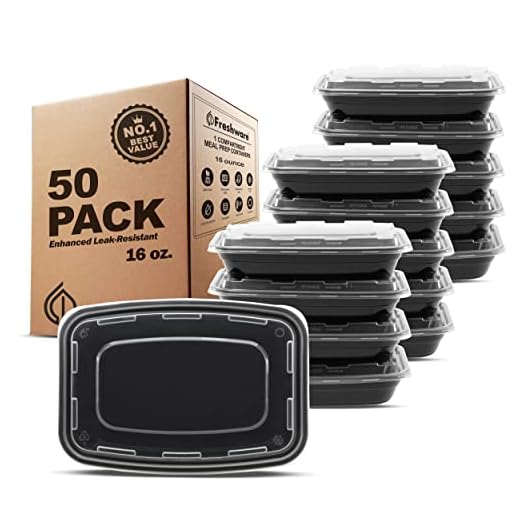
Choose one main container. Pick a leak-proof flask for hot food. Add a light utensil and a small napkin. Compare: Bentgo-style bento for portion control, Pyrex for reheating, and a 16oz disposable pack if you need short-term prep.
Next you will build a core carry kit that fits your goal and your life.
Build a Core Carry Kit
One bag that fits your life
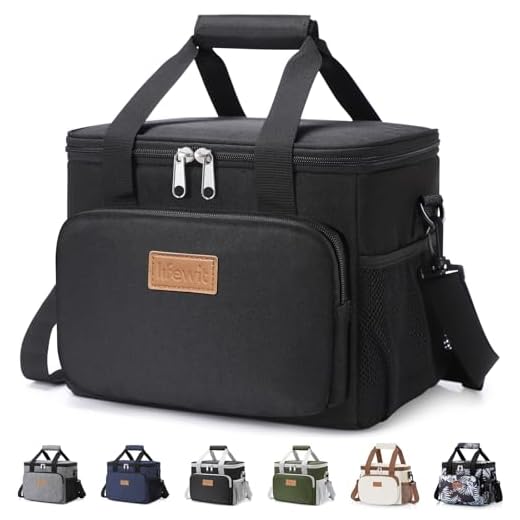
Pick one bag. Use it every day. It should fit your commute, not your entire garage. Look for a bag that is light, water-resistant, and has a flat base so boxes sit straight. Try a tote if you walk. Try a slim backpack if you bike. A courier style clings close. A small insulated tote works for short walks and errands.
One container that does the heavy lifting
Choose a single, reliable food box. Metal for heat retention. Glass for reheating. Plastic for weight. Go with a leak-proof lid. Stackable shapes save space. Good examples: Bentgo Original for portion control, LunchBots Double for simple meals, or a 24 oz Pyrex glass dish for hot soups.
One cup, one cutlery set
Pick a cup you use every day. A 16–20 oz Hydro Flask or Zojirushi keeps drinks hot or cold. Choose a small, break-proof mug for short trips.Choose lightweight cutlery. Stainless travel sets or bamboo kits work. A simple spork will cut weight and fuss. Keep it in a small pouch or clipped to the bag.
Cut the extras
Ask: Does it add meal value? If not, drop it. Extras kill simplicity. Keep only a napkin, a small salt/pepper, and a tiny soap strip if you rinse. Remove duplicate lids, extra cloth bags, and bulky sleeves.
Balance size, weight, and function
Size to your meal. Carry just enough volume for one lunch and maybe a snack. Pick hard-wearing materials. Match shapes so things stack. Test your kit one week. Note what you miss. Adjust down, not up.
Next, you will choose the actual containers and utensils that pair with your new kit.
Choose Simple Containers and Utensils
Choose one shape that nests
Pick a shape that stacks. Rectangles save space in a fridge and bag. Round jars fit mugs, but they wobble. Test the fit at home. If your boxes nest, you carry fewer lids.
Pick the right material
Go with metal or strong plastic. Stainless holds up. It won’t stain. BPA-free plastic is light. Glass is great for reheating but breaks. Think about your day. If you bike, choose shockproof gear.
Lids and seals
A good lid seals tight. Snap locks beat loose screw tops for travel. Avoid lids with many rubber inserts. They trap food and slow drying. You want one seam to clean.
Cups and utensils
Pick a cup that works hot and cold. A double-walled steel tumbler keeps coffee warm and iced tea cold. Choose utensils that fold or stack. A folding spork or a 3-piece stainless set that nests will cut down space. A single-piece chopstick set works too.
Traits that matter
Watch the traps
Lids with thin silicone gaskets fail first. Fancy multi-part containers make clean-up slow. Lightweight plastic can warp in a hot car. If you want proof, try a lunch swap with a coworker. You will see which boxes survive a commute.
Keep your kit honest. Fewer parts mean fewer chores and fewer surprises. Next, you’ll learn how to choose foods that travel well and match these tools.
Pack Foods That Travel Well
Think three parts
Aim for base, protein, veg. That keeps meals steady. A bed of brown rice. A pocket of grilled chicken. A pile of roasted broccoli. You eat warm or cold with little fuss. It cuts packing time.
Foods that hold up
Pick grains and roots. Pick cooked veg over limp greens. Pick simple proteins that keep shape.
Wet bits, keep them sealed
Dressings and dips break at the worst moment. Use jars for wet parts. A 16-oz Ball mason jar works. Glass keeps sauces tight. Pack hummus in a small Pyrex or a leak-proof cup. Wrap sandwiches in wax paper or use a sturdy flat wrap to avoid soggy bread.

Pack smart and simple
Layer warm things on the bottom. Put crunchy things on top. Keep dressings apart. If you reheat, use containers that go from fridge to microwave or oven. If you eat cold, choose foods that taste good chilled. Test one combo once. Repeat what works.
A quick real-world test: pack a rice bowl with roasted veg and a hard protein. Walk an hour. It arrives intact and satisfying. Next, you’ll learn how to plan, pack, and rotate your meals with ease.
Plan, Pack, and Rotate with Ease
Make a mini plan for the week
Pick three meals you like. Map them to three or four days. Cook one base. Cook one protein. Mix and match. This keeps choices small. It saves time and stress. Try a Sunday plan: roast veg, cook rice, grill chicken. You now have three lunches ready to go.
Cook once. Pack daily.
Cook in one run. Portion into containers like Rubbermaid Brilliance or OXO Good Grips. Pack fresh bits each morning. Heat what needs heat. Eat what’s fine cold. A Hydro Flask 18 oz Food Flask works for hot soups. Bentgo boxes work for wraps and sides. Small moves add up.
Morning checklist
Use a short list you trust. Put it on the fridge or your phone. Check it in the morning. Pack the night before when you can. That saves the frantic rush.
Keep extras at work
Store go-to staples at work. Use a desk drawer or mini fridge. That keeps a spare lunch when plans fail. Good options: instant oats, a spare Rubbermaid container, a jar of peanut butter, canned tuna, a fork.
Rotate and replace
Label containers with a date. Eat oldest items first. Toss food that smells off. Swap worn seals and torn bags quickly. A routine check every two weeks keeps your kit sharp. You will cut waste. You will cut stress. Routine beats rare big efforts.
Keep It Lean: Care and Simplify Over Time
Trim the growth
Your kit will grow. That is normal. Fight back with small rules. Try one-in, one-out. Or set a cap: three containers, one utensil set, one cooler bag. Each month remove one item you never use. You will free space and calm.
Test one change at a time
Swap one thing. Use it for two weeks. If it saves time or space, keep it. If not, put the old piece back. This stops clutter from creeping back. It also keeps choices simple.
Mend or toss
Fix what you can. Replace seals, tighten screws, glue a loose handle. A new silicone gasket costs less than a new box. Toss what is stained, warped, or smelly. The rule: if it fails twice, it goes.
Clean on a schedule
Set easy habits. Rinse daily. Deep wash once a week. Soak lids and seals. Air containers dry on a rack. Keep a small kit for repairs: spare lids, a tube of food-safe silicone, a scrub brush.
Replace with intent
When something breaks, buy the version you actually need. If you reheat at work, choose a durable heat-safe box. If you eat on the run, pick a slim, leakproof container. Simple swaps cut bulk and cost.
Reassess every few months
Make tiny wins. Remove one fork. Lose one napkin. Each cut adds space and calm. Keep what works. Let go of the rest. Next, apply this to your final step: Make It Yours and Use It.
Make It Yours and Use It
You can make lunch easy. Start small. Pick a core kit and simple containers. Choose foods that travel well. Build habits that stick. Pack once. Rotate often. Trim what you do not need. Carry less. Move light. Eat well. Save time. Save money. Free your mind. Make tweaks as you go. Keep what works. Drop what slows you down. Use it daily. Live with less and enjoy your day. Start today. Keep it simple.


Helpful article overall but I would have liked more on cleaning tips. For instance, which containers are dishwasher-safe vs hand-wash only? I ruined a lid once by tossing it in the wrong rack.
Also, anyone have advice on pantry space when you store 50-pack boxes? My closet is overflowing.
Good point — we’ll add a cleaning section in an update. Generally stainless steel is hand-wash or top-rack, while some plastic containers are top-rack dishwasher-safe. Check manufacturer notes. For pantry space, stack vertically or donate extras.
Foldable storage bins for under-shelf use helped me organize the leftovers of bulk packs.
I keep backups under my bed 😂 Not ideal but saves closet space.
Okay, confession: I keep the 50 Pack 16oz Single-Compartment Meal Containers in my car for emergency lunches. Work like a charm when plans change last minute. Also cheap and stackable.
Downside: people think I sell food now. 😂
You could label them ‘Zoe’s Catering’ and make a side hustle out of it 😂
That’s smart. I keep a few in my desk drawer for takeout leftovers or when I forget to bring lunch.
LOL — emergency lunches = brilliant. Single-compartment containers are great for one-dish meals and last-minute pickups.
Love the ‘Start Small, Carry Less’ idea. I got tired of lugging a giant cooler to work every day — switched to a Stainless Steel 3-Compartment 27oz Bento Box and it’s been a game changer. Keeps things neat and no soggy salads.
A couple of notes: watch the portion sizes if you switch to smaller containers — you’ll either feel freed or still hungry (depends on your metabolism 😂). Also, the article’s tip about rotating meals saved me from lunch boredom.
Thanks Emma — glad the bento box worked for you! If you’re still getting hungry, try adding a small handful of nuts or a boiled egg to the 3-compartment setup. Keeps you full longer.
Totally agree — the compartments keep sauces separate too. Which brand of bento did you get?
I’ve got the same one and sometimes bring a little container of dressing in a 16oz single-compartment for dips. 😋
Long comment incoming — sorry not sorry. I used to overpack: two containers, spare water bottle, full-size utensils, snacks, sauce bottles. After reading this article I slowly pared down. Here’s my step-by-step:
1) Ditched the bulky plastic bowl for the 27oz bento (lasts all day).
2) Replaced single-use sauce packets with a tiny leakproof container.
3) Switched to the insulated tote for commutes — saves me from soggy sandwiches.
4) Kept only two 24oz containers for weekend batch-cooks.
Result: my bag is lighter, fewer dishes to wash, and I actually look forward to packing again. Also — rotate like the article says; I got tired of lentils after week 3 until I swapped meals around. 😊
You convinced me. Step 1 is happening this weekend. Might cry over the loss of my huge Tupperware though 😅
This is exactly the level of detail I needed. Step 2 is especially smart — little leakproof containers = lifesaver.
Fantastic breakdown, Grace. Love the practical sequence — very actionable for readers trying to downsize.
Love the ‘Plan, Pack, and Rotate with Ease’ section. I started a simple spreadsheet with a 2-week rotation and it made grocery shopping way less chaotic.
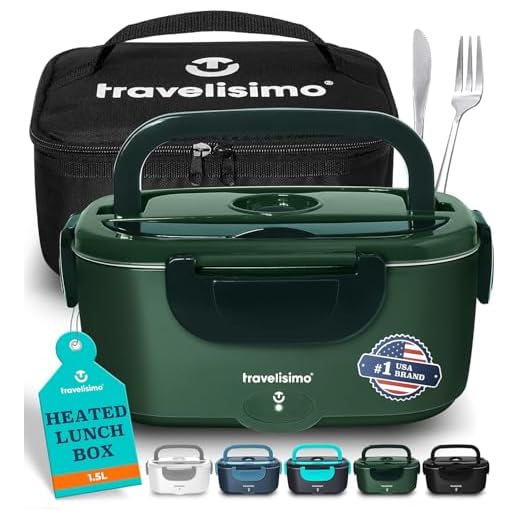
Two things I learned: (1) Pack foods that travel well — roasted veggies > fresh lettuce for durability. (2) The 80W 1.5L Electric Portable Heated Lunch Box is worth mentioning for folks who want hot meals but don’t have access to a microwave. It’s a bit bulky but heats well.
Thanks for sharing the spreadsheet idea — that’s a practical hack. The electric lunch box is definitely a niche product but loved by some commuters.
Does the electric box smell after heating curries? Curious if it’s worth using for spicy food.
It holds smell a bit if you don’t clean it quickly. I use a small container inside to reduce direct contact and it helps.
I use mine for rice and stews — works great, and I keep a folded microfiber towel in the bag for cleanup.
This line made me LOL: ‘Make It Yours and Use It.’ Simple but honest. I tried the 50 Pack 24oz Reusable Meal Prep Containers for meal prep on Sundays — saved me so much time weekday mornings.
However, warning: 50 packs are MASSIVE. Don’t buy them if you don’t actually meal prep. I ended up donating half. 🤦♀️
Great feedback, Priya — the 50-count sets are definitely geared to folks who prep a lot or need bulk storage. Glad you found a use for some and donated the rest — better than cluttering a cupboard!
Adding: consider 16oz for lunches and 24oz for weekend meal storage. That combo seems popular.
Haha same here. Bought a 50 pack on sale and realized I was more of a ‘cook twice a week’ person than a ‘prep 7 meals’ person.
Also — the 24oz size is perfect for big salads or pasta. If you like variety, get both 16oz and 24oz.
Tip: freeze extras or give to friends. I keep a dozen in rotation and the rest in a closet for backup.
Minor nitpick: the article recommends ‘Start Small’ but then lists both 50-pack containers and a 27oz bento — kinda mixed signals. I get the point (start small, then find what works) but maybe reorder examples?
Also, shoutout to the Insulated Reusable Lunch Bag with Shoulder Strap. The strap made commuting easier for me — hands-free ftw.
Agree on the strap. I bike to work and the strap keeps my bag secure. Worth the small extra cost.
Good catch. The intention was to offer both small and bulk options for different readers, but we can clarify the flow. Appreciate the shoulder strap shoutout — it’s underrated.
I’m skeptical of the ‘minimalism’ angle for lunches. I work in construction — can’t exactly carry a delicate bento with me on site.
That said, the Insulated 12-Can 9L Medium Lunch Cooler Tote idea might be useful. Anyone here tested that with heavier gear or hot thermoses?
Good point — minimalism isn’t one-size-fits-all. For active jobs, try a durable insulated tote and heavier-duty containers (stainless steel). The cooler tote should handle a thermos and a bento fine if it’s well-packed.
I work in landscaping and use an insulated lunch bag with shoulder strap — super durable and keeps my soup hot when I need it. Not fancy but it survives the day.
The ‘Keep It Lean: Care and Simplify Over Time’ bit is so true. I started throwing out cracked lids and mismatched sets every month. Feels weirdly therapeutic. Also: the insulated reusable lunch bag with shoulder strap lasted me 3 years — solid purchase.
3 years is great. Which brand was it? I’m looking for a long-lasting one.
Do yourself a favor and replace cracked lids immediately; they harbor smells and bacteria.
I grabbed a mid-range brand from an online retailer — durable fabric and a good zipper. Worth the price.
Love the ritual of decluttering — small steps compound over time. Glad your shoulder-strap bag held up!
I tried going fully minimalist and switched to a single 3-compartment bento + reusable utensils. It’s been easier, but social lunch invites (pizza day 😅) still throw me off. Anyone else have tips for those days?
I just embrace it and eat pizza with a fork from the bento lol. But if you don’t want greasy hands, a napkin + set of foldable utensils helps.
Nice to hear it worked for you. For pizza days, I bring a small disposable or backup container to share, or just enjoy the treat and get back to routine next time.
Wanted to add: ‘Choose Simple Containers and Utensils’ is underrated. I switched to a small bamboo fork and metal straw — simple, light, and no more plastic bite-marks on my lids. Also these utensils are dishwasher-safe and actually look nicer than I expected.
Where did you get yours? I’m on the hunt for a set that fits in a small case.
Nice call on bamboo/metal utensils. They often last longer and feel nicer in use — great for keeping lunches simple.
I bought a little travel set on Amazon — came with a case, fork, spoon, chopsticks and a straw. Under $15.
Short note: the 80W 1.5L Electric Portable Heated Lunch Box is a life-saver for long office days. I can heat my stew and it smells like home. But pro tip — bring a small towel because condensation can pool.
Also, anyone tried using the electric box on long bus rides? Curious about vibration and spills.
I wouldn’t risk it on a bumpy ride. Use it at the office or car, not on public transit imo.
I’ve used mine in a car once (with 12v adapter) and it was fine as long as it’s upright.
Nice tip about condensation. For bus rides, it’s best to keep the unit unplugged and upright — the heating element should be off. Some users use a silicone insert to stabilize containers.
Question: anybody used the Insulated 12-Can 9L Medium Lunch Cooler Tote for commuting with a laptop? Mine is too tight for that but curious if the dimensions work for folks who like to keep tech separate from food.
Most 12-can totes are designed for food and not padded for laptops. If you need both, look for a bag with a separate padded laptop compartment or use a laptop sleeve inside a larger tote.
I used a larger insulated backpack with a laptop sleeve — best of both worlds. The 12-can tote was too small for my 15″.