
Master Your Oven Toaster
You will learn to tame your oven toaster. Small changes change results. You will gain heat control, timing sense, and better crusts. This guide gives clear steps. Read. Try. Master your oven toaster. Apply them and cook with calm confidence.
What You Need

Toaster | Haier I-Master Series 7 — Expand Your Toasting Mastery in 6s
Know Your Machine
You'd be shocked how many ovens lie. Learn its tricks.Read the manual. Learn the modes: Bake, Broil, Toast, Convection. Know what each does.
Test the temp. Use an oven thermometer. Run a tray at 180°C for 10 minutes. Note hot spots. Move slices to find the best place. Mark it.
Check the racks. Use the rack that fits your pan. Remember: top heats more in broil. bottom heats more in bake. Empty the crumb tray. Clean coils when cool. Check the door seal. Replace if loose.
Listen to the fan. If it hums, it works. Check for dampers or angled racks. Know the timer and auto shut. Decide if you trust the timer or your watch.
Try quick tests. Toast a slice for 2 minutes and note the color. Bake a small cake and time it. Test pans: thin pans brown fast, dark pans absorb heat, glass takes more time. Use foil to shield a crust.
Write your results. Keep a log for at least ten cooks.

Control Heat and Time
Seconds and degrees change dinner. Want crisp or soft? You decide.Master heat. Learn numbers and what they do. Start low and slow for even cooks. Use high heat for crust and quick browning. Preheat until stable. Wait ten minutes after the dial clicks.
Use an oven thermometer in the center. Place a rack where the food gets the wanted heat. Track time, not guess. Time per side. Time per rack. Add or cut time in small steps (2–5 minutes).
Note carryover heat after you open the door. Expect food to keep cooking when you pull it out. Use timers for stages. Set a secondary timer for checks. Use foil to slow browning. Remove foil to finish.
Remember that mass matters. Bring cold food toward room temp to cut bake time. Measure with a probe for meats and bread. Learn target temperatures. Rest meats to lock juices. Let bread cool to set the crumb.
Keep a simple quick-reference list near the oven:
Keep the table on your phone or a card near the oven. Check it twice when you try a new recipe.

Pick Racks and Pans Like a Pro
One rack can ruin a roast. Small moves, big wins.Place food on the middle rack for even bake.
Use the top rack for fast browning.
Use the bottom rack for strong base heat.
Choose heavy pans to hold steady heat.
Choose thin pans to crisp fast.
Use dark pans to speed browning.
Use glass to hold heat and slow the bake.
Preheat stone and set it for crisp bases.
Avoid crowding the oven.
Leave space so air can move.
Rotate pans halfway.
Swap front to back.
Turn trays for even color.
Line pans to cut clean time.
Lift food on a wire rack for toast.
Place casseroles on a sheet to catch drips.
Broil with close watch.
Move food up for char and down to avoid burn.
Adjust time for pan depth: thin sheet = fast; deep dish = more time.
Test one pan and rack.
Repeat until you know the pair.
Use a probe through the vent for roasts.

Use the Right Cooking Mode
Broil, bake, roast—each has a job. Stop mixing them up.Use the right mode for the job.
Toast thin slices for quick crisp.
Broil to brown fast from above.
Bake for even heat around food.
Roast for big cuts.
Reheat slowly to keep moisture.
Set toast low at first. Flip often. Example: toast a bagel at low heat and flip at color change.
Keep the door ajar when broiling if your model calls for it. Watch time and stand close.
Preheat the oven with racks where you will cook. Start cakes in the center.
Use a foil tent to slow browning on the top.
Brown roasts at high heat, then lower to finish. Use a probe and pull at temperature, not time. Rest meat under a loose foil tent.
Toss vegetables with oil. Spread in a single layer. Turn once.
Add a few minutes and cut heat slightly for frozen food.
Cover food to reheat to keep steam. Use a pan with a splash of water for rice.
Crisp skins by finishing under the broiler.
Clean spills once cool. Train your eye. Trust tests.

Care, Safety, and Smart Upgrades
A clean oven cooks better. A small fix saves big worry.Clean your oven after use.
Remove crumbs from the tray.
Empty the drip pan.
Wipe spills when cool with warm water and mild soap.
Use a baking soda paste for stuck grease.
Let the paste sit 30 minutes.
Scrape with a plastic or silicone tool.
Do not use steel wool on coatings.
Check seals and hinges.
Replace worn gaskets.
Test the latch and inspect the door glass for cracks.
Inspect the cord.
Replace frayed cords.
Keep the area clear of paper and cloth.
Ventilate when you cook strong smells.
Do not block vents.
Turn the oven off and cool it if smoke pours out.
Keep a fire extinguisher near the kitchen.
Order the right part for broken pieces.
Fit it yourself if you know how.
Call service if unsure.
Upgrade with a probe thermometer for meat.
Buy a sheet pan that fits your oven.
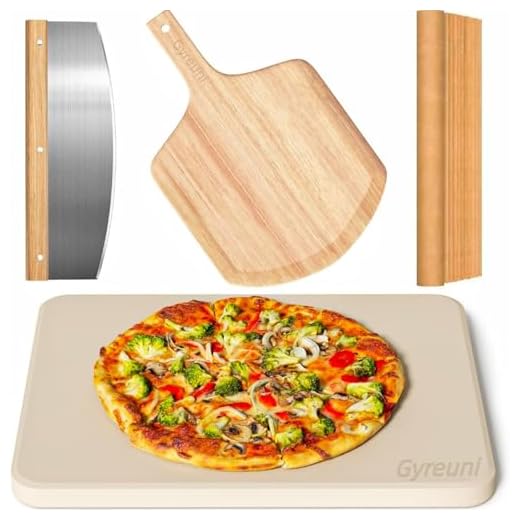
Try a pizza stone for crisp crust.
Add a higher rack to raise food.
Fit a bright oven light.
Keep notes of changes and dates.
Always.
Start, Test, Master
Start small. Test once. Note the result. Adjust in tiny steps. Keep clear notes. Repeat until you know your oven. Make rules. Cook with care. Mastery grows from habit. Try this now and share your results with us today please.


I’m amused by people treating toaster ovens like tiny professional kitchens. 😂
But seriously, the controls/time section fixed my burnt garlic problem — I was not respecting that small space cooks faster. Lower temp + watch closely = much better.
Garlic burns in 30 seconds under broil, lesson learned the hard way. Thanks for the reminder!
Ha — tiny kitchens, big results. Glad the time/heat advice helped. Small spaces really amplify heat effects.
Random tip: line the crumb tray with a bit of foil but don’t cover vents. Makes cleaning easy. Also, if you want better searing, preheat a cast iron pan inside the toaster for a few minutes before adding steaks. Results = chef-level. Not sponsored 😂
Nice hack, Claire. Just remind readers to avoid covering air vents — safety first. Preheating cast iron can really up the sear game in a small oven.
Oh wow, cast iron in a toaster oven — never tried that. Does it smoke a lot?
A little smoke sometimes if you’re at high temps, but a quick vent and you’re fine. Use a bit of high-smoke-point oil.
Great guide — the ‘Know Your Machine’ bit was a revelation for me. I always assumed my toaster oven behaved like a regular oven. Quick question: my model only has ‘Bake’ and ‘Toast’ settings. Should I just use Bake for everything and adjust time/temperature, or does Toast actually change the heat distribution?
Also check your manual — sometimes ‘Toast’ will automatically flip the element intensity. If unsure, do a test with bread to see the difference.
Good question, Sarah. In many toaster ovens, ‘Toast’ uses high top heat and a shorter cycle, while ‘Bake’ uses more balanced heat. If your model lacks convection, using Bake and watching time/temperature is a safe bet for most things. For crisping the top, try switching to Toast near the end.
I have the same setup — I usually bake, then hit toast for the last 2–3 minutes to get a golden top. Works every time!
Humorous rant incoming: why is it so satisfying to hear the little beeps at the end of a bake? Is that just me? 😅
Anyway, the guide made me less scared of experimenting with modes. I tried convection roast for veggies and they caramelized perfectly — no drama.
I mute my oven and use my phone alarm. Problem solved. 🙂
Haha phone alarms FTW. My partner always misses the oven beep so now we both get notified.
Beep = win. Also, invest in a timer app if your oven beeps are too quiet.
You’re not alone — I think the beeps are small victories. Glad the convection roast worked out for you!
I like the care and safety section but I feel like it could use more specifics about cleaning crumb trays and where to store the unit.
Like, can I leave mine on the counter with the plug in 24/7? Is it bad to store heavy pans on top of it? Also, the electrical outlet question: should I be worried about dedicated circuits?
I leave mine out but unplug overnight. Never had issues. Also, putting a silicone trivet under it protects counters from heat.
If you’re in an apartment with old wiring, watch for sparks or frequent tripping — that’s a red flag to get an electrician.
Good points, John. Best practice: unplug when not in use and don’t store heavy items on top (it can damage controls). Crumb trays should be emptied after each session to avoid fire risk. Regarding circuits, most toaster ovens are fine on standard kitchen circuits, but high-draw models used simultaneously with other heavy appliances can trip breakers — a dedicated circuit helps if you have frequent heavy use.
Loved the ‘Pick Racks and Pans Like a Pro’ section. Quick tip: if your oven is small, consider half-sheet pans so you can fit multiple items without overcrowding. Saves time when meal prepping.
I like heavier aluminum pans — more expensive but hold shape. Avoid thin cheap steel ones.
Excellent tip, Olivia. Half-sheet pans are perfect for compact ovens and help with airflow for even cooking.
What’s your go-to pan brand? Mine warps after a few uses and it drives me crazy.
Short but sweet: the heat probe suggestion was a lifesaver. I used to guess temps and undercook meat. Bought one for $15 and now my chicken isn’t rubbery anymore. Thanks!
Awesome, Maria — probe thermometers are one of the simplest upgrades with the biggest impact. Glad it helped!
Same here. If your oven has a port, you can leave the probe in while baking — makes things so much easier.
I appreciate the safety tips. One tiny nitpick: the cleaning section should warn more about using steel wool on reflective interiors — I ruined a perfectly good reflector once. Maybe add recommended cleaning tools (soft cloth, baking soda paste).
Great point, Ben. We’ll add that — avoid abrasive pads on reflective or non-stick surfaces. Soft cloths, mild soap, and baking soda for stubborn spots is the way to go.
I use a toothbrush for corners — surprisingly effective.
Also avoid bleach on stainless inside — it can discolor. Gentle cleaners only.
Neutral note: some of the upgrade suggestions felt a bit pricey for a toaster oven hobbyist like me. A cheaper ‘starter kit’ list (probe, silicone mat, cheap convection tray) would be a nice alternative.
Solid feedback, Chris. We can add a budget-friendly starter list for readers who want big wins without big spend.
Yes — probe + silicone mat is all I needed. Skip the expensive gadgets at first.
I built my starter kit for under $30 and it made a huge difference.
I tried the ‘start, test, master’ method and it’s sooo practical. Did three test runs with cookies at different racks and temps, and now I have a cheat sheet stuck on the fridge. Highly recommend for anyone who hates guessing. 🙂
Sure — middle rack, 325°F for 9 mins, then move up and +2 mins broil. That worked for my sheet; adjust slightly for different doughs.
Ooo can you share your cookie settings? I’m always battling uneven browning.
Yes! A fridge cheat sheet is a pro move. Small tests save a lot of wasted food and frustration.
Question: for frozen convenience foods, do you preheat the toaster oven or just pop them in? The manual sometimes conflicts with the food packaging instructions and I get mixed results.
When in doubt, preheat. Toaster ovens are small and heat up fast, but preheating ensures even cooking. If the package suggests a preheated oven, follow that; otherwise try preheating and monitor the first time to adjust.
I follow the package but drop the temp by 25°F and add a couple minutes — works great in my toaster oven.
I don’t preheat for fries; just toss them in and add a few minutes. For things like frozen pizza, preheat for best crust.
Constructive: the section on ‘Use the Right Cooking Mode’ is helpful but the jargon (convection, broil, bake) could use a 1-line cheat sheet table for quick reference. I’m lazy, but I wanna know at a glance when to use broil vs convection.
Good suggestion, Raj. A quick-reference table would be handy — maybe we’ll add a printable cheat sheet in an update. In short: broil = top heat, quick browning; convection = fan-forced, even/fast baking; bake = steady even heat without fan.
Totally agree, a visual would help. I usually use convection for roasted veggies and broil for finishing.
I gotta say, the humor throughout the guide made the technical parts easier to swallow. One request: could you add a short troubleshooting checklist (e.g., ‘uneven browning -> rotate pan, drop temp 15°F, try convection’)? Would save time scrolling.
Yes please. I’d follow a ‘if X then Y’ list religiously.
Thanks — love that idea. A quick troubleshooting flowchart or checklist would be a handy addition for quick reference.
This guide is practical but also kinda addictive. I found myself making small experiments (temp tweaks, rack positions) like a mad scientist. 😂
Tip for folks: keep a sticky note pad and jot down one variable per test so you actually remember what you changed. Otherwise you’ll be second-guessing forever.
Agreed — I have a little logbook now. Helps replicate successes.
Love the scientist approach. Documenting tests is underrated — it speeds up learning immensely.
Okay, I tried the rack/pan advice and wow — mind blown.
I always used the middle rack because ‘middle is safe,’ but moving things up when I want browning and down for slow cooking actually changed everything.
The guide’s suggestion to use dark pans for faster browning was spot on.
Also, FYI: placing a pizza stone in my toaster oven made the crust crispier than my regular oven (wild!).
Thanks for the tips, gonna keep testing.
Love hearing that, Tom. Pizza stones can be game changers in toaster ovens — just be cautious with thermal shock if washing them. Glad the rack tips helped!
Yeah I preheat the stone 10–12 minutes. And I use a thin layer of oil on the stone for pizza — keeps it from sticking w/out heavy cleanup.
Have you tried preheating the stone first? It makes a huge difference. Also, stone + convection = next level.
I didn’t know dark pans brown faster — saved this tip. Do you recommend foil under stuff to make cleanup easier?