
Bake Better Bread at Home
You can bake great bread in your machine. This guide strips noise and shows clear steps. Use simple tricks and steady methods. Measure, watch, and tweak. Get warm loaves with crisp crust and soft crumb. No extra fluff. Just bread.
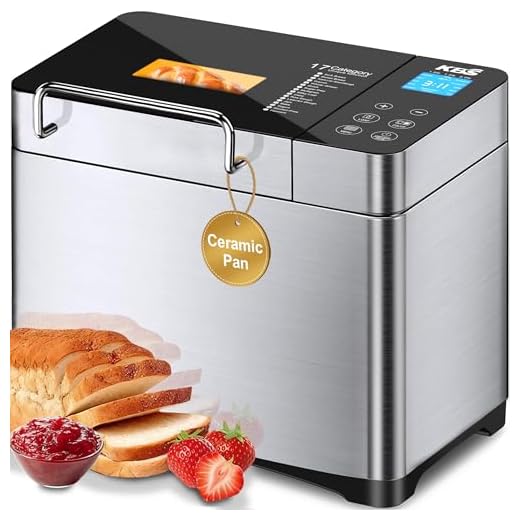
What You'll Need

Ultimate Beginner Bread Machine Recipe: Easy, Foolproof Homemade Bread for Your Bread Maker
Choose the Right Machine and Loaf Size
Not all machines bake the same. Want a loaf that looks and tastes like you expect?Pick a machine that fits your goals. Match the size and features to how you bake.
Buy for how you bake, not for ads.

Pick a Simple, Solid Recipe
One good recipe beats ten weak ones. Which ingredients truly move the needle?Start with a basic loaf. Use bread or strong flour for firm gluten and a good rise. Use instant yeast for steady results.
Keep salt and yeast apart when you add the pan. Use cold water in warm kitchens to slow the rise.
Weigh ingredients. Avoid guessing with cups. Master the base before you swap flours or add seeds.
Place yeast on top of the dry mix. Measure once. Bake the same recipe three times to learn your machine.

Measure and Add Ingredients Precisely
A gram shifts the crumb. Want predictability? Measure, don’t guess.Weigh ingredients on a scale.
Add liquids first if your manual says so.
Add dry ingredients on top.
Make a small well for the yeast if required.
Keep salt away from yeast at the start.
Favor precision.
Expect humidity and flour type to change the mix.
Example: on very humid days drop flour by 5–10 g.
Example: on dry days add 5–10 g water or a teaspoon.
Record what you did.

Select the Right Program and Settings
Your machine has moods. Use the program that fits your dough, not the fastest one.Choose the bread type and crust you want. Pick “Basic,” “Whole Wheat,” or “Dough” to match the mix.
Use the whole wheat or dough cycle for denser mixes. Example: select the whole wheat cycle for a 100% whole-grain loaf.
Avoid delay timers with fresh yeast. Do not let fresh yeast sit in liquid for hours.
Set the crust color to light, medium, or dark. For a crisper crust, use a darker setting. Example: choose dark for a bakery-style top.
Check the manual for knead times and paddle speed. Set the machine, then watch the first run closely to catch sticky dough or poor rise.

Watch the Dough and Make Small Fixes
Dough speaks. Will you listen? A small tweak saves a loaf.Open the lid during knead if the dough looks wrong. Aim for a soft, smooth ball that clears the pan.
Test the dough with a finger or use the windowpane test. Stretch a bit. Stop when it thins without tearing.
Add a tablespoon of water or flour at a time. Fix one tablespoon, then knead two minutes and check.
Adjust by rule:
Watch how the dough behaves. Note exact tweaks and timing. Use those notes for your next bake.
Finish, Cool, and Store for Best Texture
The last act makes the loaf sing. Don’t slice too soon.Remove the pan as soon as baking ends.
Ease the loaf out and set it on a wire rack so air moves under and cools it evenly.
Let the crumb set for at least 20 minutes before you slice; slicing hot bread crushes the crumb.
Warm slices in a hot skillet for 30–60 seconds per side to revive crust and scent.
Practice cutting a test slice at 25 minutes to learn your machine’s rhythm and to know when the crumb feels right.

You Can Do This
Follow simple rules. Learn one loaf. Repeat. Tweak. You will get bread you love. Try your first loaf now. Share photos and notes. Ask questions. Join the baking. Start today. Make it yours. Share and celebrate.


Good guide but would love a section on troubleshooting gluten-free mixes. I tried the same program twice and the loaf was crumbly both times. Any tips for adapting steps 2-5 for gf flours?
I’ve had success switching to a power knead (if your machine has that) and adding an extra egg for structure. Also don’t skimp on hydration.
Thanks Marcus — that’s a great suggestion. For gluten-free, you often need more binding agents (like xanthan gum or psyllium) and sometimes a longer knead or rest. We’ll consider adding a GF troubleshooting sidebar.
Tried this last weekend — not perfect but waaaay better than my first attempts. A few notes: my machine’s paddle kept leaving a hole in the bottom (anyone else?), and I accidentally put 1 extra tsp of salt (😬) but it was still tasty.
Also — love the “You Can Do This” pep talk at the end. Made me feel less like I was sabotaging dinner.
Paddle hole is common — try removing the paddle after the first rise if your machine allows it, or coat it lightly with oil to reduce sticking. Glad the guide helped!
I remove mine mid-cycle too. Works well but make sure you do it when the machine isn’t kneading hard — safety first.
Extra salt happens to the best of us 😂 But honestly sometimes a little extra gives it a nice flavor boost. Just not too much next time!
Love this guide — super clear! I switched from using a super-old machine to a newer one last month and following steps 1 and 3 actually made a huge difference.
A couple of practical tips from me:
– Weigh the flour if you can (cups lie).
– Add water a little at a time if your dough looks dry during the first knead.
– Let the loaf cool fully before slicing (I learned the hard way 😅).
Thanks for making baking less intimidating!
Question: how long do you usually let it cool? I feel like 30 minutes isn’t enough for bigger loaves.
Totally agree on the cooling part. I once cut into mine and it turned into a gummy mess. Patience is a virtue (and hard to practice with fresh bread haha).
Great tips, Laura — especially about weighing flour. We added a note about that in the recipe section for clarity. Thanks for sharing your experience!
Nice step-by-step layout. A couple of extra thoughts:
1) If your machine has a delayed start, only use it if ingredients are super fresh and it’s cool in the kitchen — otherwise the yeast can wake up too early.
2) For storage (step 6), I usually slice and freeze half the loaf; toasting straight from the freezer works great.
3) Typos: found a small misspelling in step 3 (‘teaspon’ -> ‘teaspoon’). Not a big deal but I thought you’d want to know.
Overall — helpful & encouraging. You can do this indeed!
Agreed on labeling. I write the date and type of loaf on a piece of tape. So helpful when you bake a lot.
Appreciate the feedback and the typo report — keep them coming!
Freezing slices is a lifesaver. Also label them with dates — my ‘mystery loaf’ revenge still haunts me 😂
Thanks for the catch, Olivia — fixed the typo. Great tips on delayed start and freezing. We’ll add a frozen-slicing note to step 6.
Delayed start + hot kitchen = sad yeast. Learned that the hard way once when my dough overflowed… not pretty.
This was my first time using a bread machine and your step-by-step made it actually doable.
I picked a simple white recipe from step 2, measured everything like step 3 said, and watched the dough like step 5 suggested.
It rose better than I expected!
Only thing — my crust came out too dark. I used the ‘light’ setting but maybe my machine runs hot.
Any thoughts on adjusting baking time or program for a lighter crust?
Congrats on your first machine loaf, Priya! If the crust is too dark, try reducing the crust setting (many machines have light/med/dark) or start with the dark setting but stop 5–10 minutes early. You can also tent the loaf with foil right after baking to prevent further browning.
I had the same issue — lowering the oven temp isn’t an option on my machine, but selecting ‘light’ and then immediately removing the loaf and letting it rest in the pan for 5 min helped.
Another trick: brush a little milk or butter on top before the last few minutes of baking if you want a softer, less dark crust.
Also check where you place the machine. Direct sunlight or a warm spot can make the interior hotter and affect crust color.
I read step 5 and laughed because I swear my dough has a mind of its own. 🤦♂️
Sometimes it sticks to the paddle, sometimes it looks perfect, sometimes it’s like ‘nope’ and refuses to rise.
Anyone else feel like they’re conducting an orchestra with no musical training?
Haha yes. I started jotting down the room temp and the brand of yeast. After a month I could predict which days would be drama-free.
You’re not alone, Ethan! Dough can be finicky — small adjustments in flour type, humidity, and yeast freshness will change behavior. Keep notes (dates, brand, humidity) and patterns will emerge.