
Meet Your Electric Utensils: A Clear Start
You will meet a new kind of tool. They are small and powered. They stir, heat, mix, and cut with little effort. This short guide shows what they do. It will help you pick the right one.
You will learn the main types. You will see what each handles best. You will get tips to use them safely. You will learn care steps to make them last.
By the end, you will feel ready. You will save time. You will cook with more ease.
This guide is brief, clear, and built for you.


Meet Your New Favorite Kitchen Gadget: Nonstick Electric Griddle Crepe Maker
What Electric Utensils Are and How They Work
The short fact
Electric utensils are hand tools with motors, heaters, or battery packs. They trade elbow work for steady power. Some heat. Some spin. Some vibrate. You plug them in, charge them, or feed them USB power. You press a switch. The tool does the heavy bit.
Inside the case
You will find a few simple parts. Each part has one job.
These parts explain why one tool chops and another melts. A strong motor and metal blades cut dense food. A low-heat element and thin plate warm without burning.
Power types and what they mean
You must match power to the task.
How they work in practice
You put an input in. The motor spins. The heater glows. A blade reduces, a whisk aerates, a coil heats. Real-life: you blend a pot of tomato soup with an immersion blender. The motor hums. Lumps vanish. You saved a bowl and a mess. In another case, a small rotary grinder smooths nuts into butter in minutes. Look at RPM and wattage on the label. Higher numbers usually mean faster or stronger.
Safety basics you must follow
Follow these simple rules.
Check labels for IP ratings, wattage, and recommended duty cycle. That tells you what the tool can do day after day.
Common Types and What Each Does Best
Heated spoons and forks
These heat small bites fast. You press them to warm soup, melts, or soft cheese. They shine at quick fixes. They do not replace a stove or oven.
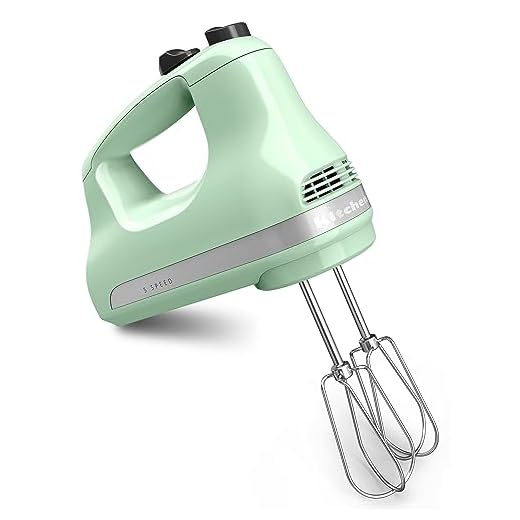
Electric stirrers and whisks
They cut time and sweat. They whip cream, blend dressings, and keep sauces smooth. You hold the handle. The motor does the mixing.
Choppers and mini blenders
They save you from the knife and the big blender. They chop nuts, mince garlic, and make single-serve smoothies. Small cups. Big help.
Heated knives
They slice with less drag. The blade warms and cuts through bread, butter, and some cheeses cleanly. They make neat work of dense loaves and cold cuts.
Battery-powered utensils
These give you freedom. They work in the field, at a picnic, and on a boat. They trade raw power for mobility.
You now know which tools solve which small woes. Next, you’ll learn how to match one to your kitchen and habits.
How to Choose the Right Electric Utensil for You
You decide with rules. Clear rules. Start with the work you do. Match the tool to the task.
Start with the job
List what you do each week. Make smoothies? Puree soups? Whip cream for guests? If you use it daily, pick a tool built for heavy use. If it’s for once-a-month jobs, choose something simple and cheap. A hand blender is great for soups. A chopper wins for quick salsa.
Check power, runtime, and charge speed
Corded tools give steady power. Batteries give freedom. Look at wattage for corded tools. Look at runtime and charge time for battery tools. If you blend every morning, a corded unit or a fast-charge battery is smarter. If you travel, check how many minutes it runs on a single charge.
Feel the weight and grip
Pick it up in a store if you can. It must sit right in your hand. Heavy tools tire you fast. Light tools can feel cheap. Look for rubber or molded grips. Note where buttons sit. Can you reach them while working?
Look at controls and heat
Does it have speed settings you will use? Do you need variable speed or just on/off? For heated utensils, check how precise the temp control is. Simple dials often last longer than touch pads.
Read labels for materials and dishwasher advice
Stainless steel and BPA-free plastics last. Check if blades and jars are dishwasher-safe. Some motors can’t see water. If you hate hand-washing, buy dishwasher parts.
Compare build quality, warranty, and spare parts
Read warranties. Look for replaceable blades, seals, and bowls. Check if the brand sells spare parts. A $50 model with no parts may cost more in the long run than a $120 model with service.
Step-by-step checklist
Next, you’ll learn how to use, care for, and keep these tools safe.
Use, Care, and Safety: Make Them Last and Keep You Safe
You must use them right. Read the short manual first. A good start saves time and money. The tips below give clear do’s and don’ts. They are short. They are useful.
Read the manual and set up right
Read the safety page. Learn where the motor vents live. Note what parts go in the dishwasher. Follow the charge routine the maker gives. If a tool ships with a safety lock, use it.
Cleaning and food safety
Detach parts that touch food. Rinse crumbs first. Soak oily jars in hot water. Use a brush for crevices. Never sink the motor or base. Wipe the base with a damp cloth. Unplug before you clean or change blades.

Power, batteries, and charging
Keep water away from charging ports. Charge only with the supplied cable or approved charger. If a battery runs hot, stop charging and call support. For long storage, leave batteries at about 40–60% charge. That holds their life.
Heat points and hot metal
Motors get hot. Give them rest between long runs. Watch metal parts after a heat job. Let the unit cool on a heat-proof pad. Use oven mitts on hot jars. Do not pour hot liquid into a cold glass jar — it can crack.
Replace worn parts and spot smells
Check seals, gaskets, and blade mounts every few months. Replace cracked seals. If you smell burning or plastic, stop and unplug at once. A faint motor smell after long use can clear. A sharp chemical or burning smell means trouble. Do not ignore it.
Quick fixes for common faults
Store blades safe and dry. Use blade covers or wrap them in a clean cloth. Label spare parts. A little care keeps your tools running and your kitchen calm.
Practical Uses, Recipes, and Clever Hacks
Small tasks that pay off
You will put them to work. Use a heated spoon to soften butter and spread it cleanly. Run a mini whisk through vinaigrette to make it smooth in ten seconds. Pulse a chopper for a quick salsa or pesto. A heated fork keeps a plate warm for service. Battery tools go to the beach, the park, or a slow hotel room breakfast.
Try this quick step: heat the spoon for 10–15 seconds. Test on your wrist. Butter the bread while it melts. Simple. Fast. Neat.
Quick recipes you can make now
Hacks that save time
Batch prep. Chop herbs and nuts, then freeze in ice-cube trays. Reheat in short pulses rather than long runs. Swap heads when you can; a whisk head makes a blender do dressings. Use brief bursts to avoid heat build-up and to keep texture.
Use a non-slip mat under jars to steady the tool. Keep a damp cloth nearby to wipe blades fast. Label frozen cubes with dates. These small moves cut minutes every week.
For travel and for hands that tire
Choose battery-powered tools with simple buttons. Bring a small power bank for long trips. At a picnic, a cordless chopper makes guac in minutes. A heated spoon will melt cheese on a scone at the table.
If your hands tire, look for one-button action, larger switches, and long grips. Add a rubber sleeve to the handle. Anchor a bowl with a damp towel. Use a tool with a stay-cool base. These changes let you do more with less strain.
Use these ideas today. Read the next brief section for the final tips.
Start Small. Use Smart.
You now know what electric utensils do. Pick one tool that fits a real need. Match it to a task you do often. Buy one you can handle and store. Read the manual. Use it with care. Keep barriers to safety. Clean it after use. Dry it well. Store it where it is safe and easy to reach.
Small tools save time and ease strain. Learn the controls. Try simple recipes and fast fixes. Build skills step by step. Keep it simple. Start with one. Use it well. Let it earn its place in your kitchen.


Start small they said. Use smart they said. I now own three hand mixers, two blenders, and a frother stand that judges me. lol
Seriously though — the article’s advice to match tool to task is solid. Don’t buy a countertop blender if you only ever froth milk and whip eggs. Save the counter real estate for snacks.
Haha — relatable, Oliver. Appliance creep is real. The ‘Start Small’ piece aims to prevent exactly that: buy for the tasks you actually do, not for aspirations.
Appliance judgment is the only kind of silent critique I accept 😂 Also, invest in a tiny hook for the frother and stop shame-loading your counter.
This article nailed the “Practical Uses, Recipes, and Clever Hacks” section. A few hacks from my side:
– Use the KitchenAid Variable Speed Corded Hand Blender to make single-serve pancake batter right in the cup — less washing.
– The Hamilton Beach 6-Speed is amazing for whipping cream in under a minute.
– For smoothies, the BLACK+DECKER glass jar gets colder faster and keeps flavors truer than plastic imo.
Also, if you’re short on space start with a Zulay frother and a small hand mixer and upgrade later. Start small, use smart for sure!
Love these practical hacks, Ava — thanks for sharing. The single-serve pancake batter trick is going into the article’s recipe box.
Quick note: if you use the hand blender for hot soups, pulse gently to avoid splatter. Learned that with a very angry tomato soup once 😂
Agree on glass vs plastic — glass doesn’t retain odors. But it’s heavier, so if you’re moving stuff around a lot, keep that in mind.
Great safety reminder, Grace. We’ll add a line about pulsing vs continuous blending for hot liquids under the ‘How they work’ section.
Ooh pancake in the cup tip is genius. Also, for whipped cream — chill the bowl and beaters for 10 minutes in the freezer first. Works like a charm.
Loved the “Start Small. Use Smart.” bit — totally me. I bought a Hamilton Beach 6-Speed Electric Hand Mixer last month after reading something similar and it’s been a game changer for weekday baking.
Pros: light, easy to store, quick clean-up.
Cons: not as heavy-duty as the KitchenAid 5-Speed Ultra Power Hand Mixer if you’re doing big batches.
If you bake once a week, Hamilton Beach is perfect. If you’re the muffin-for-a-weekend type, consider stepping up.
Thanks Maya — glad that section resonated. Great tip about frequency of use guiding the choice. Do you find the Hamilton Beach handles stiff batters well?
I agree with Maya. I have the Hamilton and for 2-3 loaves or a couple dozen cookies it’s fine. Tried a heavy pound cake once and it struggled a bit — switched to a KitchenAid for dense mixes.
Appreciate the extra context, Liam. I’ll add a short note in the article about which models handle dense batters better.
So, honest question — why are there two KitchenAid Variable Speed Corded Hand Blender listings (one Onyx) in the article? Are they the same thing with different colors or slightly different specs?
I was eyeing the Onyx because it looks slick, but I’m wondering if corded blenders are still worth it vs cordless options from other brands. Cord length, power, and longevity matter to me because I hate buying appliances that die after a season.
Also, are there specific maintenance tips to make the motor last longer? I don’t want to toss money into a flashy name if the internals are meh.
Thanks Marcus and Grace — I’ll clarify the corded/cordless trade-offs in the ‘How to Choose’ section so readers can match features to use-cases.
Good catch, Ethan — the Onyx is the color variant of the KitchenAid Variable Speed Corded Hand Blender, same specs but marketed separately. Corded tends to give steadier power for things like emulsifying and blending hot soups for longer periods.
Maintenance tip: avoid running the motor continuously for very long stretches, wipe the housing clean (never submerge), and let it rest between heavy cycles.
I have the non-Onyx KitchenAid and it’s been fine for 3 years with weekly use. I agree with the admin — let it cool between long runs. And keep the blade area free of gunky food; a quick rinse after each use helps.
Corded = more power for less money, usually. If you’re blending smoothies all day maybe cordless is nice, but for soups/sauces I prefer corded. Also cheaper to repair in my experience.
Quick safety/cleaning question that I couldn’t fully find in the ‘Use, Care, and Safety’ section: the BLACK+DECKER 10-Speed Countertop Blender with Glass Jar — can I put the glass jar in the dishwasher? The manual is vague about top rack vs bottom rack, and I’m paranoid about thermal shock. Also, are the blades removable for deeper cleaning, or do you just tip and rinse?
I do a lot of green smoothies and sometimes freeze fruit, so I want to avoid cracks or hidden mold in seals. Any hacks for cleaning the gasket/seal area?
Thanks Ava — vinegar soak is a great natural trick. I’ll add a short ‘deep-clean’ subsection to the article with these steps.
Good question, Noah. Most glass jars are dishwasher-safe on the top rack, but with frequent hot-to-cold transitions (like freezing), hand-washing reduces stress on the glass. The BLACK+DECKER model usually has removable blades — twist-and-lift — but check the model number to be sure.
For gaskets: soak in warm soapy water and use a small brush (an old toothbrush works) to clean the rim. Let all parts air-dry completely before reassembly to prevent mold.
I hand-wash the jar but put the blade assembly in the dishwasher. For the gasket: I squeeze a 50/50 vinegar-water mix into the rim, let it sit 10 minutes, then brush and rinse. No mold so far.
Okay but can we talk about the Zulay frother? 😍 I bought the Zulay Powerful Milk Frother Wand with Stand after seeing the article and my lattes at home are 10/10 now. Cheap, tiny, and dramatic foam. Also — I accidentally used it in a big pot once and now it has a scar lol. Still works tho.
Haha the scar thing is real — I dented my frother stand trying to fit it into a jam-packed cupboard. Pro tip: keep it on the counter, not the Tetris shelf.
So happy it worked out, Sofia. We tried to include a few inexpensive items like the Zulay for readers who want a coffee-shop feel without the machine.