
Unleash Your Inner Baker
Baking bread at home brings joy. You mix, knead, and watch your dough rise. With these six secrets, you can create delicious loaves easily. Imagine the warm smell of fresh bread filling your kitchen. Are you ready to impress your taste buds? Let’s get started!
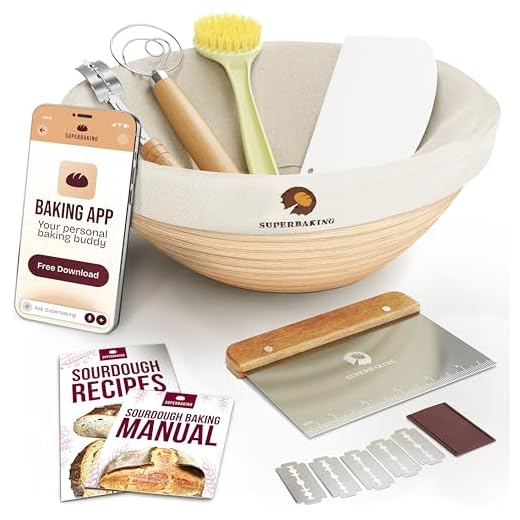
What You Need to Get Started
Master the Art of Baking: Create Irresistible Homemade Bread!
Master the Basics of Bread Dough
Every Great Bread Starts with a Solid FoundationGather your ingredients. Flour, water, yeast, and salt are essential. Use high-quality flour for the best texture. Combine 3 parts flour to 1 part water. Add 1 teaspoon of salt for flavor. Finally, sprinkle in your yeast.
Mix them well. Create a soft, shaggy dough. Remember, each ingredient plays its role. Flour gives structure. Water hydrates. Yeast adds lift. Salt controls fermentation.
Once you have your mix, let your senses guide you. Feel the dough. Is it too sticky? Add a touch more flour. This is your foundation. Master these basics, and you’ll have great bread.

Knead Like a Pro
Get Your Hands Dirty for the Best ResultsKnead your dough with purpose. Use your hands or a stand mixer. Push, fold, and turn the dough. This develops gluten. Gluten gives bread its strength.
Don’t fear the mess! Flour your surface. Roll up your sleeves. Kneading is a workout. You will feel the dough transform under your palms. It should be smooth and elastic.
Aim for 10 minutes. If using a mixer, let it run for about 5 minutes on medium speed. Test it: poke it lightly. If it springs back, you’re on the right track. Trust your instincts. Your effort will pay off.

Let It Rise – Patience is Key
Don’t Rush the Process; Good Things Come to Those Who WaitAllow your dough to rise in a warm place. This moment is crucial. Cover it with a damp cloth to trap warmth. The yeast needs time to work its magic.
Wait for the dough to double in size. This usually takes 1 to 2 hours. Take a walk. Read a book. Enjoy the aroma of your kitchen.
Observe how it expands. This is fermentation at work. It enhances flavor and texture. Trust the process. Great bread takes time. The best bakers know that patience rewards them with perfection. Enjoy the wait; it’s part of the journey.

Shape Your Dough with Confidence
Transform That Dough into a Work of ArtShape your dough with care. This step defines your loaf’s look and feel. Pre-shape the dough into a loose ball. Let it rest for 15 minutes. This relaxes the gluten. Then, decide on your final shape.
For a round loaf, pull the edges into the center. Flip it over, and tighten the surface by cupping it with your hands. For a batard, shape it into an oval and taper the ends.
Play with shapes! Each one has its charm. Use a bench scraper for precision. Enjoy this creative phase. You’re crafting a beautiful loaf. Your confidence shines here!

The Perfect Bake – Timing is Everything
Achieve a Golden Crust That’s Hard to ResistPreheat your oven to 450°F (230°C). Add a shallow pan at the bottom to create steam. This steam gives you a crust that sings. It traps moisture and ensures a beautiful rise.
Place your shaped dough on a parchment-lined baking sheet. Score the top with a sharp knife for style and to control the rise.
Bake until golden brown, about 25 to 30 minutes. Trust your senses. The aroma will fill your home. Tap the bottom of the loaf; it should sound hollow. That’s your cue. It’s the moment of truth. Enjoy the anticipation!

Cool and Enjoy Your Masterpiece
The Final Touch – Patience Pays Off AgainLet your bread cool. This step is crucial for texture. Place the loaf on a wire rack. Allow air to circulate around it. If you slice too soon, you’ll ruin the loaf. The steam inside needs to escape for the perfect crumb.
Wait for at least 30 minutes. You’ll feel the anticipation build. Once cooled, slice into your creation. The crust should crackle. The inside will be soft and warm.
Savor each bite. Share with friends or keep it all to yourself! You earned this moment. Enjoy the fruits of your labor.

You Did It!
Congratulations! You’ve unlocked the secrets to baking bread. Now it’s time to experiment. Each loaf will teach you something new. Don’t be shy—share your results with friends and family. Get creative in the kitchen. Your next masterpiece awaits. Happy baking!


I love this guide! The timing tips were super helpful. I usually overbake and it comes out dry. But this time it was perfect! 🍞✨
That’s fantastic, Megan! Timing can be tricky, but it sounds like you’ve got it down! What type of bread did you make?
Congrats! I feel like I’m getting better with each loaf, too!
I tried the ‘let it rise’ section, and my dough literally exploded! 😂 Is that normal or did I mess something up?
Haha, it sounds like you had a lively dough! Sometimes, if the yeast is too active or the temperature is too warm, it can rise too much. Just keep an eye on it next time!
I think that happened to me once! It’s better than flat dough though, right? 😂
@Emily R. True! At least it didn’t taste bad! Just a bit messy.
I’m still confused about the kneading thing. How do I know when it’s kneaded enough?
Good question, Anna! The dough should be smooth and elastic when it’s ready. You can also do the ‘windowpane test’.
I just knead until my arms are sore! 😂 But the windowpane test is a good tip!
This guide rocks! I never thought I’d be able to bake bread, but here I am, pulling my first loaf out of the oven! 🎉
That’s amazing, Brian! What kind of bread did you make?
Congrats! That feeling of pulling out a fresh loaf is unbeatable!
So, I attempted the shaping part, and let’s just say… it looked like a pancake. 😂 Any suggestions for a newbie?
@admin Videos are super helpful! I found a great one on YouTube that helped me a lot.
Don’t worry, Jake! Shaping takes practice. Try watching a few videos to see the technique in action. It really helps!
Wow, this guide is a game-changer! I always thought baking bread was for pros only. I tried the kneading tips, and my dough turned out so smooth! 😍 Can’t wait to try shaping it next! Anyone else had success?
I’m still struggling with the rise part. Any tips?
@Lisa G. Patience is key! I left mine for an hour longer than I thought and it worked wonders!
Totally! I was also intimidated at first. But once you get the hang of it, it’s actually super fun! What kind of bread are you making?
So glad to hear that, Sarah! Kneading is definitely an art. Let us know how shaping goes!
I really liked the section on mastering the basics. I feel like I have a better understanding now. Thanks!
You’re welcome, Rachel! Mastering the basics is the best foundation for baking.
Definitely! The basics can make or break your bread!
I’m not a baker, but this inspired me to try! Just finished my first loaf and it looks decent! 😅
Nice! Did you follow the guide for your first loaf?
That’s awesome, Kevin! Remember, it’s all about practice. How did it taste?
Okay, so I got a bit carried away with the toppings. Bread turned out great, but now it’s a pizza loaf! 😂
Haha, why not! A pizza loaf sounds delicious! What toppings did you use?
Sounds like a tasty experiment! I’m here for it! 🍕
This is a great guide, but I wish there were more details on the cooling part. Is it really that important?
Totally agree! I used to cut right away, but it was always gummy inside.
Great point, Chloe! Cooling is crucial for the texture and flavor to develop fully. I recommend letting it cool for at least 30 minutes.