
Unlock the Secrets of Sous Vide
Dive into the world of sous vide cooking! With this technique, you’ll achieve perfectly cooked meals every time. It’s about control. It’s about precision. This guide will show you how to cook like a pro. Let’s get started and unlock your culinary skills.
What You Need for Success

Master the Art of Sous Vide: A Step-by-Step Guide to Perfect Cooking
Step 1: Choose Your Vacuum Sealer
The Key to Seal the Deal—Literally!Pick a vacuum sealer that fits your needs. A good vacuum sealer is essential. It keeps your food fresh and flavors intact. Decide between handheld or countertop models.
Consider features like reseal options and an accessory port. If you plan to sous vide frequently, invest in a reliable brand. Your meals deserve it.
For example, if you’re cooking steak, use a sturdy countertop model. It’ll keep the juices locked in. Happy sealing leads to happy cooking!

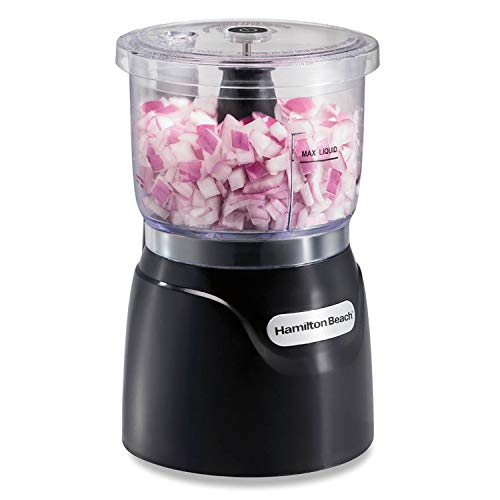
Step 2: Select Your Ingredients
The Right Ingredients Make All the Difference!Choose fresh, high-quality ingredients. This is the foundation of sous vide. Your selection matters.
Opt for proteins like:
Don’t forget veggies! Carrots, asparagus, and zucchini all work beautifully. Seasoned and cooked precisely, they bring color and crunch to your plate.
Visualize the finished dish. Imagine the vibrant colors and robust flavors. Good ingredients shine through in every bite. Quality matters. Select wisely and enjoy the rewards of your effort. Happy cooking!

Step 3: Season Like a Pro
Why Less Can Be More!Start by keeping it simple. Use salt, pepper, and herbs. These enhance the natural taste of your ingredients without overpowering them.
Apply a pinch of salt. It draws out flavor and moisture. Too much salt can ruin the meal. Balance is key.
Add a touch of pepper. Freshly cracked black pepper lifts the dish. It adds just enough heat.
Incorporate herbs. Fresh or dried thyme, rosemary, or dill are excellent choices. A few sprigs of thyme can transform your dish. Remember, less is often more.
Consider an example. If you’re cooking a chicken breast, rub it lightly with salt and sprinkle with thyme. Let it sit for a few minutes. It will soak up the flavors. Keep your seasonings straightforward. Your ingredients deserve it.

Step 4: Set the Right Temperature
Get Your Science Right for Perfect Meals!Research the ideal temperature for your ingredients. It’s crucial to mastering sous vide cooking. Different foods require different settings to unlock their full potential.
For meats:
For seafood:
For vegetables:
Use a reliable sous vide immersion circulator. It ensures precise water temperature. Consistency is key. It transforms raw ingredients into culinary masterpieces. Adjust the temperature, and watch your food come alive with flavor. Happy cooking!

Step 5: Cook to Perfection
Timing is Everything—Don’t Rush It!Place your sealed bags in the water bath. Ensure they are fully submerged. Floating bags can lead to uneven cooking.
Set the timer. Follow the recommended cooking time for your ingredients. For example, a steak may need two hours at 130°F while chicken might take two hours at 145°F.
Stay patient. Sous vide cooking takes time. This isn’t a quick meal. But it’s worth it. Let the sous vide magic happen. The process breaks down fibers, transforms flavors, and retains moisture.
Imagine thick, tender slices of beef awaiting you after patiently waiting. Dinners become memorable moments. So relax, and let the water work its wonders. When the timer goes off, you will savor the perfect meal you’ve crafted. Enjoy!

Step 6: Finish with a Sear
The Crunchy Finish That Takes It Over the Top!Heat a skillet or grill. Get it screaming hot. This is where you create a crust. The beautiful brown color adds character to your dish.
Remove the bag from the water bath. Unwrap your protein and pat it dry with paper towels. Moisture is the enemy of a good sear.
Coat the skillet lightly with oil. Use a high smoke point oil like avocado or canola. This prevents sticking and promotes browning.
Place your protein in the skillet. Don’t overcrowd the pan; give each piece space to breathe. Sear for 1-2 minutes on each side. Listen for the sizzle. That’s a promise of flavor.
Finish with a bast. Add butter, garlic, and herbs during the last 30 seconds. Tilt the pan and spoon the melted mixture over the protein. It elevates the flavor. This is your masterpiece’s final flourish. Serve and enjoy!

Your Sous Vide Journey Begins
Now you know the steps! Use this guide to experiment and enjoy delicious meals. Sous vide cooking is easy and rewarding. Each dish is a chance to push your limits. What will you create first?


I’m so excited to try sous vide cooking! I’ve seen so many people raving about it. But, uh, is it really that much better than traditional cooking? Can someone convince me? 😂
Welcome to the sous vide community, Sophia! It’s a different experience for sure. The precision and consistency are what make it special!
Honestly, once you go sous vide, you won’t want to go back! Perfectly cooked every time!
I appreciate how detailed this guide is! However, I got stuck on Step 4. How do I know what temperature to set for different meats? Is there a cheat sheet or something? 🥩
Check out the USDA guidelines! They have some good charts for sous vide temperatures.
Thanks for the feedback, Liam! You can find temperature guides online, but generally, beef is great at 130°F for medium-rare. It all depends on personal preference!
I’m loving this guide but I’m a bit confused about the searing part. How long should I sear after cooking? I don’t want to ruin the texture! 😬
Exactly! Just keep an eye on it. Don’t get distracted by your phone or the TV, trust me! 😂
Searing is quick! Just a minute or two on each side in a hot pan should do. You want to get that nice crust without overcooking.
This guide is solid, but can we talk about seasoning? I feel like I’m missing something. Adding more herbs didn’t seem to cut it for me. Should I be marinating? 🤔
Great question, Brian! Marinating can definitely enhance flavor. Just be careful with acidic marinades if you’re cooking for long times!
I usually just season with salt and pepper before sealing. Have you tried adding garlic or rosemary? Those are my go-tos!
Just tried sous vide for the first time using this guide and wow! It’s like magic! The steak turned out so tender 🤤. I can’t believe I waited so long to dive into this! One thing though, I used a cheap vacuum sealer and it sort of struggled… any recommendations?
I had the same issue with my old sealer! I recently upgraded to a Chamber Vacuum Sealer, and it’s a game changer! Worth the investment!
Glad you enjoyed it, Emily! As for vacuum sealers, I’ve heard good things about the FoodSaver models. They seem to have a good balance of price and performance.