
Welcome to the World of Electric Gravy Makers
Are you tired of lumpy, uneven gravy? Do you want a smoother, richer sauce to complement your meals? Look no further. Electric gravy makers are here to save the day. These handy kitchen gadgets simplify the process, delivering delicious results every time.
In this article, you will discover what an electric gravy maker is and why it should be a staple in your kitchen. We’ll explore the key features to look for when choosing the right model. You’ll also find a list of the top electric gravy makers available on the market today. Plus, we’ll guide you on how to use and maintain your machine. Finally, get ready to impress your family and friends with some delightful gravy recipes. Let’s make gravy easy!

What is an Electric Gravy Maker?
An electric gravy maker is a specialized kitchen appliance designed to simplify the process of making gravy. Unlike traditional methods that often involve stovetop cooking and constant stirring, electric gravy makers automate much of the hard work. These devices typically combine heating, mixing, and sometimes even straining—all in one compact machine.
The Basics
You start by adding your base ingredients into the gravy maker, such as drippings, stock, or broth. The machine heats the mixture while mixing it gently to work out any lumps. The result is smooth gravy without the stress.
Differences from Traditional Methods
Traditional gravy-making can be labor-intensive. You might spend time whisking over heat, adjusting seasoning, and straining to get an ideal texture. Electric gravy makers change the game with:
Imagine coming home after a long day, ready to enjoy comfort food without the fuss. With an electric gravy maker, you can whip up luscious gravy in no time.
As you explore this world, keep in mind what features you might value most in your new gadget. In the next section, we’ll look at why you should consider using an electric gravy maker in your kitchen.
Why Use an Electric Gravy Maker?
When it comes to making gravy, simplicity can be crucial. An electric gravy maker streamlines the entire process. Here are some reasons to consider adding one to your kitchen arsenal.
Time-Saving Convenience
Picture this: you just roasted a beautiful turkey. The last thing you want is to spend an hour fussing over the stovetop. With an electric gravy maker, you can add your drippings and let the machine work its magic. In just a few minutes, dinner is ready, and you have more time to spend with family.
Consistency is Key
Ever had a feast interrupted by a lumpy gravy disaster? Electric gravy makers promise consistency every time. They mix and heat your ingredients evenly, resulting in a smooth texture. No more worrying about whether your gravy will hold up under critical eyes.
Reduced Mess
Traditional methods often leave you with a splattered stove and a pile of dirty dishes. Electric gravy makers take away the mess. You pour in your ingredients, and the machine does the mixing. Clean-up is as easy as rinsing out the container.
Versatile Options
Want to try something different? Many electric gravy makers can also handle sauces or soups. Their multi-functionality adds value by expanding your cooking capabilities.
Embracing an electric gravy maker not only eases your holiday preparations but can also simplify everyday meals. Excited to see what features to look for when choosing one? Up next, we’ll explore the key features that make a great electric gravy maker.
Key Features to Look For
When selecting an electric gravy maker, several key features can enhance your experience and ensure high-quality results. Here’s what to consider:
Size and Capacity
The size of the gravy maker matters. A compact model is great for small kitchens, while larger units can accommodate sizable batches—perfect for holiday gatherings. Think about your typical cooking needs. For an average family dinner, a capacity of 4 to 6 cups can be sufficient. However, for larger gatherings, look for models that hold 8 cups or more.
Material and Durability
The materials your gravy maker is made of can impact both performance and longevity. Stainless steel models are durable and scratch-resistant, while non-stick interiors simplify cleanup. Choose materials that withstand high temperatures to maintain flavor integrity and safety.
Ease of Use
A user-friendly design makes all the difference. Look for features like:
Heating and Mixing Technology
Not all gravy makers cook and mix the same way. Some feature advanced heating elements that promote even cooking, while others employ robust mixing mechanisms to eliminate lumps. Models with adjustable temperature settings allow you to customize thickness and flavor.
Additional Features
Consider models with these added conveniences:
Finding the right electric gravy maker tailored to your needs will change the way you cook gravy forever. Next, let’s dive into some of the top electric gravy makers currently on the market, so you can gauge which one fits your kitchen perfectly.
Top Electric Gravy Makers on the Market
Getting the best electric gravy maker can make a big difference in your cooking experience. There are several options out there, each with unique features and price points to suit your needs. Here’s a quick look at some of the top models available today.
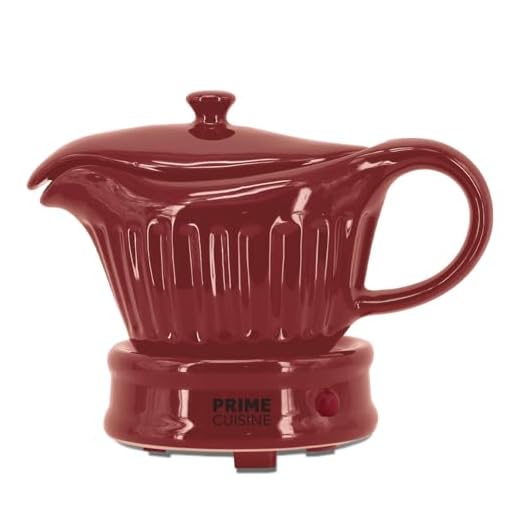
1. Prime Cuisine Electric Gravy Boat Warmer
2. Cuisinart Gravy Maker
3. Hamilton Beach Electric Gravy Separator
4. Oster Gravy Maker and Warmer
5. Chefman Electric Gravy Maker
By weighing your cooking habits against these features, you can find your perfect match. Each of these electric gravy makers brings something unique to the table. With your new gadget in hand, in the next section, we will walk through how to use it effectively to create mouthwatering gravies.
How to Use an Electric Gravy Maker
Using an electric gravy maker can simplify your cooking process and help you create delicious gravy with ease. Here’s a straightforward guide to get you started.
Step 1: Prepare Your Ingredients
Begin with your base. Collect your drippings from roasted meats or sautéed vegetables in a bowl or measuring cup. You’ll typically want to use around 2 cups as your starting point. Don’t forget to gather any additional ingredients like flour or cornstarch, seasonings, and broth you might want to add.
Step 2: Add the Ingredients
Once your ingredients are ready, pour the drippings into the gravy maker. Follow with your broth or any stock you’ve chosen. Add flour or cornstarch to thicken, remembering to measure it out—about 1-2 tablespoons should do for every cup of liquid. Season with salt and pepper to taste.
Step 3: Set the Temperature
Turn on your electric gravy maker and set it to the recommended temperature—usually medium. Many models will have a simple dial or buttons. Don’t rush this step; proper heating ensures an even mix and helps eliminate lumps.
Step 4: Mix and Wait
Watch as the machine stirs and heats the mixture. Most electric gravy makers will automatically agitate the ingredients, so you can sit back and relax. Keep an eye on it; if your model doesn’t have an adjustable timer, you may need to stir manually occasionally.
Step 5: Pour and Serve
When your gravy reaches the perfect consistency, carefully pour it out through the spout. Serve immediately or use the “keep warm” function if your model has one. Pair it with your potatoes, meats, or vegetables, and relish the delighted looks around the table.
Tips for Perfect Gravy
Now that you know how to make perfect gravy effortlessly, let’s turn our attention to keeping your electric gravy maker in pristine condition. In the next section, we’ll cover cleaning and maintenance tips to ensure it lasts for years to come.
Cleaning and Maintenance Tips
Proper care and cleaning of your electric gravy maker can extend its life and keep it performing well. Here are some practical steps and best practices to ensure your gravy-maker remains in top shape.
Cleaning After Use
Unplug the Unit: Always disconnect it from the power source before cleaning to ensure safety.
Cool Down: Allow it to cool completely. This step prevents burns and helps you handle it safely.
Dishwasher-Safe Parts: If your model has parts that are dishwasher-safe, load them into the dishwasher for hassle-free cleaning. For non-dishwasher-safe components, gently wash them by hand using warm soapy water.
Wipe the Body: Use a damp cloth to wipe down the exterior. Avoid abrasive materials that could scratch the surface.
Tackling Stubborn Residue
If you encounter stuck-on gravy or residue:
Regular Maintenance
Keeping your electric gravy maker clean and well-maintained ensures it will serve you delicious gravies for years to come. In the next section, we will explore some mouthwatering gravy recipes you can master with your newly maintained appliance.
Delicious Gravy Recipes to Try
Get inspired with simple and tasty gravy recipes you can make using your electric gravy maker. Start experimenting today.
Classic Roasted Turkey Gravy
This timeless recipe uses drippings for a rich and savory flavor.
- Ingredients:
- 2 cups turkey drippings
- 1 cup chicken broth
- 1/4 cup flour (for thickening)
- Salt and pepper to taste
- Method:
- Combine the drippings and broth in your gravy maker.
- Gradually whisk in flour to avoid lumps.
- Set to medium heat and stir until thickened.
Mushroom and Herb Gravy
Perfect for vegetarians or as a delightful complement to any meat.
- Ingredients:
- 1 cup vegetable broth
- 1 cup sautéed mushrooms
- 2 tablespoons cornstarch
- Fresh thyme, rosemary, and sage (to taste)
- Method:
- Add broth and sautéed mushrooms to your electric gravy maker.
- Stir in cornstarch mixed with a little water.
- Heat until thick, adding herbs for a fragrant finish.
Onion and Red Wine Gravy
Rich in flavor, this gravy pairs beautifully with beef dishes.
- Ingredients:
- 1 cup beef drippings
- 1/2 cup red wine
- 1/4 cup onion, finely chopped
- 2 tablespoons flour
- Method:
- Pour drippings into your gravy maker and add red wine and onions.
- Whisk in flour, then heat until it reaches a lovely, thick consistency.
Quick Creamy Gravy
Ideal for breakfast over biscuits or alongside fried chicken.
- Ingredients:
- 2 cups milk
- 1/4 cup flour
- Salt and pepper to taste
- Method:
- Add milk to the gravy maker, then whisk in flour.
- Heat on medium, stirring until creamy. Add seasoning to taste.
These recipes are just a starting point. Your electric gravy maker can open up a world of flavor.
Now that you have some delicious gravy ideas, let’s summarize how your newfound skills can lead you toward properly executed gravies for every occasion in the next section.
Your Path to Perfect Gravy
As you wrap up your journey into the world of electric gravy makers, take a moment to appreciate their benefits. These handy gadgets simplify your cooking routine. No more messy stovetops or lumpy sauces. Just smooth, rich gravies with ease.
Embrace the joy of stress-free cooking. With the right electric gravy maker, you can elevate your meals to a new level. So go ahead—explore the options, try out those delicious recipes, and savor the fruits of your labor. Your perfect gravy awaits!


Wow, I never knew electric gravy makers existed! 🤯 This article really opened my eyes. I’ve been using the ol’ stovetop method forever, but it can be so messy. I might have to pick up that Prime Cuisine Electric Gravy Boat Warmer now! Anyone tried it? How does it compare to traditional methods?
I just got the Prime Cuisine one last month and it’s a game changer! Super easy to use and clean, and the gravy comes out amazing! 😋
Glad you found the article helpful, Linda! The Prime Cuisine is highly rated! Let us know if you decide to try it!
I love the idea of an electric maker, but I’m worried about cleaning it. Anyone had a hard time with that?
Not at all! Most of them have non-stick surfaces, so a quick wash and you’re good to go! Just don’t let it sit with residue.
Cleaning is usually pretty straightforward, Catherine! Just follow our tips in the article for the best results!
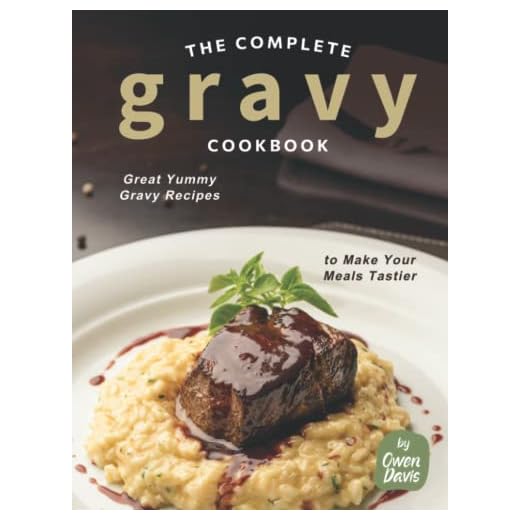
This article is gold! I always wondered how to make the perfect gravy—no more lumpy disasters for me. 😂 I’m definitely checking out that Complete Gravy Cookbook!
Thanks, Martin! The cookbook has some fantastic recipes. Let us know which one you try first!
Electric gravy makers? I thought that was just a gimmick. I usually make gravy the old-school way, but maybe I’ll give it a shot. Do you really save that much time?
Great question, Sara! They can definitely speed up the process and minimize the mess. It’s worth a try if you’re curious!
Honestly, I think they do save time, especially if you’re cooking for a crowd. Plus, no more lumps! 😄
Yeah, I was skeptical at first too, but after reading this, I’m convinced! Let us know if you try it!
I’m a bit of a gravy snob. 😅 How can an electric machine compete with a good old whisk and pan? I guess I’m just old-fashioned. Anyone else feel this way?
Totally get it, Gregory! It’s all about preference. Some people love the ease of electric makers while others cherish the traditional feel.
I hear you, Gregory! But sometimes, convenience beats tradition. Trust me, you might be pleasantly surprised! 😉
I’m still confused about how these electric makers actually work. Are they really worth the investment? I mean, can’t you just use a blender? 🤔
They have specific heating elements and usually come with features like temperature control that blenders don’t have. It’s kinda like a slow cooker for your gravy!
Exactly, Timothy! They offer more control over consistency and temperature. Definitely worth considering if you make gravy often!
I’ve had my eye on that Gias Kitchen Gravy Separator for a while now! Can’t wait to try it out; the reviews say it works wonders! Any tips for first-time users?
Make sure to follow the instructions carefully! It can be a bit tricky at first, but once you get the hang of it, it’s super easy!
Great choice, Rachel! Just remember to clean it immediately after use to avoid any sticking!
I’m a bit skeptical about these new gadgets, but the convenience they promise is tempting. I guess I’ll have to try one out. Anyone want to lend me theirs for a week? 😂
LOL, Steve! I think you’ll end up loving it if you give it a shot! Just don’t forget to return it! 😜
Haha! We recommend trying one out for yourself—let us know if you do!