Trade the Wax. Keep the Value.
You care for the earth. You want to cut waste. Beeswax wraps helped you do that. They worked for a while. But they have limits. They melt. They hold scent. They need gentle care. You can swap them. You can keep the gains. This guide shows safe, smart options.
You will learn what works for food. You will learn what lasts. You will learn what harms less. I show how to match wraps to the job. I show how to clean and repair. I show how to buy with sense. The goal is simple: keep the value. Lose the hassles. Make a switch that fits your life.
Read on. Find better wraps. Save time, money, and the planet for good.

Testing Beeswax Wraps: A Zero-Waste Alternative to Plastic Wrap
Why You Might Swap Beeswax Wraps
Performance limits you feel at home
Beeswax wraps work for bread and cheese. They fail at heat. Beeswax softens near 62–64 °C. You set a hot bowl on the counter and the wrap loosens. You try to cover a jar and the edge gaps. You want a seal that lasts. You want something that keeps liquids in.
Real-use failures to notice
The cloth can trap smells. Strong cheeses and curry leave ghosts. Repeated wash cycles dull the wrap. The wax thins. The grip falls away. In the freezer the wrap can crack. It rips on odd bowls. You find trash bags once the wrap gives up mid-use.
Ethics and lifestyle reasons
You may eat no animal products. Beeswax is not vegan. You may avoid buying items tied to commercial bee farming. Or you may simply want lower-maintenance gear. Vegan wraps and silicone need less fuss.
Quick signs you should swap
What to try instead, in plain terms
Use silicone lids or Stasher silicone bags for soups. Use glass containers like Pyrex or Weck jars for long storage. Try plant-wax wraps (candelilla) if you want a vegan cloth-like option. Pick silicone if you need heat resistance and tight seals. Pick glass if you want zero odor and easy sterilizing.
One quick tip you can use now
Test a wrap before you trust it. Fill a bowl with hot soup. Cover it and lift. If the seal leaks or peels, switch to a lid or container that clamps.
What to Look for in a Better Wrap
You pick by need. First, know what you will wrap. Then check these traits.
Safety
Look for food-grade marks. FDA, LFGB, or EU 10/2011 mean the maker tested it. Avoid coatings that shed plasticizers or PFAS. If a wrap smells of chemicals after a wash, toss it.
Temperature range
Know the numbers. Silicone often handles freezer to about -40°C and oven to ~200–260°C. Cloth wraps and plant-wax cloths work at room temps and coolers. Match the wrap to heat you will use.
Seal and breathability
Do you want airtight or breathing cover? Stretch silicone lids and vacuum bags make a tight seal for soups. Cotton or mesh lets herbs breathe and stay bright. Pick the seal that fits the food.
Cleanability
Can you hand-wash it? Machine-wash it? Toss it in the dishwasher? Hard, nonporous gear wins for greasy stew. Cloth takes more care.
Repairability
See how it fails. Can you patch a cloth with a stitch or repair a stitched seam? Can you recoat a plant-wax wrap? Silicone and glass usually last longer and need less repair.
End of life and durability
Ask: will this break down or sit in a landfill? Check compostable claims. Count uses. A cheap wrap that rips in ten washes costs more per use than a sturdier piece.
Quick checklist
You now have a simple yardstick. Use it when you shop or test at home. Next, you’ll look at the best beeswax-free options to try.
The Best Beeswax-Free Options to Try
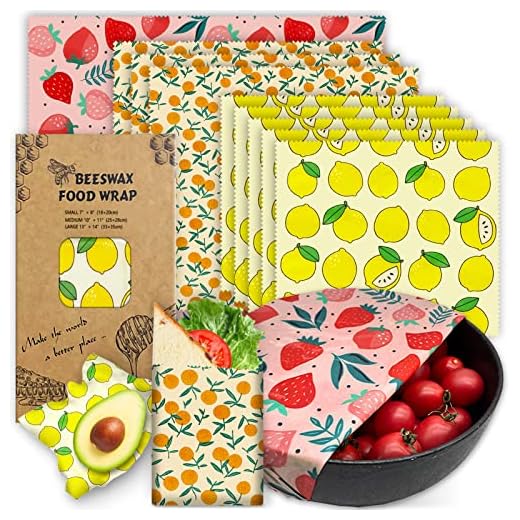
Vegan wax wraps
You get the same soft grip as beeswax. Makers use candelilla or soy. They shape around bowls. They let food breathe. Use them for cheese, bread, herbs. They fail with raw meat and long wet storage. Wash by hand in cool water. If they lose tack, warm them gently and rub in a fresh plant wax or replace.
Silicone wraps and lids
Silicone stretches. It seals. It takes heat and cold with no fuss. Use lids for bowls, jars, and baking dishes. Pick thick, food‑grade, platinum‑cured pieces. Thin, cheap silicone can tear or lose suction. Don’t use abrasive brushes. A good lid will save you many plastic sheets.
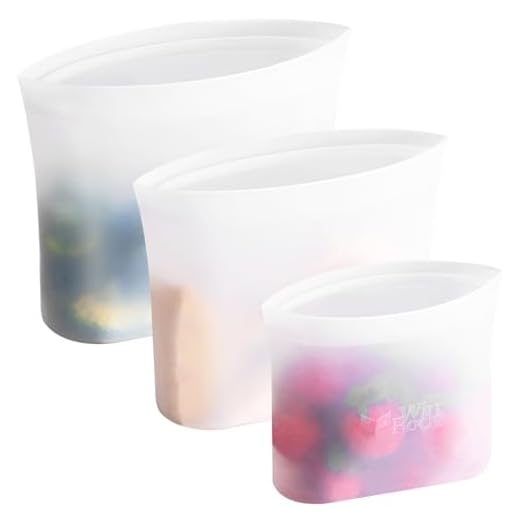
Reusable silicone bags
They zip or press shut. They replace single‑use bags in the freezer, fridge, and lunchbox. You can boil them, microwave them (check specs), and wash them in the top rack. They bend flat for storage. Watch for oily stains if you store curry or tomato sauce often.
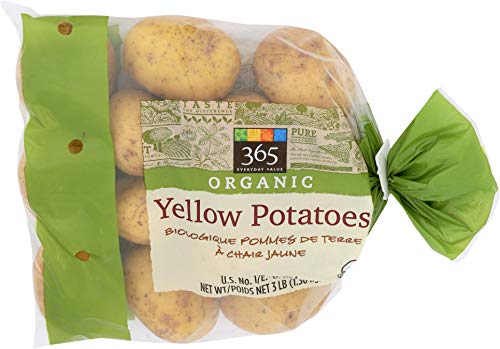
Glass and stainless containers
Glass jars and Pyrex keep food pure. Stainless tins and LunchBots hold salads and grains. They do not hold smells or stain. They are heavy and can break or dent. Use glass for wet food and long storage. Use stainless for rough use and travel.
PUL or laminated cloth
These are light and thin. They give a water barrier without plastic feel. Use them for sandwiches and dry snacks. The laminate can peel over time. Wash gently and air dry.
Compostable paper and fabric sandwich wraps
Paper wraps work for dry food and single use. Fabric wraps with snaps or liners fold into neat sandwiches. They are cheap and light. They wear out faster.
Quick picks for everyday use:
Next, you’ll match these options to the jobs in your kitchen.
Match the Wrap to the Job
Decide the task first. Then pick the tool that fits. Short cuts save time and keep food better.
Cheese and bread
Use a wrap that breathes a little. Fold loosely. Let soft cheese sit in a small bowl with a cloth cover. Hard cheese fares well in vegan wax or linen. Label the date. Replace the wrap if it smells.
Cover bowls and leftovers
Pick a silicone lid or a glass plate for a tight seal. Stretch silicone over the rim. Press the center to make a suction. For odd shapes, a sheet of silicone or a snug-fitting plate works better than fabric.
Sandwiches and lunch packs
Choose a lined fabric wrap or a zip silicone bag. If you pack wet fillings, go for a fully sealable pouch. For fast prep and cleanup, try the
They stand up in your bag. They wash fast. They handle sauces and dressings.
Freeze stock, meat, and bones
Use glass or stainless only if rated for freezer use. Leave room for expansion. Thick silicone bags work too. Label and lay flat to save space. For long freezes, double-bag oily stock.
Carry soup or wet food
Never trust a loose wrap. Choose a leak-proof jar, a screw-top thermos, or heavy silicone container with a gasket. Test it before you walk out the door.
Store herbs and greens
Wrap herbs in a slightly damp cloth or place stems in a jar with a loose cloth over the top. Use a breathable pack for delicate greens. This keeps them crisp without rot.
Travel with snacks
Pick light pouches that wash in a sink. Laminated cloth is fine for crackers. Stain-prone foods do better in silicone. Pack an extra small bag for crumbs.
Use the right tool. It makes your day easier. It keeps food longer.
Care, Cleaning, and Repair Tips
You want wraps that last. You want food that stays safe. Clean and mend with purpose.
Wash and dry right
Wash well. Use warm water and mild soap. Rinse hard. Air dry fully. Do not tuck a damp wrap into a drawer. Mold grows fast. I learned that the hard way after leaving a tea towel damp overnight.
Silicone and heat
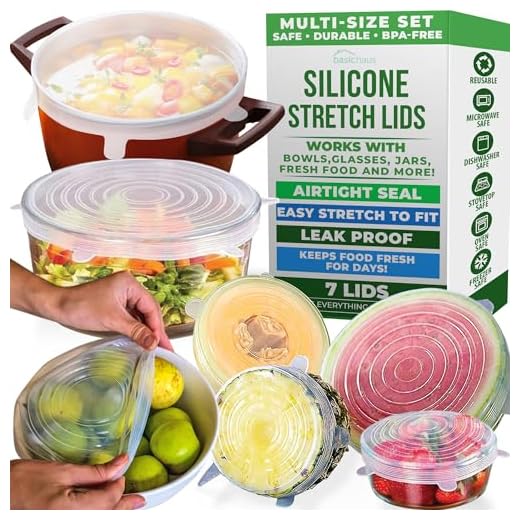
Silicone is tough. You can boil it or run it in the dishwasher if the maker allows. Check the label. Test lids like the Reusable Silicone Stretch Lids for fit before first use. High heat can warp cheap silicone. Don’t set silicone on a hot stove or under a broiler.

Glass and steel
Scrub glass and stainless with a brush. Sterilize when needed by boiling jars or using a hot dishwasher cycle. For lids with seals, remove the gasket and clean under it. Steel resists stains. Watch for chips in glass. Replace cracked pieces.
Fabric care and small repairs
Follow the care label for linen or cotton. Machine wash if allowed. Patch small holes by sewing with a simple running stitch. Use a scrap of the same cloth. A tidy stitch beats a ragged tear in the field.
Rewaxing vegan wraps
When vegan wraps lose grip, rewax them. Melt a vegan wax block in a double boiler. Brush a thin coat on the fabric. Warm briefly in a low oven or under a heat lamp to set. Test tack on a jar. Repeat only if needed.
When to toss
Stop saving what fails. If a wrap leaks, smells, or keeps you washing it twice, toss it. Time is food safety. Choose repair when it saves both.
Cost, Impact, and Smart Buying Choices
You want value. You want less waste. You want truth on the label. Look past the sticker price. A cheap wrap can fail fast. A good one can last years.
Read the label
Demand clear names. Look for “food-grade silicone,” “BPA-free,” or “100% cotton — Oeko‑Tex certified.” Avoid vague words like “eco,” “compostable” without details. If a seller hides materials or care, move on. You should know what touches your food.
Do the math
Price per use tells the truth. Compute simple totals:
Pick the option that holds value over time, not the lowest upfront cost.
Watch for hidden harm
Some plastics shed micro‑bits. Some “compostable” films need industrial composting. Check:
Buy for use, not for show
Buy only what you will use. One drawer full of wraps is waste. Start small. Test one product. Keep backups for real needs: lunches, long-term storage, travel.
Quick tips:
With these checks in hand, you can move on to closing your swap with purpose.
Swap with Purpose
You can leave beeswax behind and keep what works. Choose by use. Clean and care well. Buy less. Buy better.
Start with one item. Test it. Then change more if it fits your life. Small swaps add up. They cut waste and make your kitchen work. Nail the fit. Skip the flair. Choose durable fabrics. Repair what you can. Share what you don’t need. Repeat. Your small acts shape a kinder kitchen. Start today, see change soon.


Short and sweet: ditch beeswax for freezer stuff. Invest in good silicone bags. They’re like the armored tanks of food storage.
Haha, ‘armored tanks’ — I love that. For freezer durability, silicone and heavy-duty freezer bags are best.
Agreed. Also, label silicone with a dry-erase marker — it wipes off and saves confusion.
Loved the section on ‘Match the Wrap to the Job’ — felt practical. I switched from beeswax wraps to silicone stretch lids a few months ago and honestly, they’re a game changer for oddly shaped bowls. Also bought the Universal Silicone Stretch Lids, 7-Pack Set after reading similar recs.
Only gripe: the article glossed over smell transfer for freezer items. Anyone else notice frozen garlic giving everything a faint scent after using certain wraps?
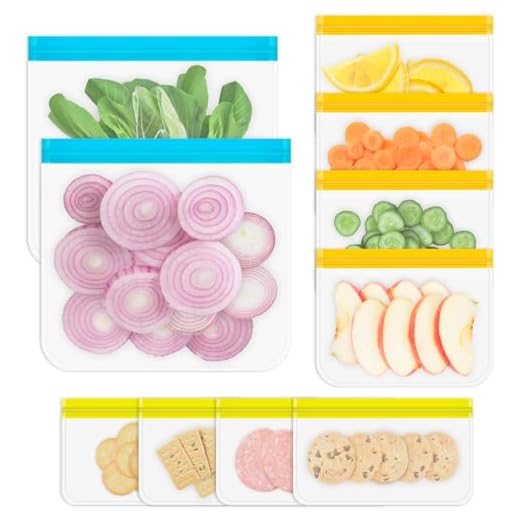
Yep! Garlic and onions are the worst. I keep those in the Stand-Up Silicone Food Storage Bags, 3-Pack and haven’t had transfer since. Worth the extra bag imo.
Good catch, Liam — smell transfer can happen, especially if food isn’t well-sealed or the wrap material is porous. For strong-smelling items, a double layer (bag plus lid) or the Silicone Reusable Stretch Lids, 7-Piece Set can help.
I line the inside with parchment for super smelly stuff 😂 Not the greenest, but it works for leftovers.
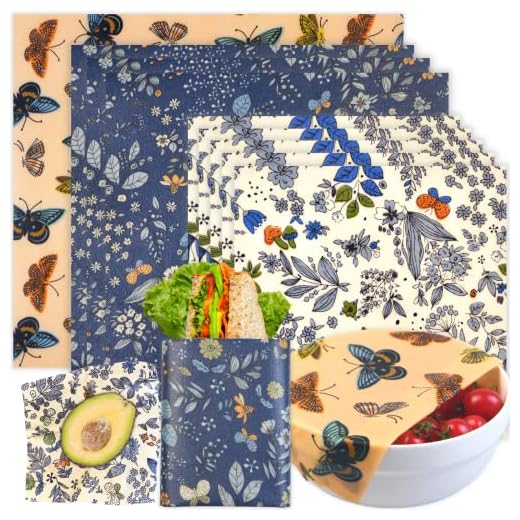
I appreciated ‘Swap with Purpose’ — it’s not just about convenience but also what your priorities are (waste, cost, or convenience). I swapped to Reusable Beeswax Food Wraps, 9-Pack Set for pantry items and silicone for freezer stuff.
That mix-and-match advice is the best part of the article.
Same here. Beeswax for bread and cheese, silicone for freezer and leftovers. Best of both worlds.
Exactly — no one size fits all. Glad the hybrid approach resonated with you.
Real talk: cost breakdown felt a bit optimistic. Silicone upfront is pricier than beeswax, and not everyone will see savings quickly unless they use them daily. The article should’ve shown a few scenarios (occasional user vs heavy user).
Fair point. We aimed to keep it general but will add scenario-based payback timelines (light, moderate, heavy users) in the next update.
As a weekly batch-cooker, I disagree — it paid off fast. But I get that for occasional users it’s slower.
Maybe a decision tree would help people choose: are you on-the-go? freezer-heavy? then pick X.
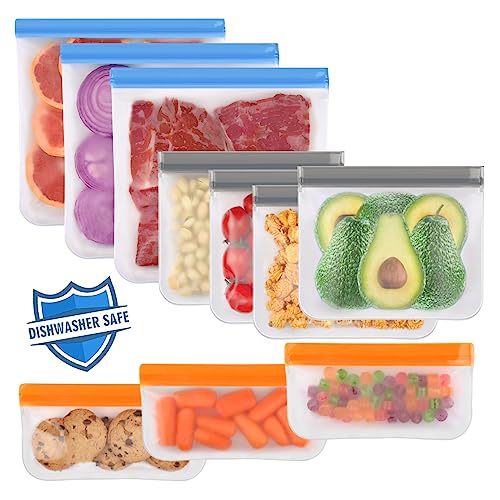
This was super helpful — I was ready to toss my beeswax wraps because they got stained and smelled weird. Considering the Dishwasher-Safe Reusable Freezer Bags, 10-Pack Set now.
Question: do dishwasher-safe bags really survive repeated dishwashing? Anyone with long-term experience?
I’ve had a 10-pack for ~18 months and they’re still holding up. I air-dry them inside-out though — heat is the enemy.
Mine chipped a little after a year but still usable. I rotate through a few sets so none are overworked.
Great question, Sophie. Many dishwasher-safe bags hold up well if you avoid high-heat drying cycles and place them on the top rack. Over time, they can show wear, but they’re generally more durable than beeswax wraps for freezer use.
I liked the ‘Care, Cleaning, and Repair Tips’ section but wanted more specifics: temperatures to avoid, best detergents, and how long each product kind usually lasts. Could you add a quick cheat-sheet in a follow-up?
Thanks for the suggestion, Vivian — a cheat-sheet is a great idea. We’ll work on a quick reference guide: temps, detergents, and average lifespans for each product type.
Agree — even a small table would save so much guesswork.
I appreciated the product list — helped me choose between the Dishwasher-Safe Reusable Freezer Bags, 10-Pack Set and the Silicone Reusable Freezer Bags, 10-Pack Set. Ended up with the silicone ones because of longevity claims.
One small nit: include price ranges next time — I had to click through Amazon to compare.
And include coupon tips! 😅
Thanks, Claire. Price ranges fluctuate, but we’ll include typical ranges or a note on how to estimate cost per use in future edits.
Price ranges would be super helpful — sometimes the same product is way cheaper from other sellers.
Long comment — bear with me:
I used to LOVE beeswax wraps for sandwiches and covering bowls, but living with a toddler changed the game.
– They kept getting chewed on (gross).
– After a couple of spills the wax got patchy.
– Cleaning was annoying when sticky jam got into the folds.
Switched to the Silicone Reusable Freezer Bags, 10-Pack Set for snacks and the Reusable Silicone Stretch Lids, 7-Piece Set for bowls. Everything is easier to clean, and the lids stretch over those weird toddler bowls. If you still want the beeswax vibe, the Patterned Beeswax Food Wraps, 9-Pack Set is cute for gifts, but not practical for my household.
Appreciate the breakdown — saves me trial and error. I’m on team silicone for anything messy.
This is exactly my experience with my cat. The stretch lids are a lifesaver. Also, silicone bags are murder-proof 😅
Thanks for the detailed share, Nora — situations like kids/pets really change the calculus. Practicality often wins over aesthetics in busy homes.
Constructive: article missed a deeper dive into repairs. You mention mending beeswax but not patching silicone or replacing lids. How do you keep silicone long-term? Any trusted hacks?
Good point. Silicone rarely ‘repairs’ per se, but you can trim edges, deep-clean with baking soda, or retire them to non-food uses when worn. For lids, keeping them away from sharp utensils helps a lot.
I’ve superglued a small tear in a lid (food-safe epoxy) — not ideal but works for non-high-temp uses.
If a silicone bag leaks, I cut it and use it as a freezer mat for raw meat trays. Not glamorous but reduces waste.
I tried to make my own beeswax wraps once. It was a disaster — sticky stove, uneven wax, and the dog loved licking them afterward. 😂
Now I use reusable beeswax for light tasks and silicone for everything else. Anyone else tried DIY?
Tried once too. If you do it, use less oil and spread thin. Still ended up in the laundry basket though.
The dog part made me laugh — same here. Learned the hard way to keep them out of paw range.
DIY beeswax can be messy — you’re not alone. Pre-made Patterned or Reusable Beeswax Food Wraps save that trouble.
Humor: beeswax wraps are the artisanal avocado toast of food storage — beautifully photogenic but fragile in real life. 😂
Serious: for picnics and cheese plates they’re great. For the freezer? No way.
This made me spit out my coffee. Accurate though.
Love the analogy. Visuals win for occasional use, but heavy-duty storage needs something more robust.
Question: are patterned beeswax wraps really worth it for gifting? I love the look but worry they’ll be used once and tossed… anyone given them as presents?
I gifted a set once with a small card about care — recipient loved it and now uses them for snacks. Presentation matters!
Patterned wraps make cute, thoughtful gifts — include care tips and recommendations for use to increase the chance they’ll be reused. Pairing with a silicone option is nice.
If the giftee is into zero-waste, they’ll appreciate it. Otherwise, pair with a small practical item (like a silicone lid) so it’s less likely to be decorative-only.
Constructive but positive: the ‘What to Look for in a Better Wrap’ is solid, but I wanted more on microplastic risk when choosing plastic-based reusable options. Are some silicone bags better than others in that regard?
Also check for chemical smell out of the package — that’s a red flag for lower-quality silicone.
Good question. High-quality food-grade silicone is generally stable and less likely to shed microplastics than certain plastics, but sourcing matters. Look for BPA-free, food-grade certifications and reputable brands.
I always rinse new silicone items, then soak in baking soda water overnight to reduce any factory smells.
Anyone tried the Stand-Up Silicone Food Storage Bags, 3-Pack? I saw those in the list and the idea of a stand-up bag for freezing soups is tempting. But are three enough? I usually freeze a lot on Sundays.
Pro tip: freeze flat in the 3-pack, then stack them upright in the freezer door to save space.
I use the 3-pack for soups and stock; I fill, freeze flat, then stand them to defrost. But yes, if you batch-cook weekly, grab the 10-pack.
Three is a starter pack — good for testing. If you freeze often, the Silicone Reusable Freezer Bags, 10-Pack Set might be a better long-term buy.
Neutral take: beeswax wraps are lovely and smell nice but they’re more of a light-use thing. For meal preps and freezer cooking — go silicone or the dishwasher-safe freezer bags.
Also, the article’s cost analysis was fair but didn’t show the payback timeframe clearly — I’d like a table next time 😅
Thanks, Grace. Noted about the payback timeframe — we’ll consider adding a clearer cost-per-use comparison in updates.
Totally agree. For me silicone paid back in ~6 months. But I’m a meal-prep fanatic so your mileage may vary.